Botched Tear Trough Filler: Causes, Fixes & Prevention
I’ve seen so many people come to me after a tear trough filler appointment gone wrong. Maybe that’s you right now.
You wanted to look refreshed, but instead you’re dealing with puffiness, lumps, or dark circles that look worse than before.
Trust me, I get it. This isn’t what you signed up for. But here’s what I want you to know: botched filler can be fixed.
In this guide, I’m going to show you exactly why these problems happen, what signs mean, and how the right doctor can safely correct everything. You’re going to be okay.
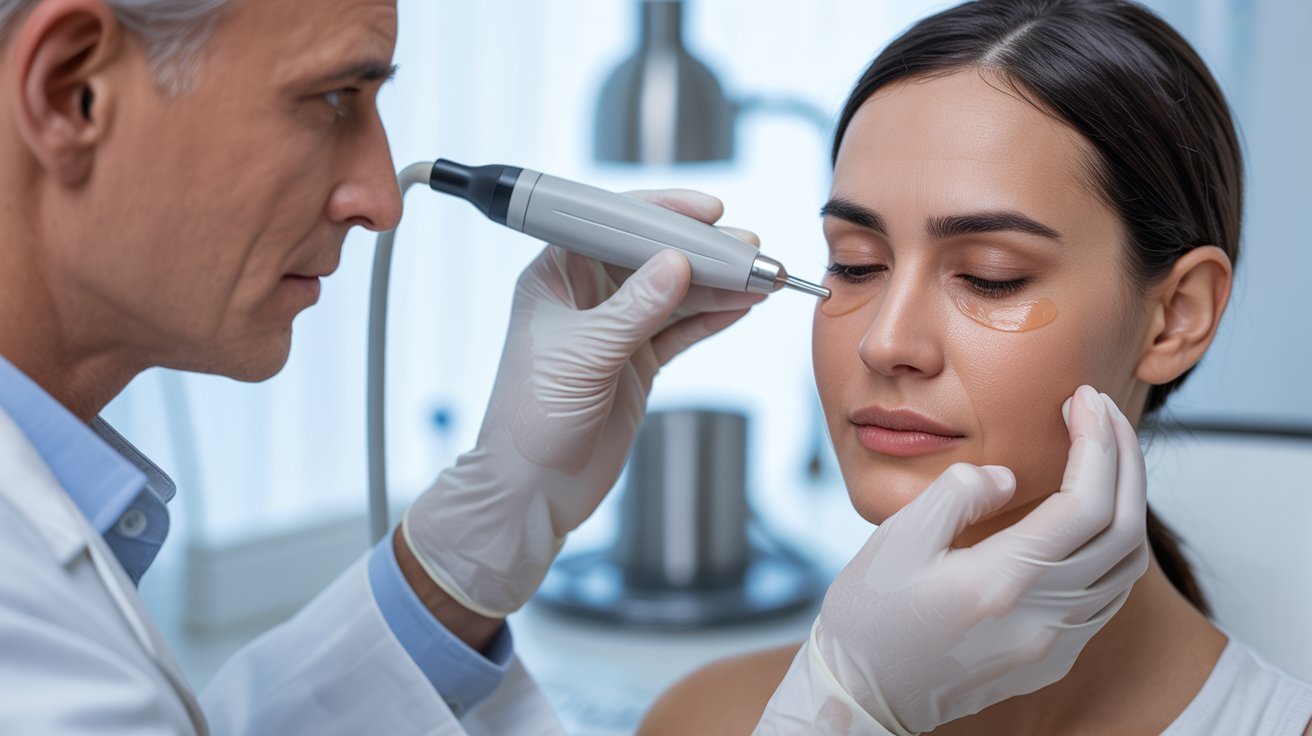
What Is a Botched Tear Trough Filler?
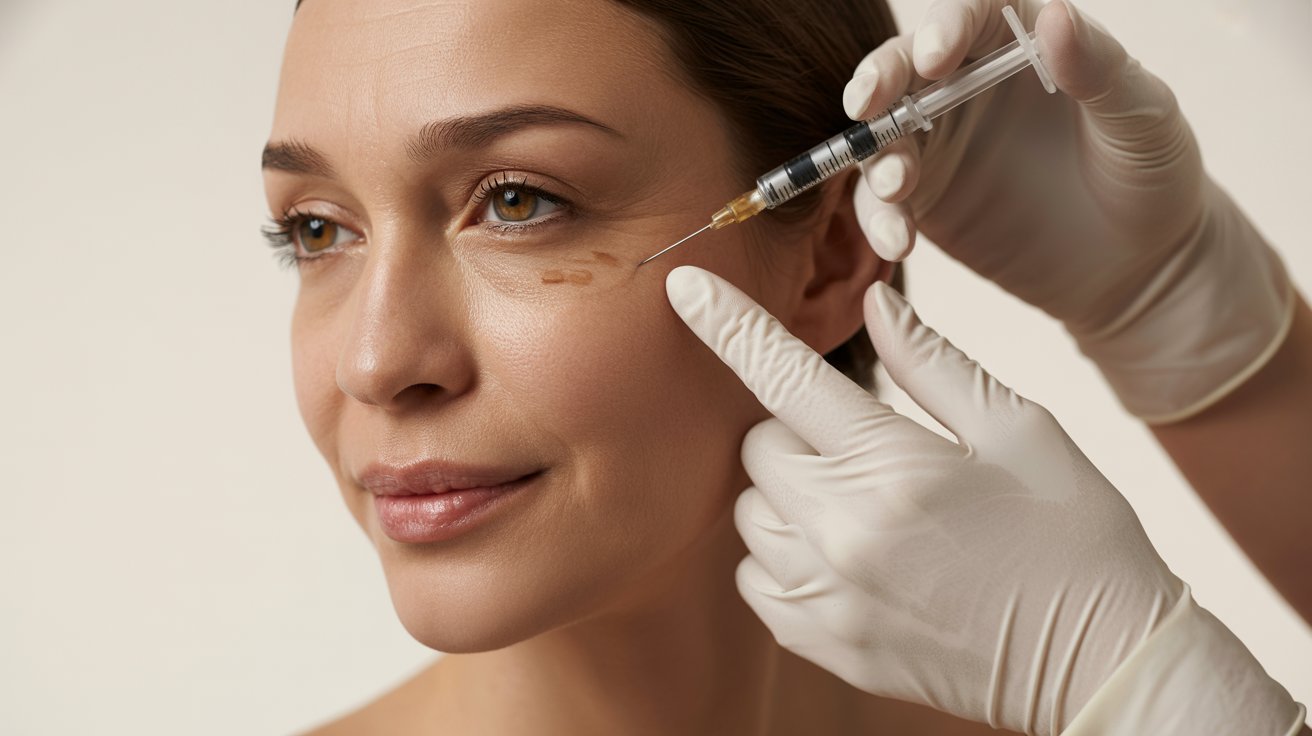
The tear trough area sits right under your eyes where the skin is super thin and delicate. This spot is tricky because it has minimal support and sits close to blood vessels and nerves.
When filler is placed too shallow, too deep, or in the wrong amount, it can migrate and cause visible problems.
The tissue here doesn’t hold filler the way other parts of your face do. That’s why even experienced injectors consider this a high-risk treatment.
It takes real anatomical knowledge to know exactly where to place the product and how much to use. One small mistake can lead to noticeable complications that are hard to hide.
Common Signs of a Botched Tear Trough Filler
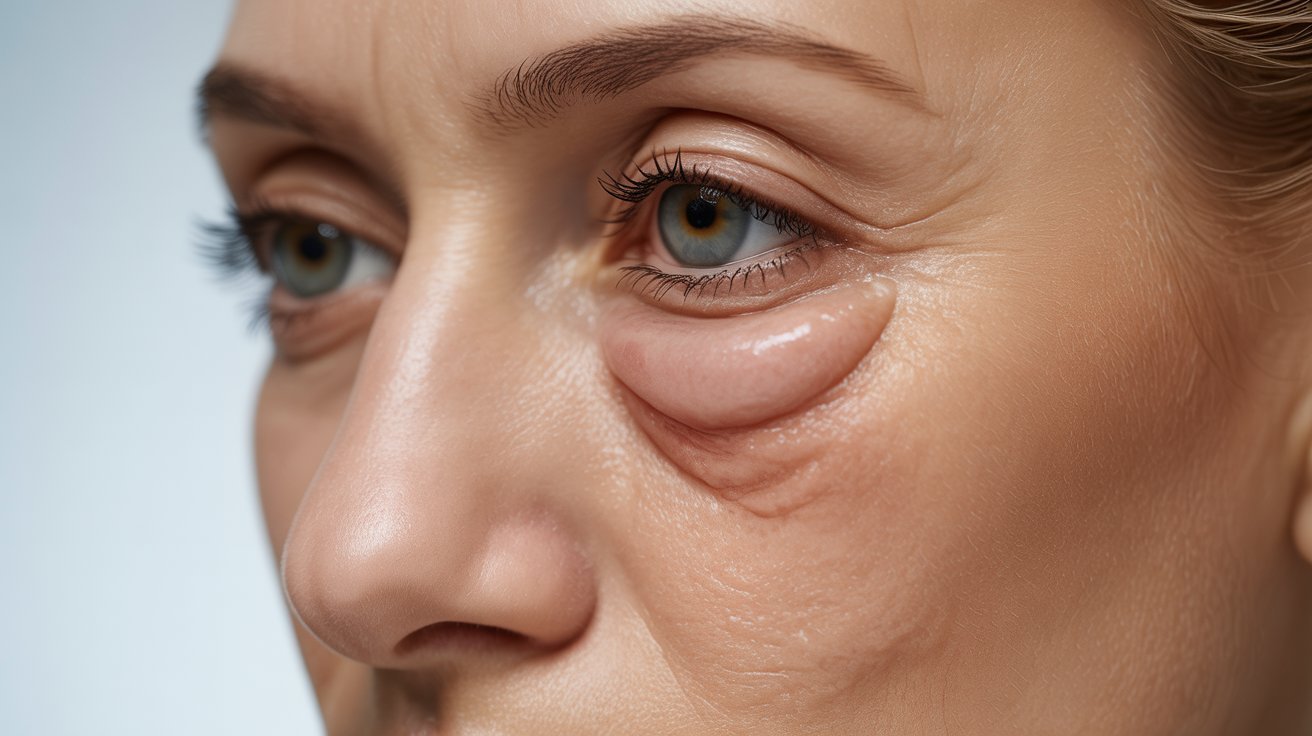
- Persistent Puffiness or “Sausage-Like” Swelling: If your under-eye area looks constantly puffy or has a sausage-like appearance, that’s a clear sign something went wrong. This swelling shouldn’t stick around for weeks or months.
- Morning Swelling That Only Partially Improves: You wake up with major puffiness that gets slightly better as the day goes on, but it never fully goes away. This pattern means the filler is holding onto water.
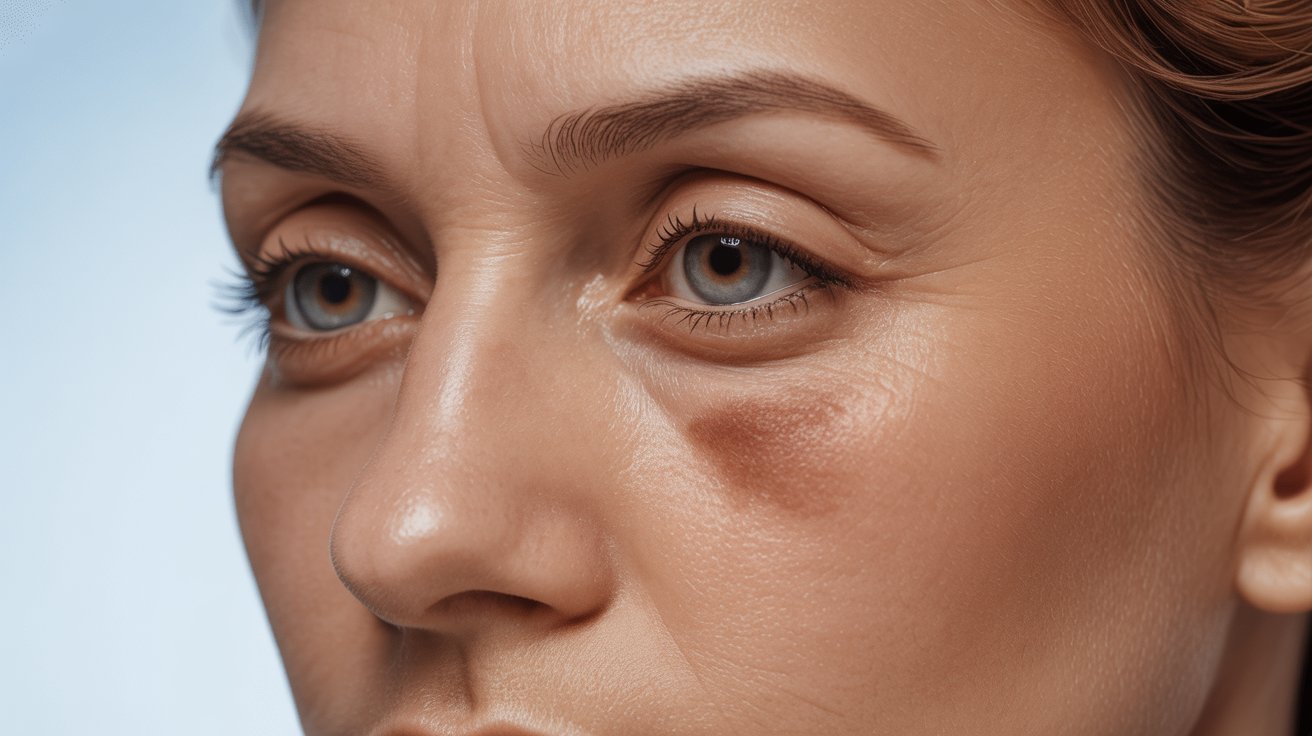
- Tyndall Effect (Blue or Grey Discoloration): Your under-eye area has turned blue or grey. This happens when filler sits too close to the skin surface and light reflects through it in a weird way.
- Palpable Lumps or Nodules: You can feel bumps or hard spots when you touch under your eyes. These lumps mean the filler wasn’t placed smoothly or evenly.
- Skin Laxity or Fluid Retention From Chronic Swelling: Long-term swelling can actually stretch your skin out, making it look looser and more tired than before you got filler.
- Asymmetry or Distorted Contour Under the Eyes: One eye looks different from the other, or the natural curve under your eyes appears off. This means the filler wasn’t distributed evenly.
Why Tear Trough Fillers Go Wrong
Tear trough filler goes wrong for several reasons. Sometimes the patient wasn’t a good candidate to begin with, but the injector didn’t recognize that.
Many practitioners lack deep knowledge of the complex anatomy in this area. Placing filler too close to the skin surface causes visible problems like discoloration.
Some injectors use too much product trying to create dramatic results right away, which leads to puffiness.
Often, they skip building support in the cheeks first, which would actually help the under-eye area look better.
And finally, not using ultrasound or proper imaging means they’re working blind, unable to see exactly where the filler is going.
Professional Treatments to Fix a Botched Tear Trough Filler
If your tear trough filler went wrong, there are professional ways to fix it. The key is finding a skilled practitioner who uses advanced techniques and proper imaging.
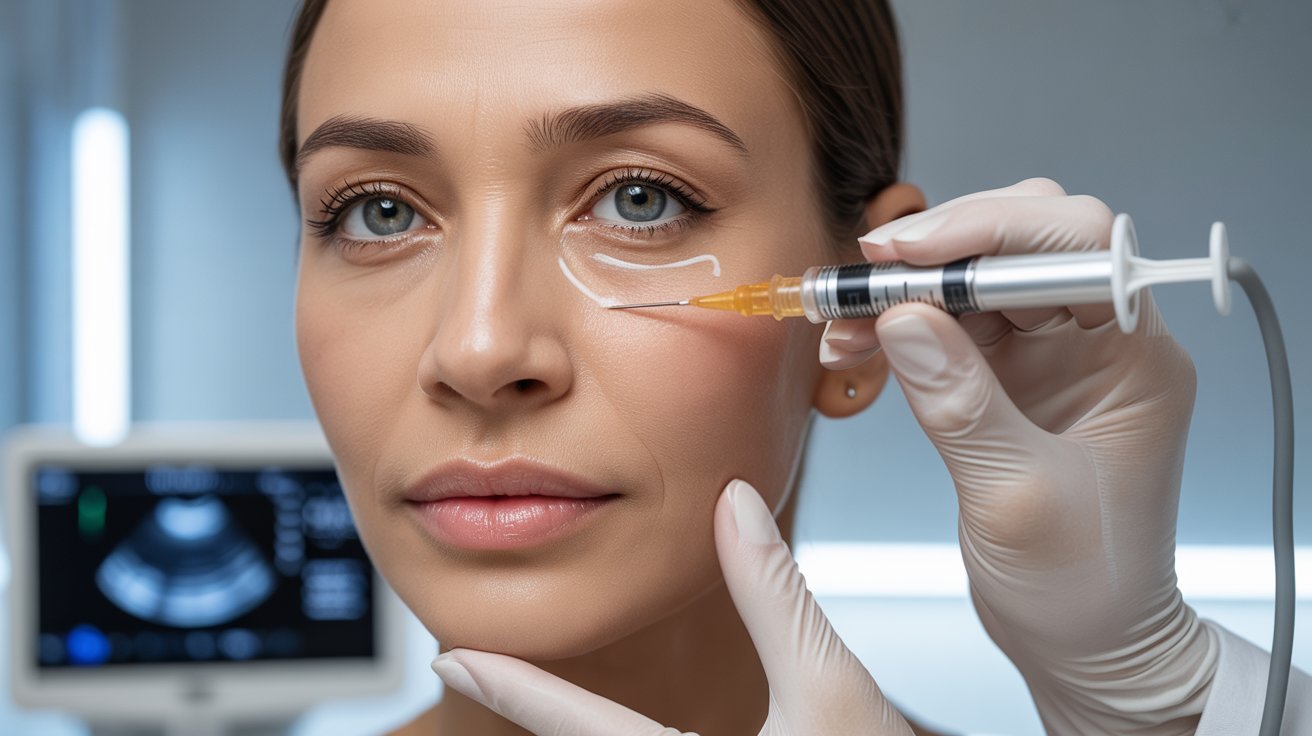
Ultrasound-Guided Assessment
Before any correction starts, a good doctor will use an ultrasound to see exactly what’s going on under your skin.
This imaging shows where the filler is sitting, how deep it went, and where your blood vessels are located.
You can’t fix a problem if you don’t know exactly where it is. The ultrasound maps everything out so the doctor knows exactly what needs to be dissolved and what should stay.
- Identifying exact filler location: The ultrasound shows precisely where the filler ended up, even if it migrated from the original injection site.
- Assessing filler depth: It reveals whether the filler is too shallow, too deep, or in the wrong tissue layer completely.
- Mapping angular vessels: This identifies blood vessels in the area to avoid them during the correction process and prevent further complications.
Hyaluronidase to Dissolve Problematic Filler
Hyaluronidase is an enzyme that breaks down hyaluronic acid filler. This is the main treatment for fixing botched tear trough filler.
A skilled injector will use small, precise amounts to dissolve only the problem areas. They won’t just dump a bunch of dissolver everywhere because that could take out good filler too and leave you looking hollow. Precision is everything here.
- Targeted dissolution: The doctor injects hyaluronidase only where the problematic filler sits, not throughout the entire under-eye area.
- Why precision matters: Using too much dissolver can remove all filler, including any that was actually helping, leaving you with a worse appearance.
- Avoiding unnecessary volume loss: Careful, controlled dissolution protects the areas that are working fine and only addresses the actual problem spots.
Step-by-Step Correction Process (Professional Protocol)
Here’s how a proper correction should go. First, you’ll have a consultation where the doctor sets realistic expectations about what can be fixed and how long it takes.
Then they do the ultrasound scan to see what’s happening. Next comes the guided dissolution where they carefully inject hyaluronidase.
After that, they assess how things look and whether you need additional treatment sessions.
- Consultation and expectation management: The doctor explains what they can realistically achieve and how many sessions you might need.
- Ultrasound scanning: They use imaging to map out exactly where the problem filler is located before touching anything.
- Guided dissolution: They carefully inject hyaluronidase into the specific areas identified in the ultrasound.
- Post-dissolution assessment: After the enzyme works, they check the results and determine if additional correction is needed.
When Surgical Options Are Needed
Sometimes filler has caused so much damage that dissolving it isn’t enough. If you have severe skin stretching, persistent bags, or structural changes, you might need surgery.
Lower blepharoplasty can remove excess skin and fat. Fat repositioning can move tissue back where it belongs. These are last-resort options when non-surgical correction won’t work.
- Lower blepharoplasty: This surgery removes excess skin and fat from the lower eyelid area when filler has caused permanent stretching or damage.
- Fat repositioning: A surgeon can move fat pads back to their natural position if filler has displaced them or caused lasting structural changes.
When to Seek Specialist Help
You need specialist help if you notice persistent swelling that lasts more than two weeks, blue or grey discoloration, visible lumps, or worsening appearance over time. Don’t wait and hope it gets better on its own.
Ultrasound-guided correction is the safest approach because the doctor can actually see where the filler is before dissolving it. This prevents guessing and protects your blood vessels.
When choosing someone to fix your botched filler, look for a practitioner with advanced training in facial anatomy, experience specifically with tear trough corrections, and access to ultrasound technology.
Check their before-and-after photos of actual correction cases, not just initial filler results.
Conclusion
Look, I know dealing with botched filler is stressful. But here’s what I’ve learned: the right expert can fix this. Getting a proper assessment with an ultrasound makes all the difference.
It’s not about finding just any injector. You need someone who truly understands facial anatomy and has corrected these problems before. This experience taught you something valuable, right?
Next time, you’ll know to ask about their training, request to see ultrasound equipment, and check their correction work.
Your face deserves someone who takes this seriously. Don’t settle for less than that level of care.
Frequently Asked Questions
How long does it take for botched tear trough filler to dissolve naturally?
Hyaluronic acid filler can take 6 to 18 months to break down on its own, depending on the product used. If you’re dealing with complications, waiting that long isn’t recommended when hyaluronidase can safely dissolve it much faster.
Can I fix botched tear trough filler at home?
No, you can’t fix this at home. You need a qualified medical professional with hyaluronidase and preferably ultrasound guidance to safely dissolve the problematic filler without causing more damage.
Will dissolving my tear trough filler make me look worse?
Initially, you might look a bit hollow after dissolution, but that’s temporary. Most people feel relieved once the puffiness and discoloration are gone, and you can always get proper filler later from a better injector.
How do I know if my injector is qualified to do tear trough filler?
Ask about their specific training in facial anatomy, how many tear trough cases they’ve done, and whether they use ultrasound. A good injector will gladly discuss their experience and show you real before-and-after photos.
Is tear trough filler worth the risk?
It depends on your situation and who’s doing it. In the right hands with proper technique, it can work well. But given the high complication rate, many experts now recommend building cheek support first or considering other options.