35 Easter Pedicure Ideas + Step-by-Step DIY Guide

Spring pedicures are my favorite! After years of doing these, I can tell you there’s nothing like fresh polish to say goodbye to winter boots.
I’ve tried so many Easter designs, those cute bunnies look great but need steady hands. Flower patterns are way easier and always turn out pretty. I’ve learned that light spring colors really do make you feel happier.
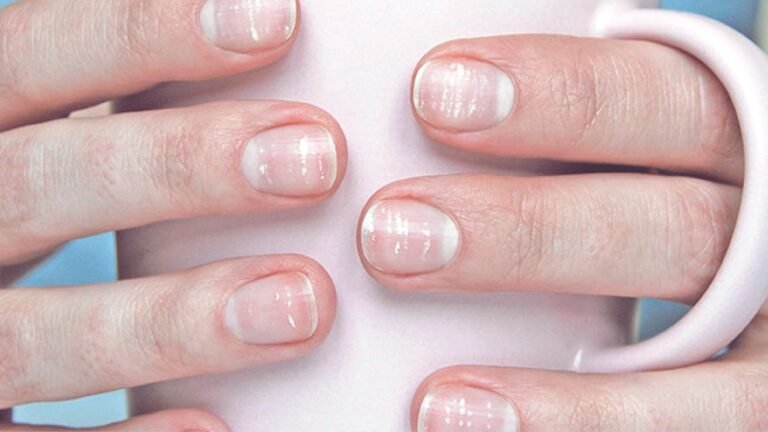
I used to get so annoyed when my polish chipped after a few days. Now I always prep my nails properly, use good base coat, and put on two thin top coats. My pedicures last almost a month without any chips.
Cleaning up between my toes was the hardest part until I got those skinny brushes. Total game changer!
I’ve actually tried every single method I’m sharing with you. These aren’t just ideas, they’re tricks that work. Ready to make your toes look amazing?
Why an Easter Pedicure is the Perfect Spring Self-Care Ritual
Winter was rough on your feet. Heavy boots. Dry air. Months of neglect. Now it’s time to give them the attention they need. A spring pedicure does more than make your toes look pretty. It helps you feel ready for sandal season.
Here’s what makes Easter pedicures special:
Fresh start vibes. Just like spring cleaning your home, a pedicure refreshes your whole mood. You’re literally stepping into the new season with clean, polished feet.
Seasonal colors boost confidence. Pastels and bright spring shades make you feel lighter. There’s real science behind color psychology. Soft pinks and mint greens actually calm your mind. Quality me-time. Between work and family, when do you really relax? A pedicure forces you to sit still. To breathe. To focus on yourself for once.
Perfect timing for open-toe shoes. Easter marks the unofficial start of sandal season. Your feet will be ready for anything.
Top Easter Pedicure Ideas & Designs
Ready for some inspiration?
I’ve collected 35 beautiful Easter pedicure designs. From cute bunnies to simple florals, there’s something for every style.
Bunny & Easter Egg Inspired Designs

These playful designs capture the fun spirit of Easter. They’re perfect if you love cute, whimsical nail art.
-
- White bunny face on big toe with pastel accents Paint your big toe white. Add tiny black dots for eyes and a pink triangle nose. Use soft purple or blue on the other toes.
- Miniature Easter egg patterns on each toe Each toe gets a different egg design. Think stripes, polka dots, and zigzag patterns in pastel colors.
- Bunny ears peeking over the cuticle line Paint your nails a soft pink. Add white bunny ears that “peek” over the top of each nail. Super cute and surprisingly easy.
- 3D bunny tail art using white flocking powder Create fluffy bunny tails with special flocking powder. It gives a real fur texture that’s impossible to ignore.
- Cartoon chicks hatching from eggshells Yellow chicks breaking out of white egg shells. Paint the “crack” lines in brown for realistic detail.
- Carrot garden design with green & orange tones Orange base with green leafy tops. Perfect for spring garden vibes.
- Polka dot Easter eggs using pastel glitter Glittery polka dots over solid pastel bases. Each toe becomes a sparkling Easter egg.
Spring Florals & Nature Motifs

Nature comes alive in spring. These designs bring that fresh, blooming feeling to your toes.
-
- Simple white daisies over mint green polish Classic spring combo. The white pops beautifully against the soft green base.
- Cherry blossom branches on nude base Small pink flowers on natural-toned nails. Very pretty and Instagram-ready.
- Lavender tips with micro-flower details French tips in soft purple with tiny flowers painted along the tip line.
- Tulip silhouette in contrasting pastels Simple tulip shapes in different pastel colors. Clean lines make this design timeless.
- Grass field with tiny floral decals Green gradient base with small flower stickers. Like walking through a spring meadow.
- Watercolor floral art using sponge blending Soft, dreamy flowers created by dabbing polish with makeup sponges. Very artistic.
- Rose gold foil over pastel floral base Paint flowers first, then add metallic accents. The shimmer makes the whole look special.
Abstract & Artistic Pastel Themes

Sometimes you want something artistic but not too literal. These designs are perfect for that vibe.
-
- Pastel ombré gradient across toes Each toe is a different shade, creating a rainbow effect. Start with the lightest pink and end with deep lavender.
- Speckled egg effect with pastel + black dots Looks like bird eggs. Use a toothpick to create random small dots over pastel bases.
- Swirl nails in Easter candy colors Think cotton candy swirls. Use a thin brush to create flowing lines in multiple pastel shades.
- Color-blocked pastel pedicure Geometric shapes in soft colors. Half moons, triangles, and straight lines create modern art.
- Abstract brush strokes in soft spring tones Paint like an artist. Random brush strokes in coordinating pastels look effortlessly chic.
- Pastel marble effect with gold veins Marble patterns in soft colors with metallic gold lines. Very luxurious.
- Matte pastel base with shiny French tips The texture contrast makes this design interesting. Matte base polish with glossy tips.
Subtle Religious & Faith-Inspired Designs

Easter has deep spiritual meaning for many people. These designs honor that while staying stylish.
-
- Small white cross on lavender base Simple and meaningful. One small cross per foot, usually on the big toe.
- Crown of thorns nail stamp on one accent toe Use a nail stamp for perfect detail. Keep it subtle on just one toe.
- Nail stickers with phrases like “He is Risen” Text decals make it easy to add meaningful words. Choose simple fonts.
- Dove silhouette in soft gray or white Symbol of peace and hope. Paint the dove in profile for the clearest shape.
- Stained-glass window effect using nail foils Colorful geometric patterns that mimic church windows. Very artistic.
- Gold cross charm embedded in gel pedicure 3D charm sealed under clear topcoat. Durable and beautiful.
- Bible verse initials with decorative letters Paint letters like “J3:16” with flourishes. Personal and faith-centered.
Simple & Minimal Easter Pedicures

Want Easter vibes without the fuss? These clean, simple designs are perfect for any occasion.
- French pedicure with pastel twist Classic French tips in soft pink, lavender, or mint instead of white.
- Nude base with white lace toe detailing Simple lace patterns painted in white over nude polish. Very bridal.
- Simple gold stripe across each nail One thin metallic line across the middle of each toe. Clean and modern.
- Pink and peach alternating toes Two complementary colors alternated across your toes. Simple but eye-catching.
- Creamy matte polish with gold studs Soft matte base with one small gold stud per toe. Minimalist luxury.
- White base with minimalist dots and dashes Simple geometric patterns. Think morse code in nail art form.
- Glossy lilac with a single rhinestone per toe Just one sparkly accent per nail. Sometimes less really is more.
DIY Easter Pedicure: A Step-by-Step Guide at Home
Want to try this at home. I’ll walk you through the process step by step. You don’t need professional tools to get great results.
What you’ll need: Nail polish remover, cotton balls, nail clippers, file, cuticle pusher, foot scrub, pumice stone, base coat, Easter-themed polish colors, topcoat, small nail art brushes, toothpicks for details
Step 1: Prep your feet

Remove old polish completely using nail polish remover and cotton balls. Don’t rush this part. Old polish can make your new colors look muddy.
Soak your feet in warm, soapy water for 10 minutes. Add a few drops of essential oil if you want to make it feel more spa-like. This softens your cuticles and makes everything easier to work with.
Step 2: Shape and clean

Trim nails straight across with sharp clippers. Never cut them in a curved shape as this can cause ingrown nails. File the edges smooth using gentle back-and-forth motions.
Start from the outside and work toward the center. Push back cuticles gently with a cuticle pusher or orange stick. Don’t cut your cuticles unless you’re experienced. This can lead to infection.
Step 3: Exfoliate

Use foot scrub on your heels and the bottom of your feet. Focus on areas that feel rough or thick. The pumice stone helps with tough spots like calluses.
Work in circular motions but don’t scrub too hard. You want smooth skin, not raw skin. Pay extra attention to your heels where dry skin builds up most.
Step 4: Rinse and dry

Wash off all the scrub with lukewarm water. Make sure no scrub particles are left between your toes. Dry your feet completely with a clean towel.
Pat, don’t rub, to avoid irritating freshly exfoliated skin. Any moisture will mess up your polish application. Wait a few extra minutes to make sure they’re totally dry.
Step 5: Apply base coat

This protects your nails and helps polish sticks better. Use thin, even strokes from cuticle to tip. Don’t flood the cuticle area or it will peel off quickly.
Let it dry completely before moving on. This usually takes about 2-3 minutes. Your nails should feel smooth and slightly tacky when ready.
Step 6: Paint your base color

Apply thin, even coats starting with the center of the nail, then the sides. Two light coats work better than one thick one.
Thick coats take forever to dry and often smudge. Wait 2-3 minutes between coats. The first coat might look streaky, but the second coat will even everything out. Keep the brush strokes smooth and confident.
Step 7: Add your Easter design

This is where the fun begins. Use nail art brushes for details like flowers or bunny faces. Toothpicks work great for dots and small details.
Dotting tools give you perfect circles every time. Take your time here and don’t worry about mistakes. You can always clean them up later. Let each color dry before adding the next layer to prevent smudging.
Step 8: Seal with topcoat

This makes everything last longer and adds a glossy shine. Apply topcoat over the entire nail, including the design. This protects your artwork from chipping and fading.
Don’t skip this step even if you’re tired. It’s what makes the difference between a 3-day pedicure and a 3-week one. Let it dry for at least 5 minutes.
Use a small brush dipped in nail polish remover to fix any mistakes around your nails. An old eyeliner brush works perfectly for this.
Pro tip: Put toe separators between your toes while the polish dries. This prevents smudging and helps air circulate around each nail. If you don’t have separators, use tissue paper twisted between your toes. Wait at least 30 minutes before putting on shoes.
Salon vs. At-Home: Where to Get the Best Easter Pedicure
Both options have their perks. Here’s how they compare:
| Factor | Salon Pedicure | At-Home Pedicure |
| Cost | $25-60+ per visit | $10-20 for supplies (lasts multiple uses) |
| Time | 60-90 minutes plus travel | 45-60 minutes at your convenience |
| Quality | Professional tools and expertise | Depends on your skill level |
| Relaxation | Full spa experience with massage | Comfortable in your own space |
| Design Complexity | Can handle intricate nail art | Best for simple to medium designs |
| Hygiene | Sterilized tools (when done properly) | Your own clean tools |
| Convenience | Need appointment and travel | Do it anytime you want |
| Durability | Usually lasts 3-4 weeks | Typically lasts 2-3 weeks |
| Customization | Limited to salon’s colors and styles | Use any colors or products you want |
| Learning | No skill development | Improves your technique over time |
| Pressure | None – just relax | Need to focus and do the work |
| Mistakes | Professional fixes them | You handle cleanup yourself |
My recommendation? Try simple designs at home first. Save intricate art for the salon. If you do go to a salon, book early. Easter season gets busy fast.
Color Psychology: Easter Hues That Boost Mood
Colors really do affect how you feel:
- Soft pink makes you feel calm and loved. It’s the color of compassion.
- Mint green is refreshing and peaceful. Like a cool breeze on a warm day.
- Lavender reduces stress and promotes tranquility. Perfect for busy moms.
- Peach feels warm and friendly. It makes you more approachable.
- Butter yellow brings joy and optimism. Sunshine for your toes.
- Sky blue creates a sense of freedom and possibility.
Choose colors that match your mood or the mood you want to create.
What to Wear With Your Easter Pedicure
Your Easter pedicure deserves to be seen:
- For church: Nude or metallic sandals, peep-toe pumps, strappy flats
- For brunch: White sneakers with your pedicure peeking out, canvas espadrilles, ankle boots with a low cut
- For Easter egg hunts: Comfortable walking sandals, ballet flats, low-profile sneakers
- For dinner: Heeled sandals, mules, dress shoes with an open toe
The key is choosing shoes that show off your hard work without competing with the design.
Instagram-Worthy Easter Pedicure Hashtags & Captions
Ready to show off your Easter pedicure?
Hashtags that work: #EasterPedicure #SpringToes #PastelNails #EasterNailArt #SpringPedicure #FootSelfCare #EasterVibes #PedicureGoals #SpringNails #SelfCareSunday
Caption ideas: “Spring has sprung on my toes”, “Easter ready from head to toe”, “Hoppy Easter vibes”, “Spring cleaning starts with my feet”, “Pastel perfection”, “Stepping into spring”, “Easter eggs on my toes”, “Fresh pedicure, fresh start”
Pro tip: Take photos in natural light. Your colors will look much better.
Show your toes from different angles. Side shots, top-down views, and action shots while walking all work well.
Conclusion
Your perfect Easter pedicure is waiting. You now have 35 lovely designs to choose from. Simple bunnies for playful vibes. Pretty florals for special occasions. Minimal styles for everyday wear. The DIY guide makes it easy to create salon-quality results at home. You don’t need expensive tools or years of practice. Just follow the steps and take your time.
Remember the key points: prep your feet properly, use thin polish coats, and always seal with topcoat. These simple steps make all the difference.
Spring is the season for fresh starts. Your Easter pedicure celebrates that new beginning. It shows the world you’re ready for warmer days and open-toe shoes. If you choose cute bunny art or simple pastels, you’re treating yourself right. Self-care isn’t selfish. It’s necessary.
Step into spring with beautiful toes and total confidence.
Frequently Asked Questions
How long does an Easter pedicure last?
A well-done Easter pedicure typically lasts 2-3 weeks with proper care. Using a quality base coat and topcoat helps extend the life of your design.
Can I do Easter nail art on short toenails?
Yes, short nails work perfectly for most Easter designs. Simple patterns like dots, stripes, and small flowers actually look better on shorter nails.
What’s the best Easter pedicure color for beginners?
Start with soft pink or mint green as your base color. These shades are forgiving and complement most skin tones while hiding minor mistakes.
How do I make my Easter pedicure designs look professional?
Use thin coats of polish and let each layer dry completely. Clean up edges with a small brush dipped in nail polish remover for crisp lines.
Should I get an Easter pedicure before or after Easter Sunday?
Book your appointment 2-3 days before Easter for the freshest look. This timing ensures your pedicure looks perfect for church and family gatherings.