25 Must-Try Minimalist Dot Nail Art Designs
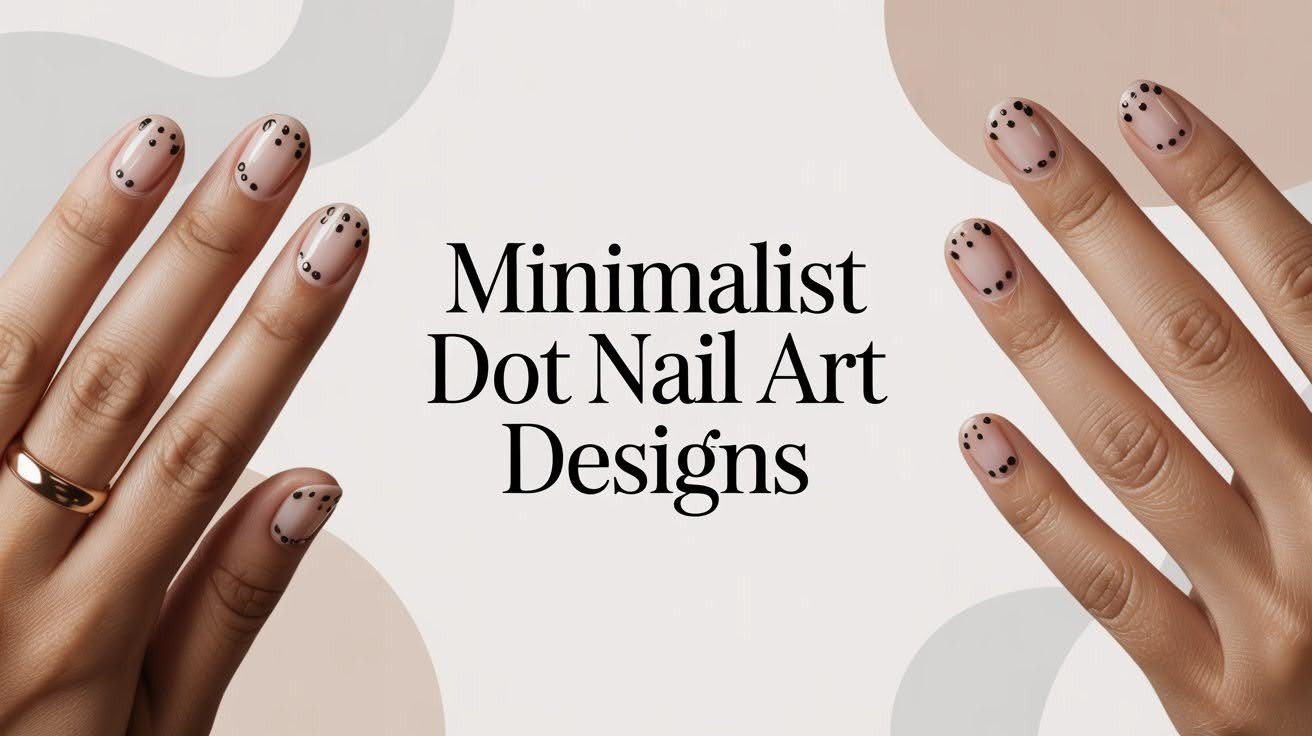
After years perfecting nail art professionally, I can tell you minimalist dots are having their moment for excellent reasons. I’ve watched countless clients request “simple but special.”
Here’s my insider trick: placement and proportion are everything. I always use odd numbers – three or five dots work beautifully. Even numbers feel too symmetrical and lose that natural charm we’re after.
My secret weapon isn’t a dotting tool, it’s the rounded end of makeup brushes. Different sizes give you perfect control and consistent results every time.
Color-wise, I swear by monochromatic schemes with subtle tonal variations. Think dusty rose base with deeper mauve dots, or sage green with forest accents. This approach keeps things good while adding just enough visual interest.
The best part? These designs age gracefully as they grow out, unlike complex patterns that chip awkwardly.
Classic Minimalist Dot Nail Ideas
Lets get started:
1. Single Black Dot on Nude Base
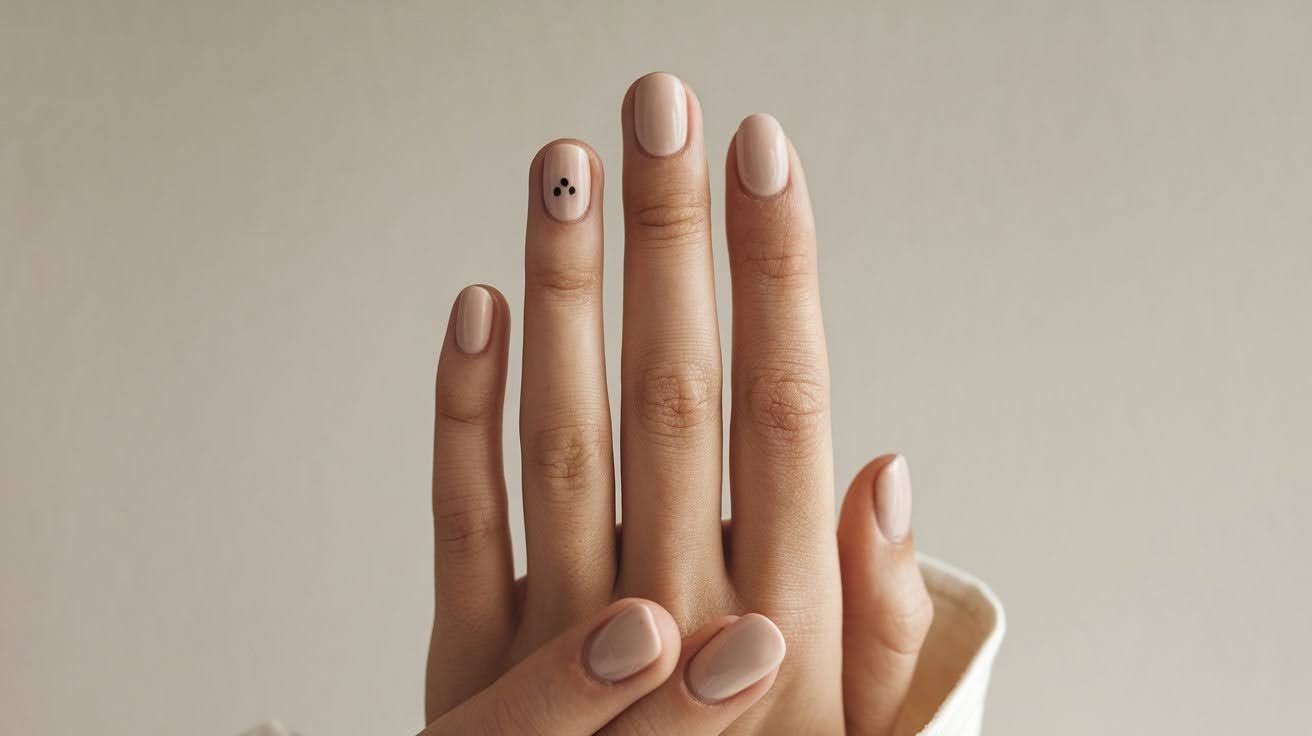
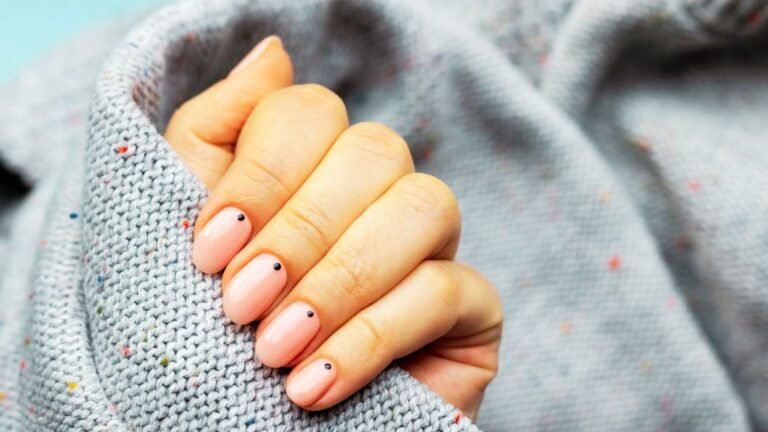
This look never goes out of style. Place one small black dot on your ring finger while keeping the other nails nude. It works great on short nails and adds just enough interest without being too much.
The key is keeping the dot small and centered. Use a dotting tool or the end of a bobby pin for perfect circles.
2. Double Dot Accent Nails
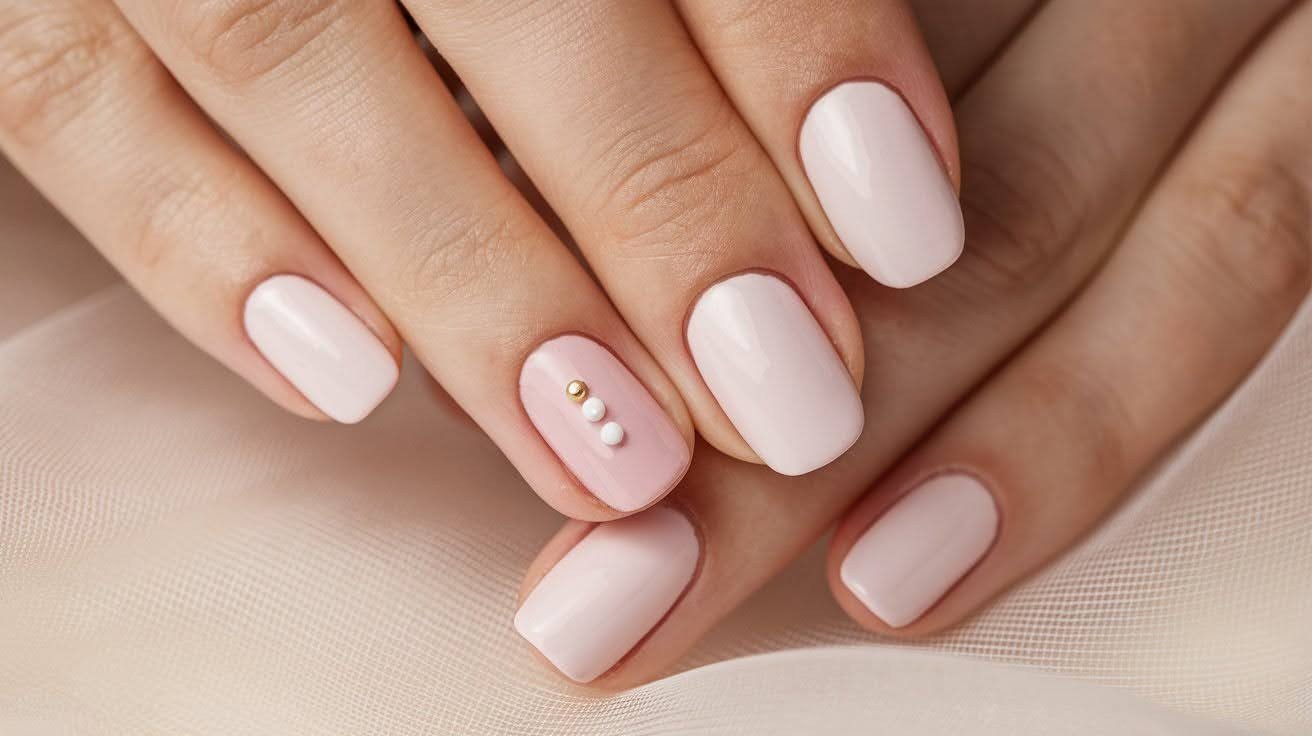
Try placing two dots on your accent nail – one near the cuticle and another close to the tip. This creates nice balance and draws the eye up and down the nail.
Choose colors that match your base polish or go for a subtle contrast. White dots on pale pink work beautifully.
3. Baby Blue Dot Nails
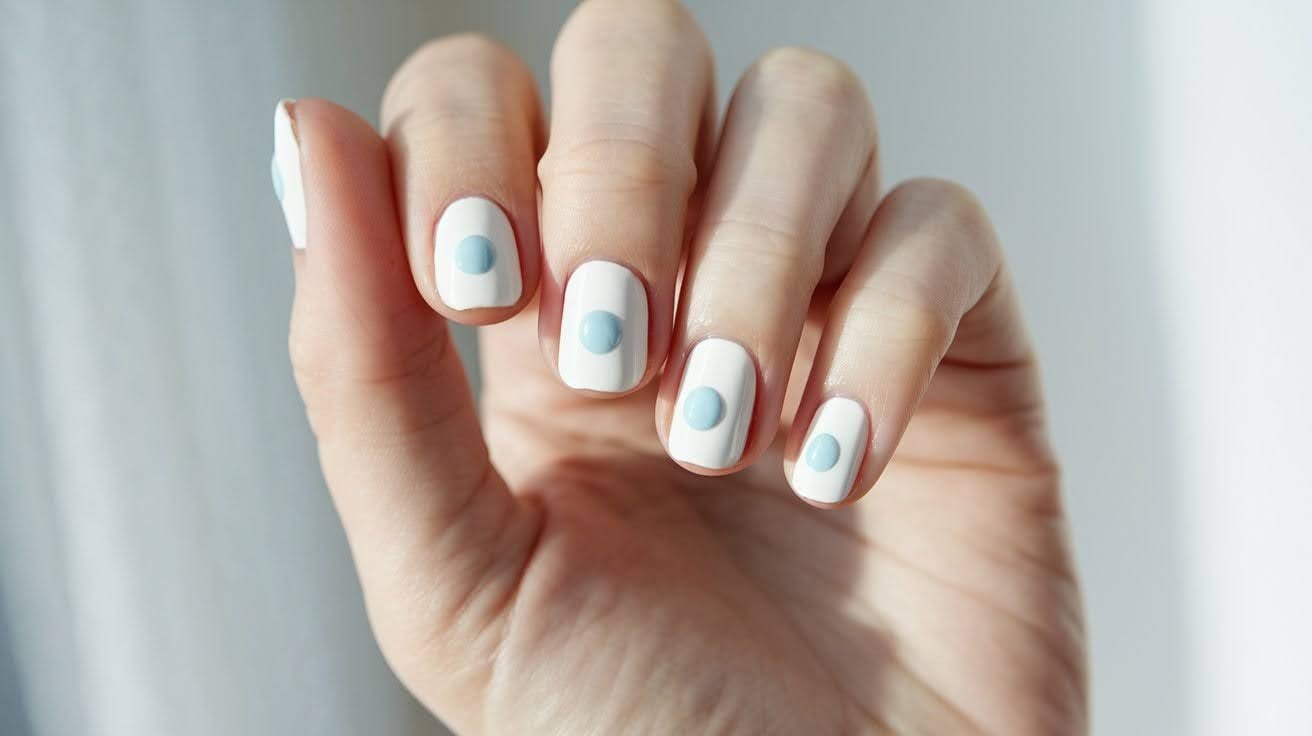
Light blue dots bring fresh energy to any manicure. They look amazing on white or clear bases during warmer months.
This combo feels clean and modern. Perfect when you want something cheerful but not loud.
4. Burgundy and Black Dot Tips
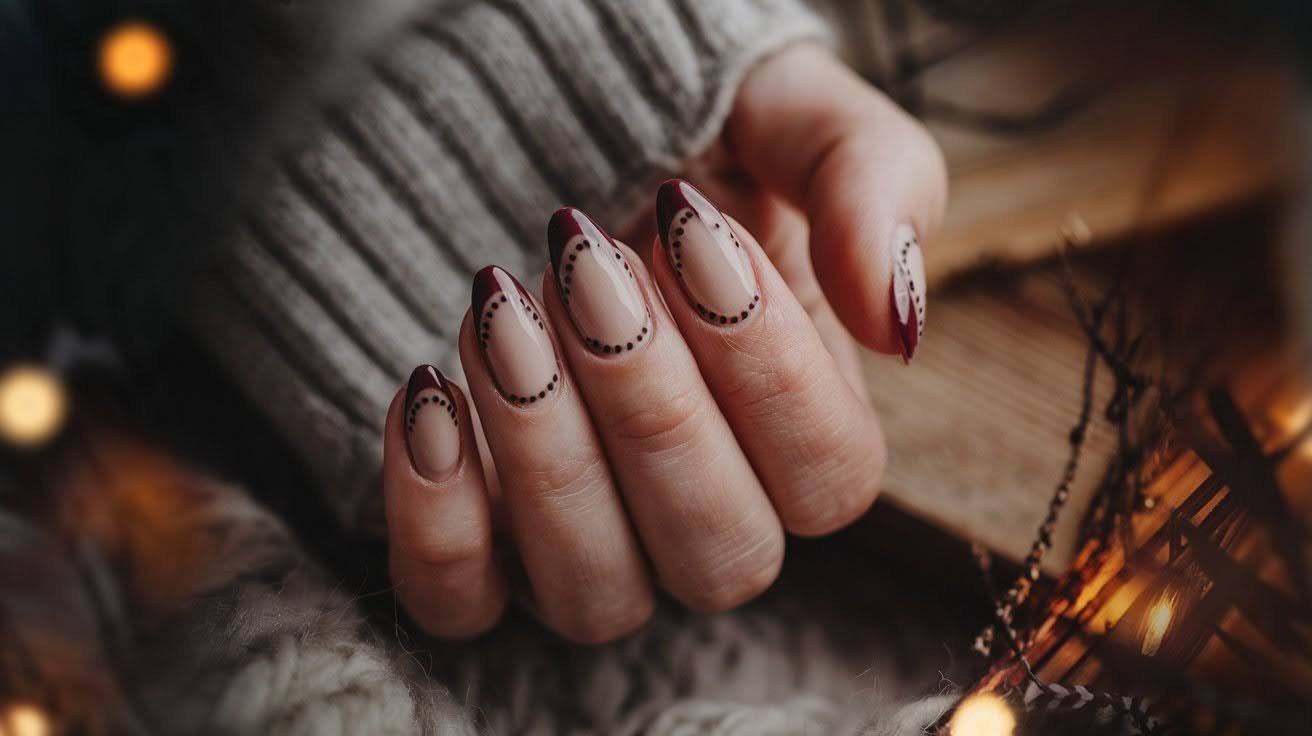
Mix dot art with French tips for fall. Paint burgundy tips, then add tiny black dots along the edge. This gives you the best of both worlds.
The dark colors create a moody vibe that’s perfect for autumn and winter months.
5. Faded French with Cuticle Dots
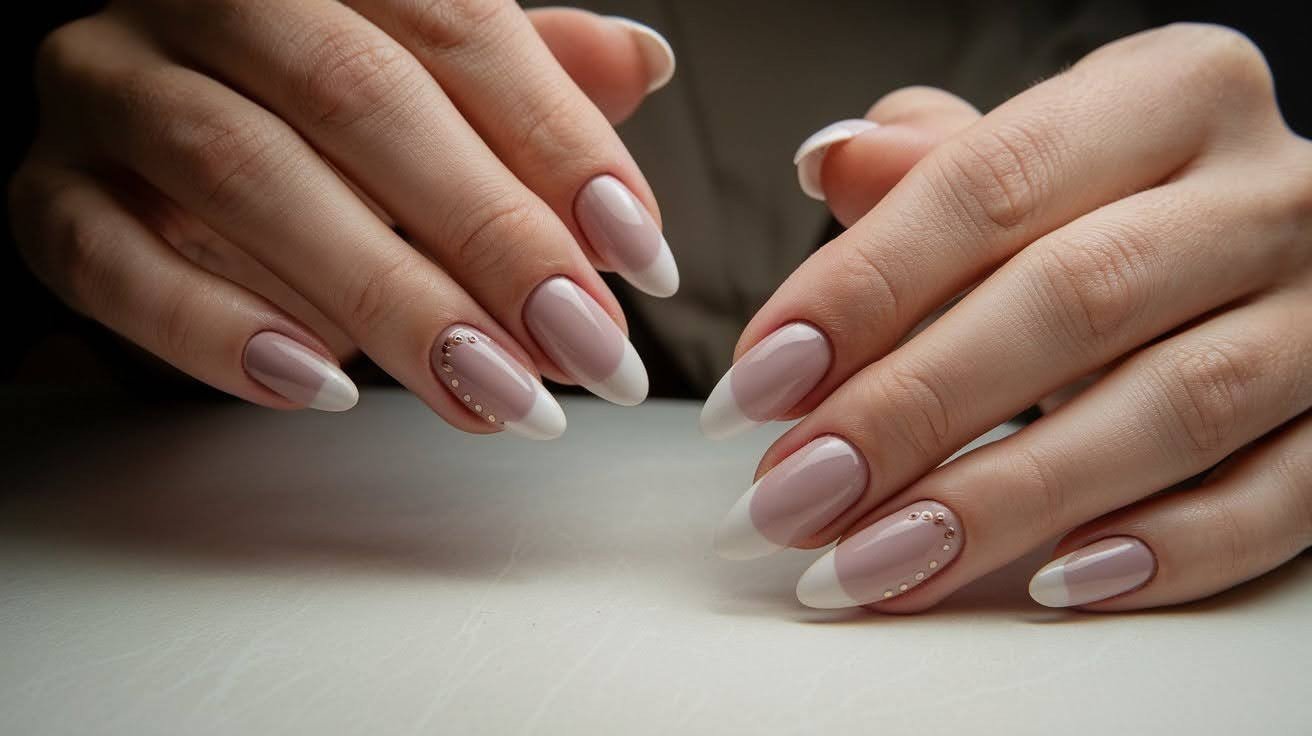
Start with a soft gradient French tip, then add small dots near your cuticles. This works well for special occasions when you want something polished but not flashy.
Use the same color family for both the gradient and dots to keep everything cohesive.
Colorful Dot Nail Designs for a Pop
Lets get those nails painted:
6. Electric Red and Yellow Dots
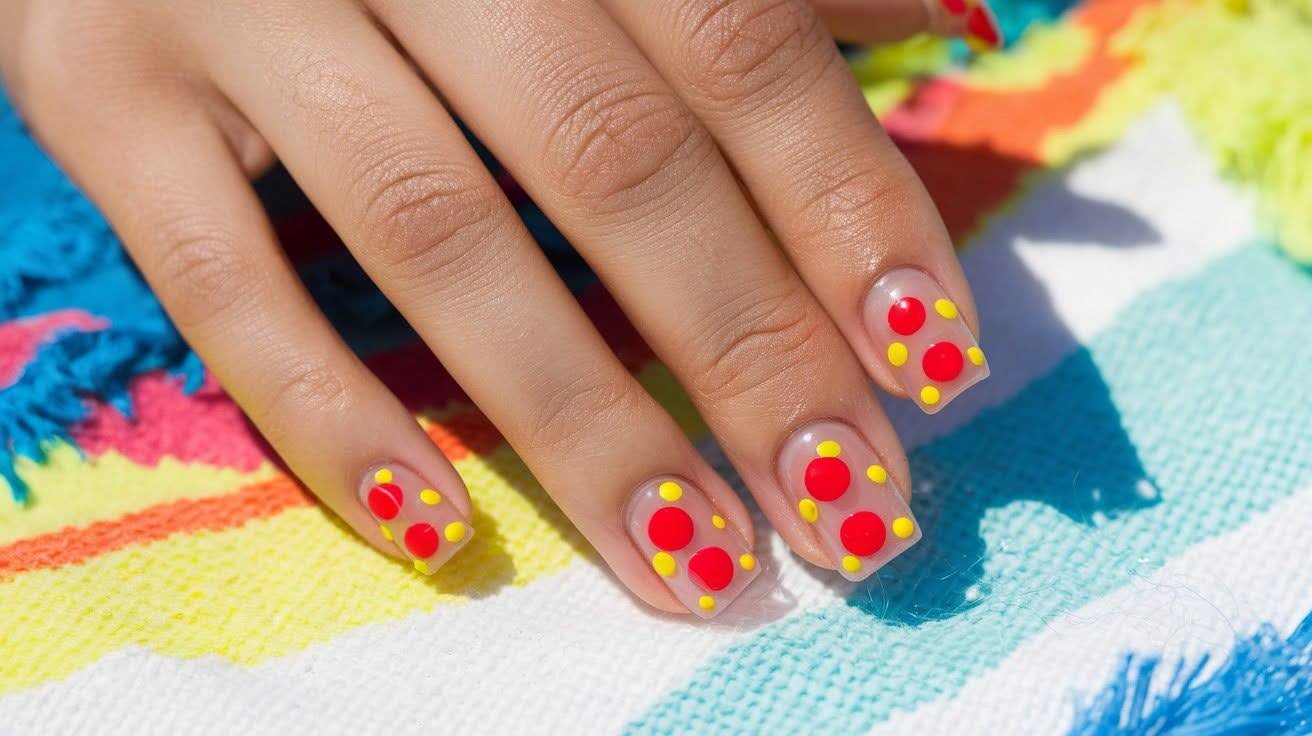
Want to make a statement? Bright red and yellow dots pack a serious punch without much work. Put red dots on a clear base, then add tiny yellow ones in between.
This combo screams fun and works great for music festivals or beach days. The contrast is bold but the simple dots keep it from being too crazy.
7. Green French with Dot Details
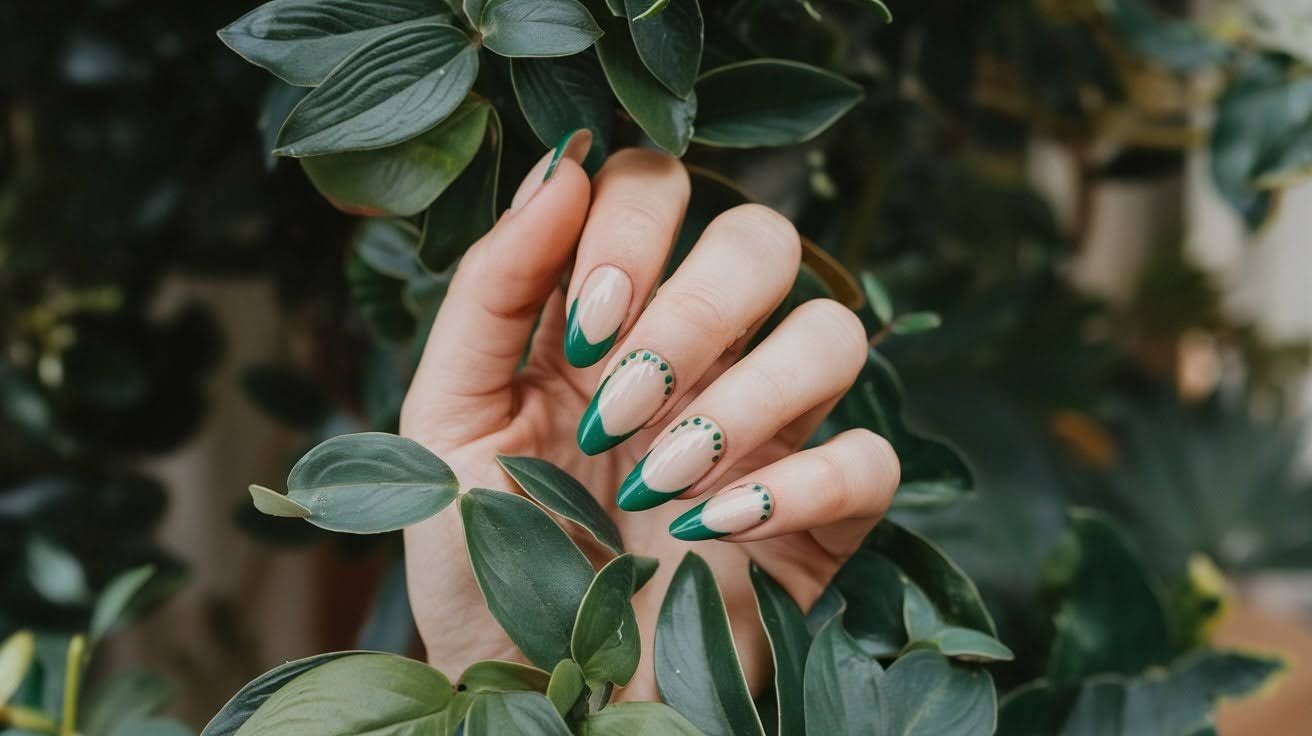
Start with classic green French tips, then add small dots in a lighter green shade. This gives you that fresh, natural feeling that works from spring all the way to fall.
Try sage green tips with mint dots for something softer. Or go darker with forest green and lime accents.
8. Brown Dot Nails on Nude Base
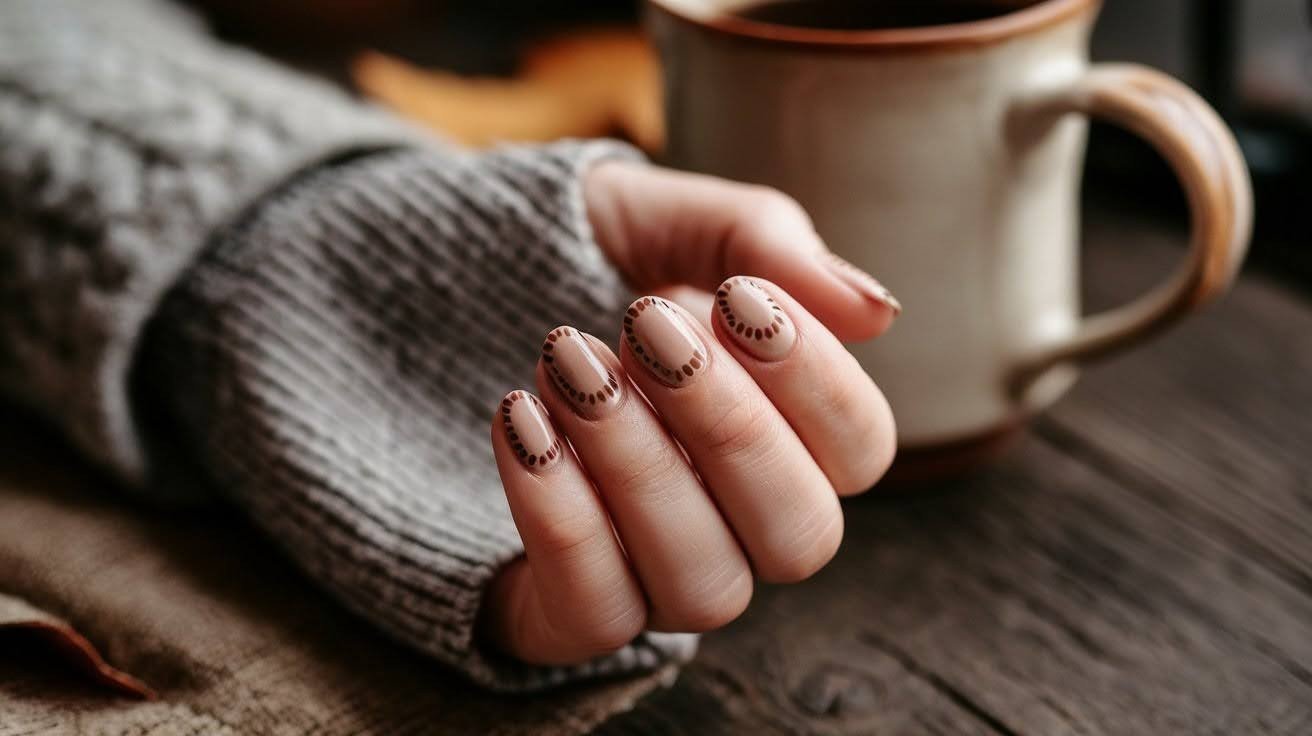
Brown dots on nude nails give off serious cozy vibes. Think coffee shop mornings and chunky sweaters. The warm, earthy tones feel grounded and comfortable.
This look is super easy to do at home. Just use a medium brown shade and space the dots evenly across each nail.
9. Blue and Orange Twin Dots
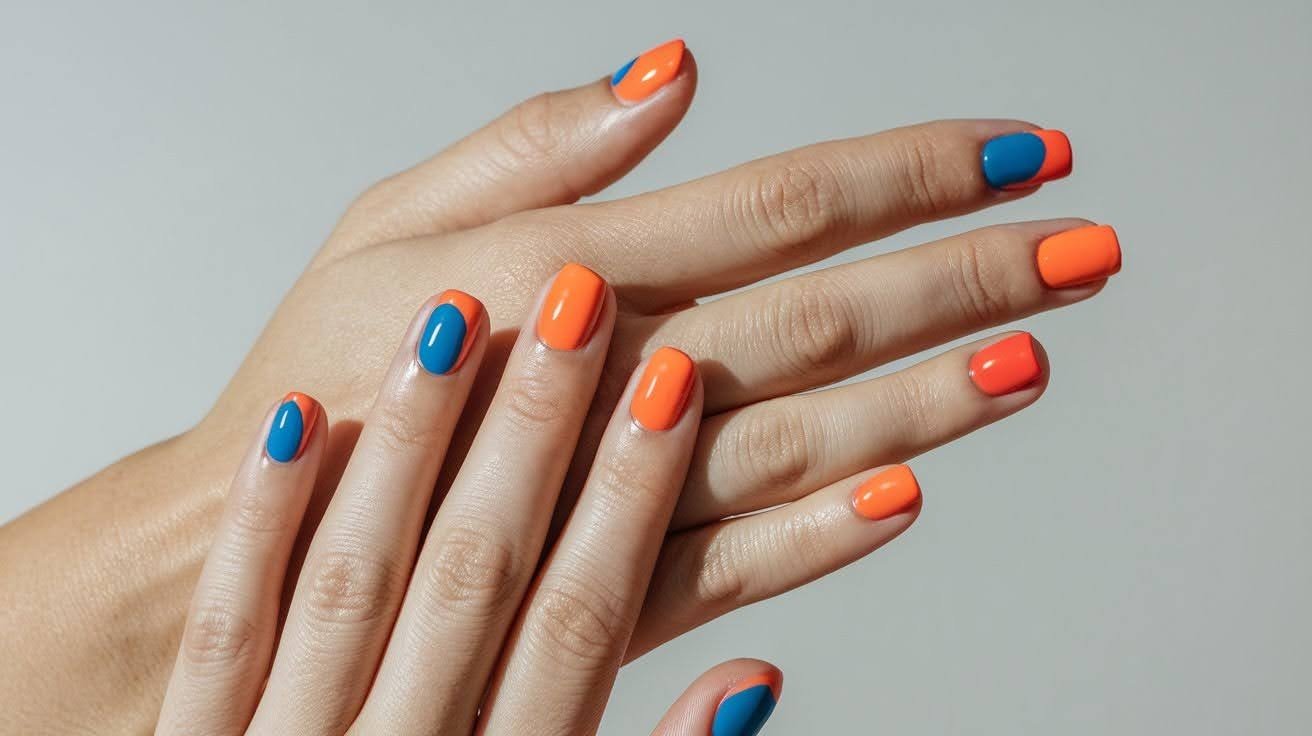
Place two dots side by side – one blue, one orange. The colors sit opposite each other on the color wheel, so they really pop together.
This works best on medium-length nails where you have room for both dots. Keep them the same size for perfect balance.
10. Ombré Dot Gradient
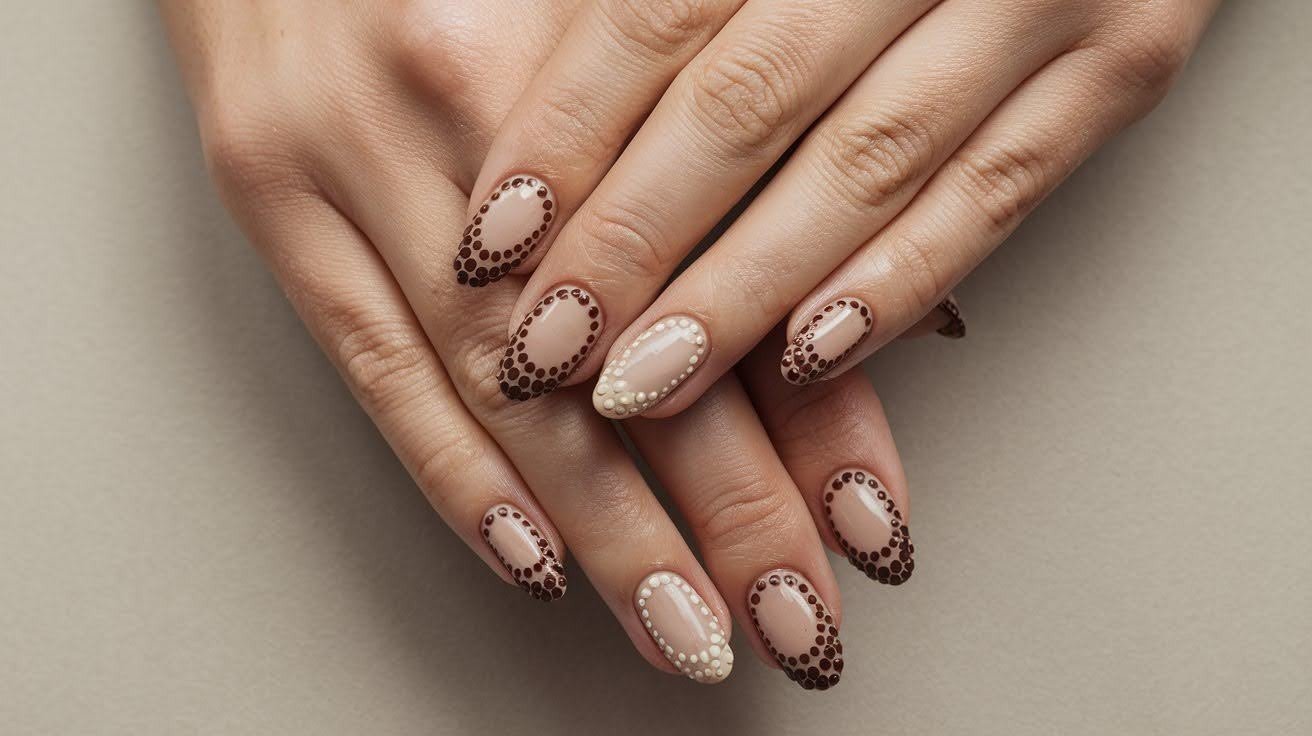
Create a fade effect using dots in different shades. Start with dark brown near your cuticles, then lighten to tan, then cream at the tips.
You can do this with any color family. Pink gradients look romantic. Rainbow dots bring pure joy. The key is keeping the dots small and close together.
Creative Dot Placement Styles
Lets get creative with these ideas:
11. Dot-Lined Cuticles
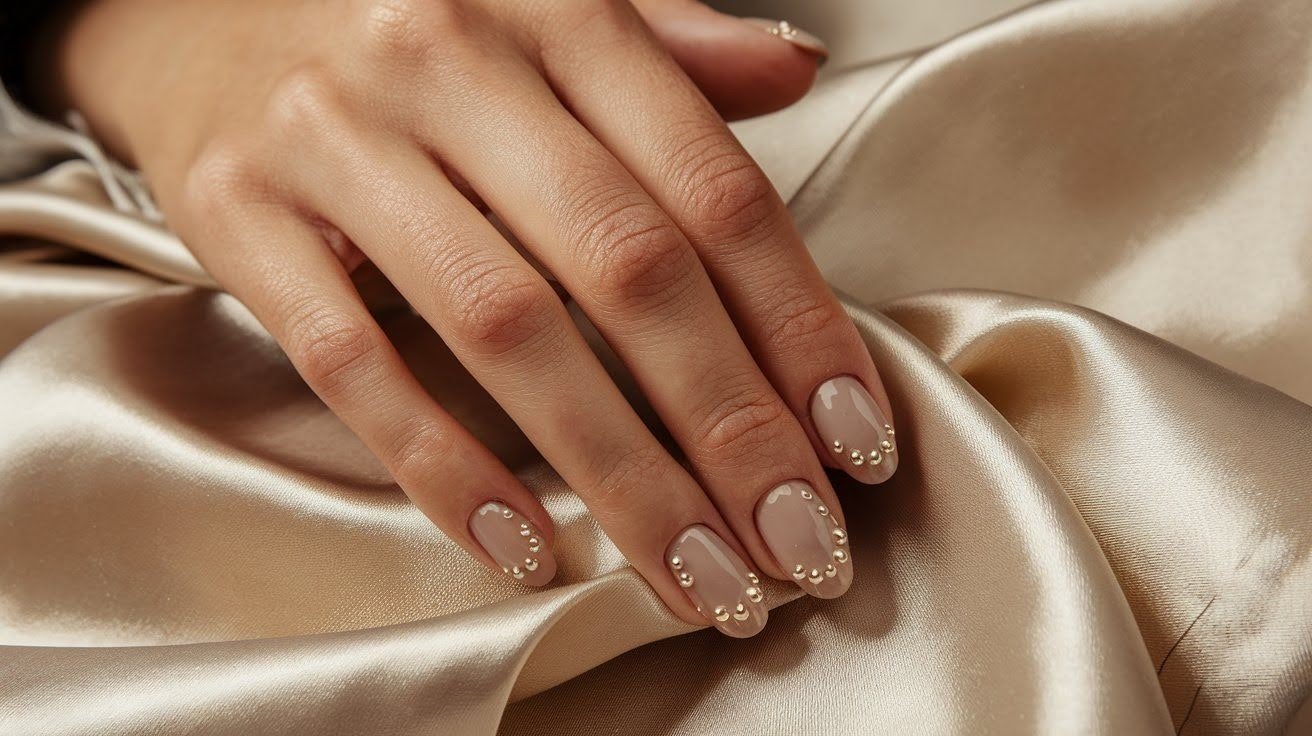
Line up tiny dots along your cuticle line to create a beaded bracelet effect. Pearl or metallic dots work beautifully for this look – they catch the light just right.
Space the dots evenly and keep them small. This creates a refined border that frames your nail bed perfectly. Gold dots on nude base polish look especially nice for special events.
12. Vertical Center Line Dots
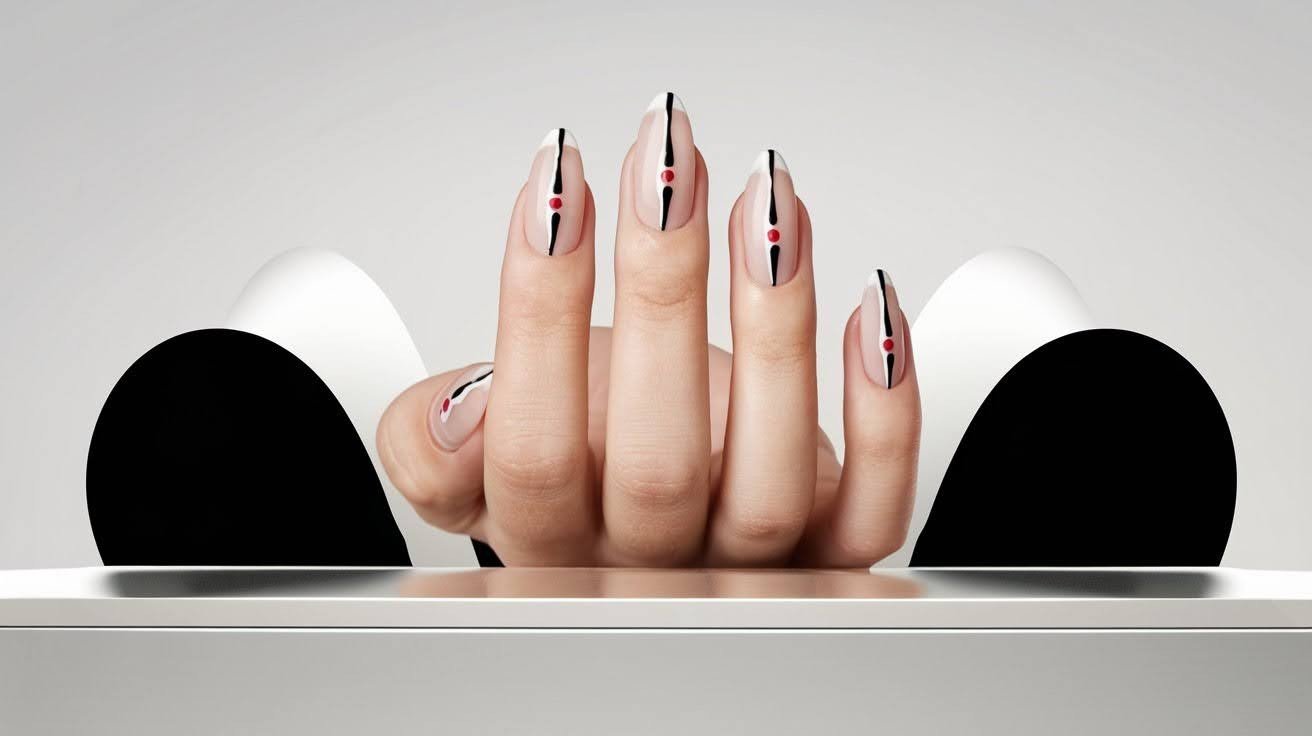
Place dots in a straight line down the center of each nail. This creates a modern, art-inspired look that works great on long almond-shaped nails.
Start with three dots and adjust based on your nail length. The vertical line makes your nails look longer and more streamlined.
13. Half-Moon Dot Accents
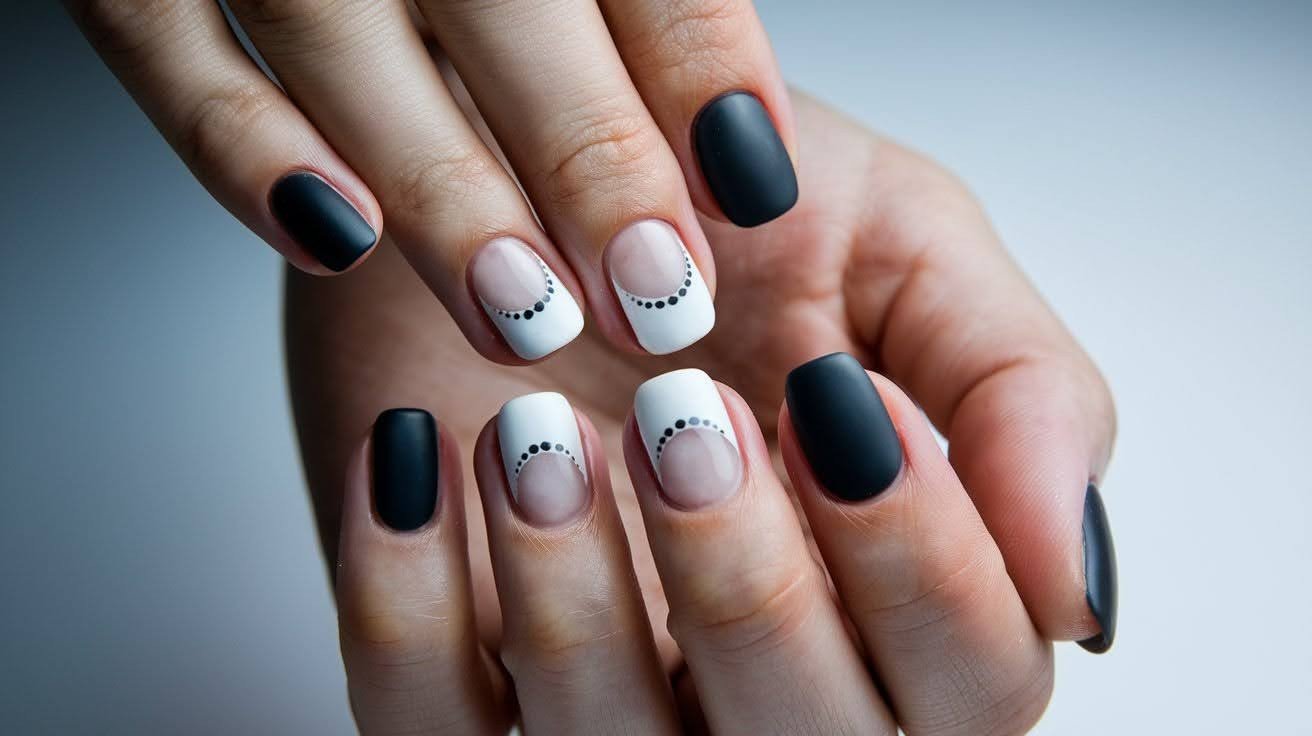
Paint your nails, then add dots in a curved line that follows your natural nail shape near the base. This creates a moon phase effect using negative space.
Leave the actual half-moon area unpainted, then add your dots just above it. The contrast between painted and bare nail makes this look really striking.
14. Dot Stripes and Lines Combo
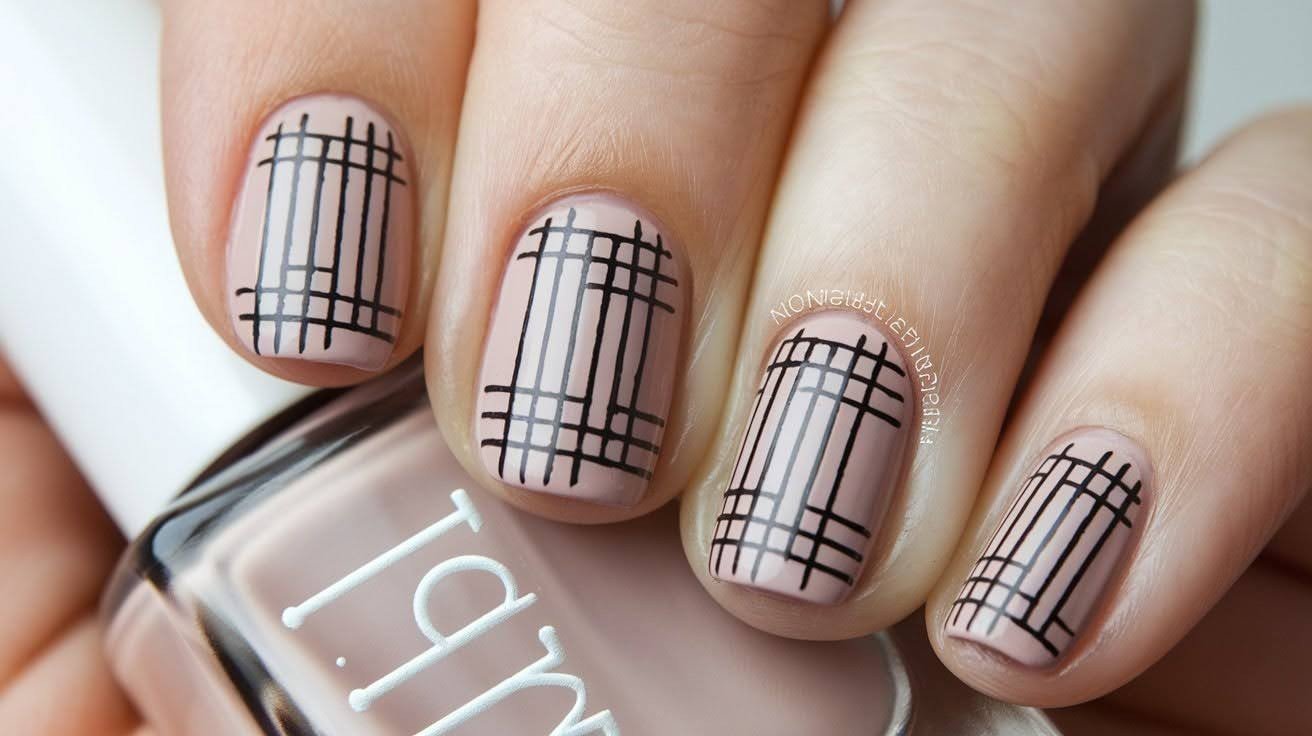
Mix dots with thin lines for an abstract art feel. Draw a simple vertical or horizontal line, then add dots at the ends or alongside it.
This gives you more visual interest while staying minimal. The combination of shapes creates movement without being busy.
15. Polka-Dotted Gold Tips
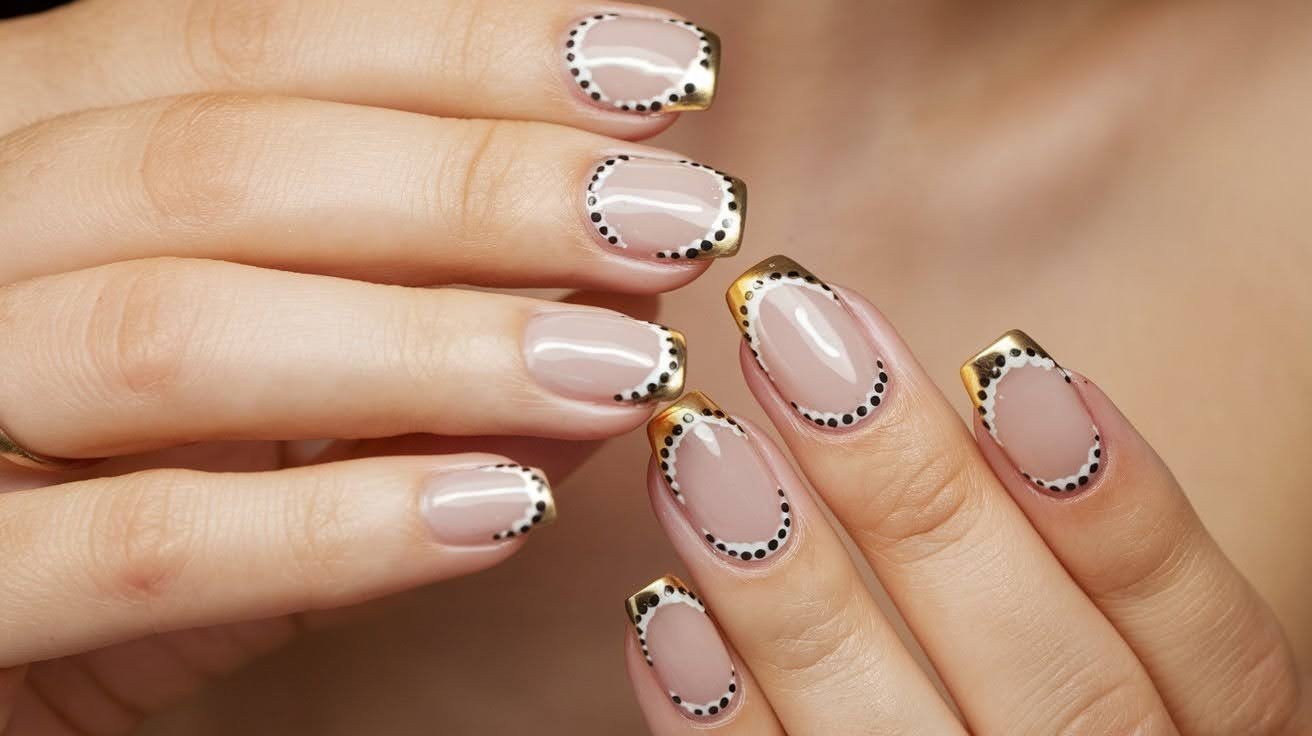
Paint classic gold French tips, then add small dots in a contrasting color along the tip line. This adds glamour without being too much.
Try black dots on gold tips for drama, or white dots for something softer. The key is keeping the dots small so they don’t compete with the gold.
Playful Minimalist Dot Combos
You got crazy ideas? It’s time to implement them:
16. Mismatched Dot Manicure
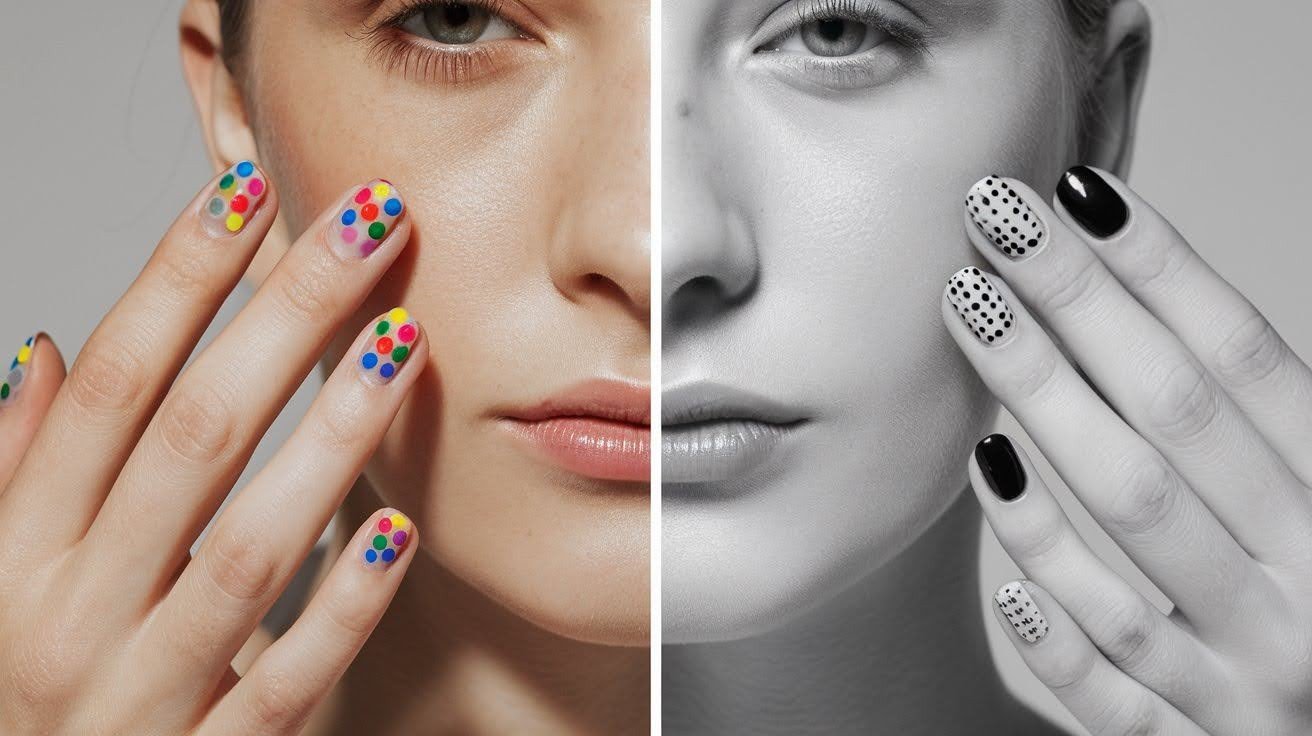
Try something different – make one hand colorful and the other monochrome. Your left hand could have bright rainbow dots while your right hand stays classic with black and white.
This works great if you can’t decide between two looks. You get the best of both worlds and can switch up your mood throughout the day.
17. Pink Glitter Base with White Dots
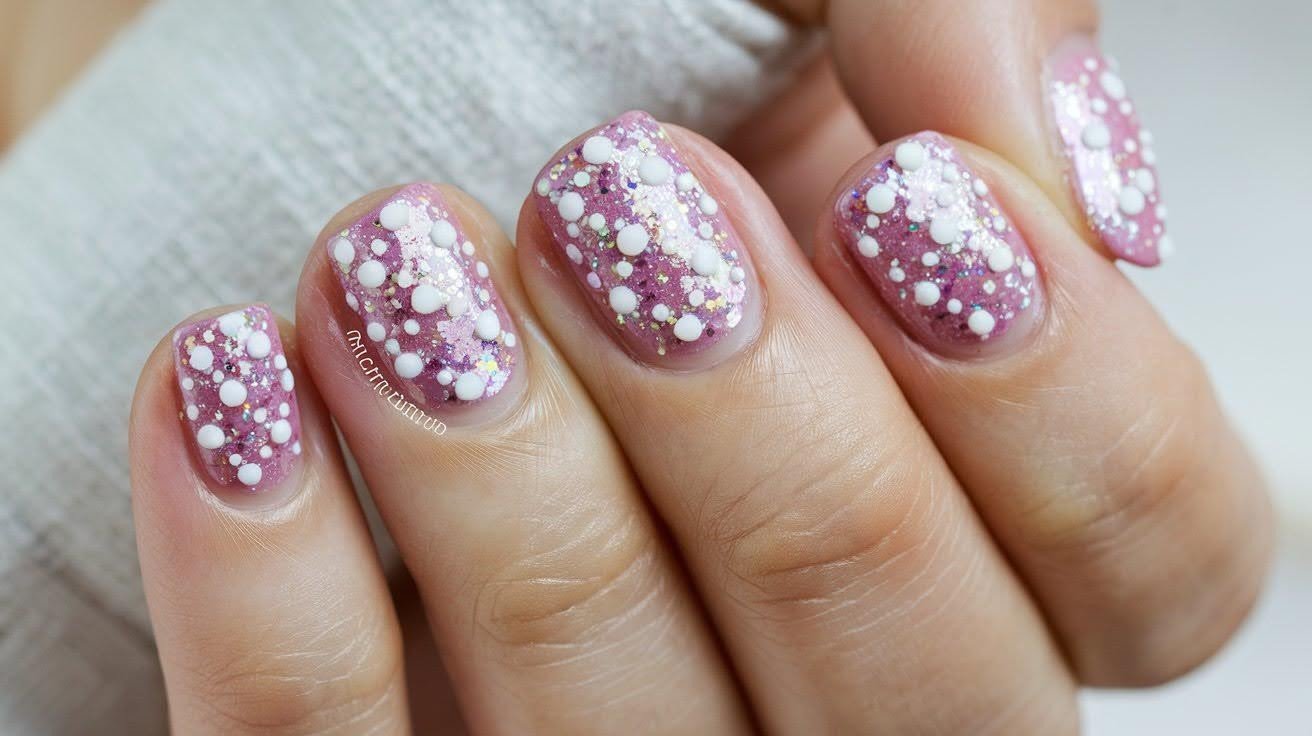
Start with a sparkly pink base, then add small white dots on top. The glitter gives you shine while the white dots keep things sweet and playful.
This combination works well for casual hangouts and weekend brunch. The sparkle catches light beautifully but isn’t too formal.
18. Chrome Dot Embellishments
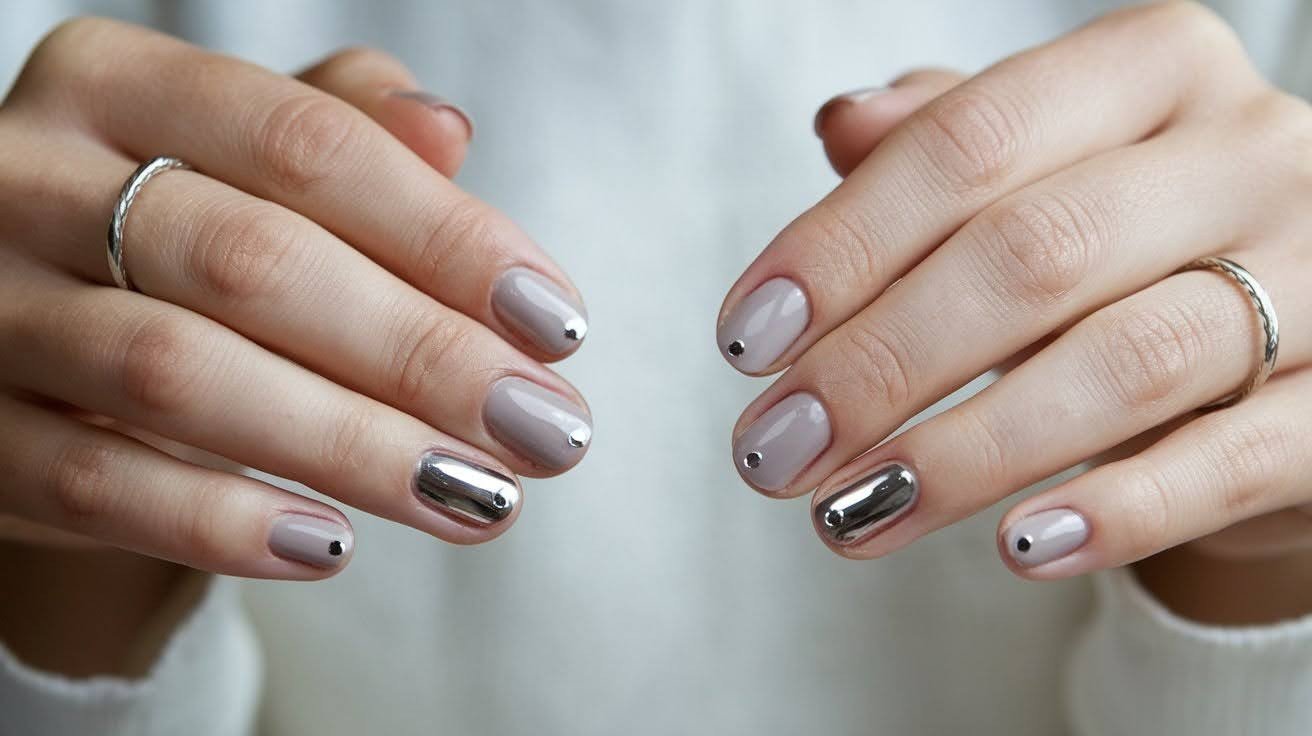
Add small chrome dots to your regular manicure for subtle metallic shine. These mirror-like dots reflect light and coordinate well with your jewelry.
Silver chrome dots work with any base color. Gold chrome feels warmer and pairs nicely with earth tones. Keep the dots small so they accent rather than dominate.
19. Black & White Dot Alternates
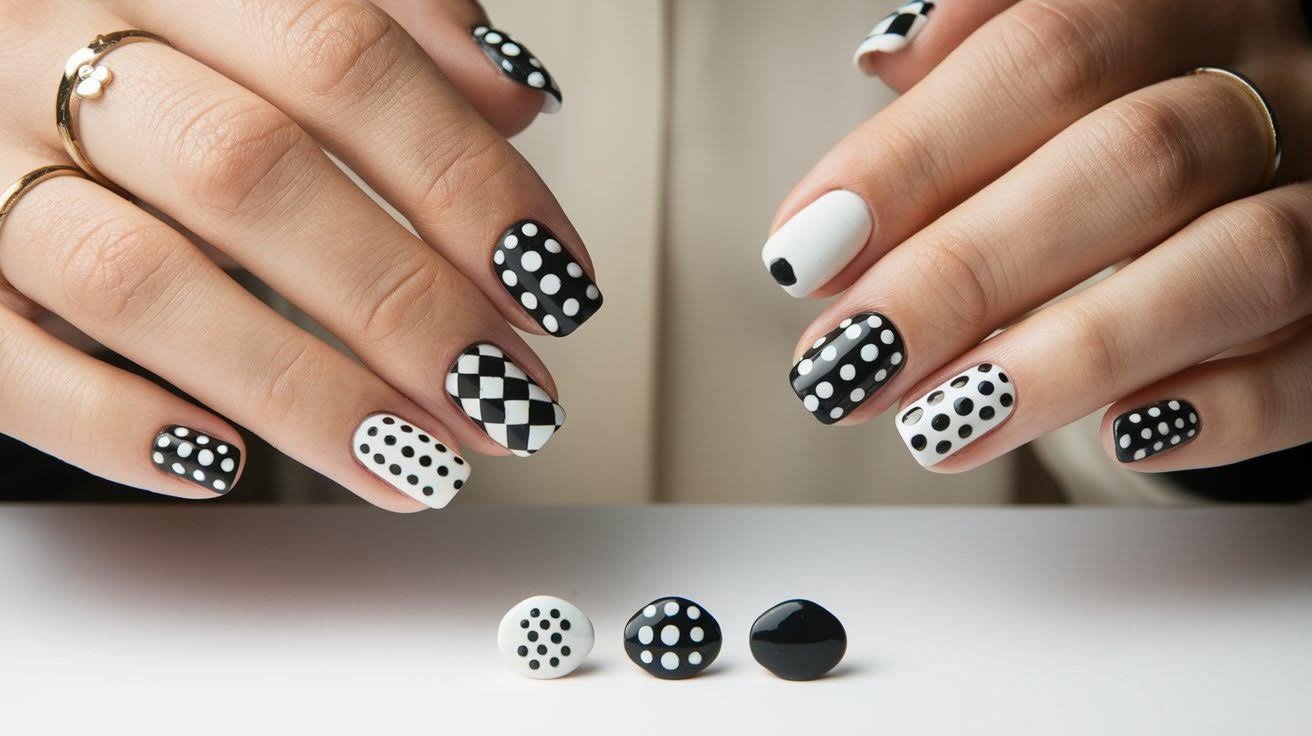
This classic color combo never fails. You can arrange the dots vertically down your nail or place them diagonally for more movement.
Try alternating black and white dots in a checkerboard pattern. Or keep it simple with just black dots on some nails and white dots on others.
20. Star Dot Embellishments
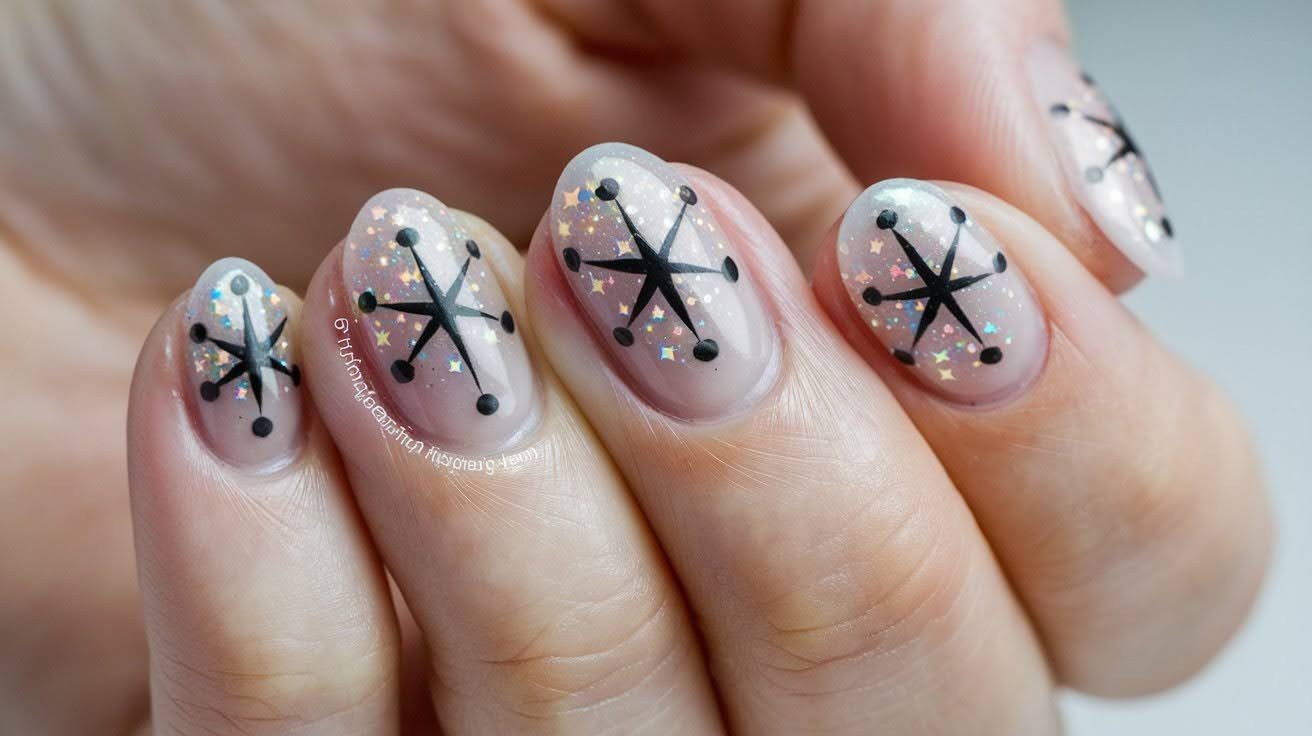
Create tiny star shapes using dots instead of traditional star stickers. Use metallic or glitter polish to make small five-pointed stars.
Make the center dot slightly larger, then add four smaller dots around it. This gives you celestial vibes while keeping the overall look minimal and handmade.
Subtle Statements with Dots
Keep it simple and quite:
21. Nude with Tiny Pearl Dots
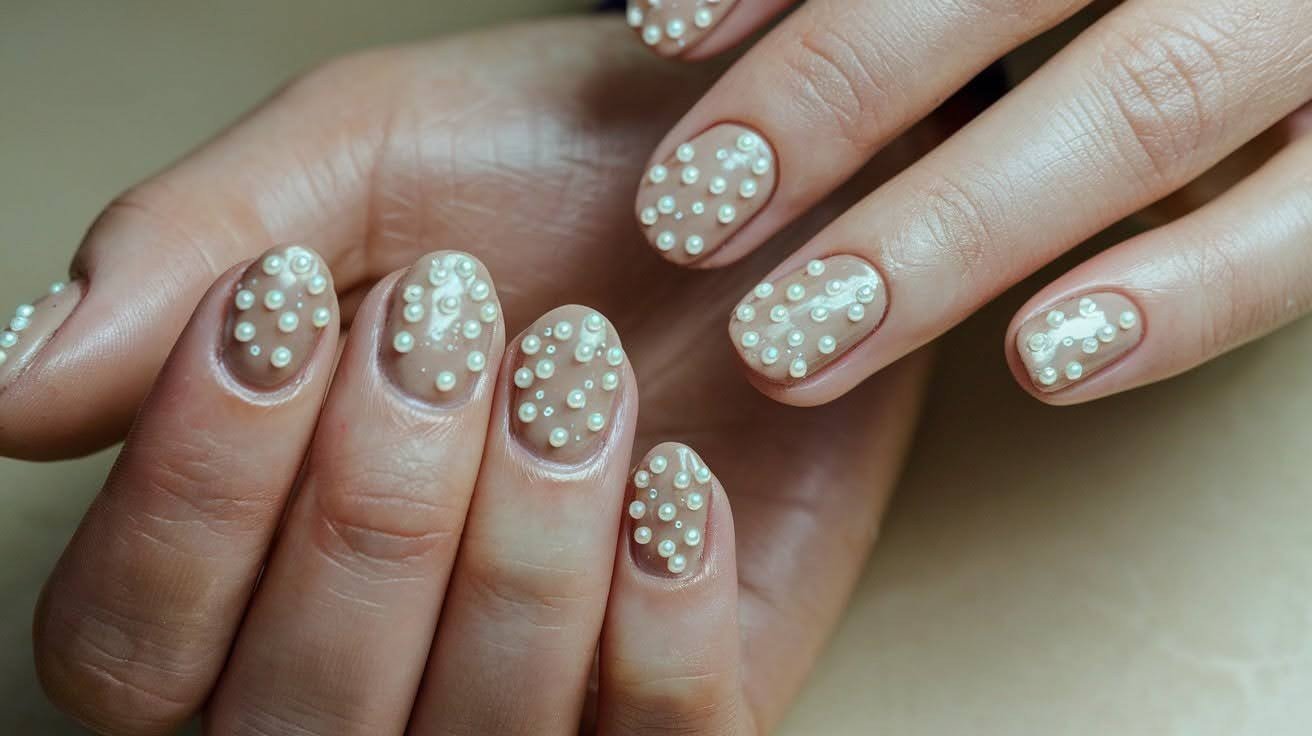
Pearl dots on nude nails create instant luxury without being flashy. The soft shimmer looks classy and works perfectly for minimalist brides who want something special.
Use actual pearl nail art pieces or create the effect with iridescent white polish. Place just one or two dots per nail to keep it refined.
22. Minimal Red Nails with Negative-Space Dot
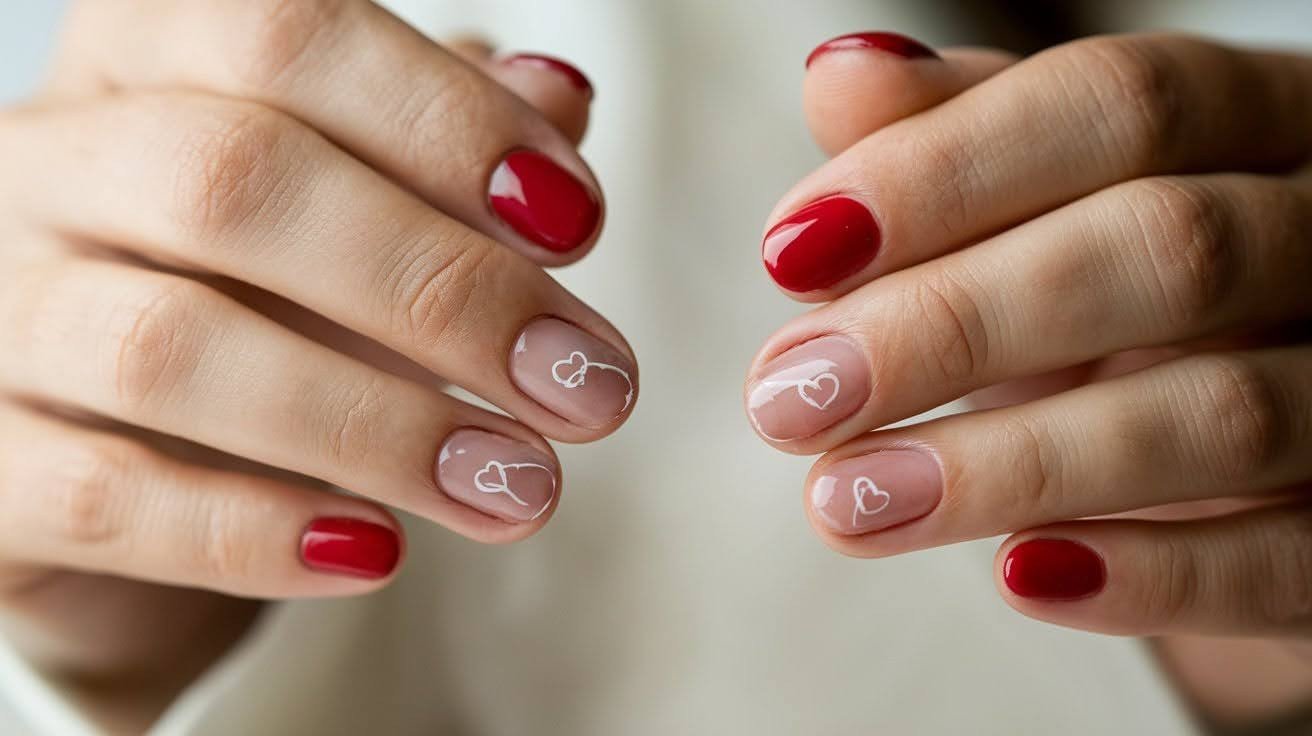
Paint your nails red, then create a small clear circle using tape or a stencil. Inside that clear space, add a tiny heart or simple symbol.
This creates a romantic, clean look that’s perfect for date nights. The contrast between the bold red and the delicate detail inside the dot feels modern and sweet.
23. Sheer Pantyhose Look with Black Dots
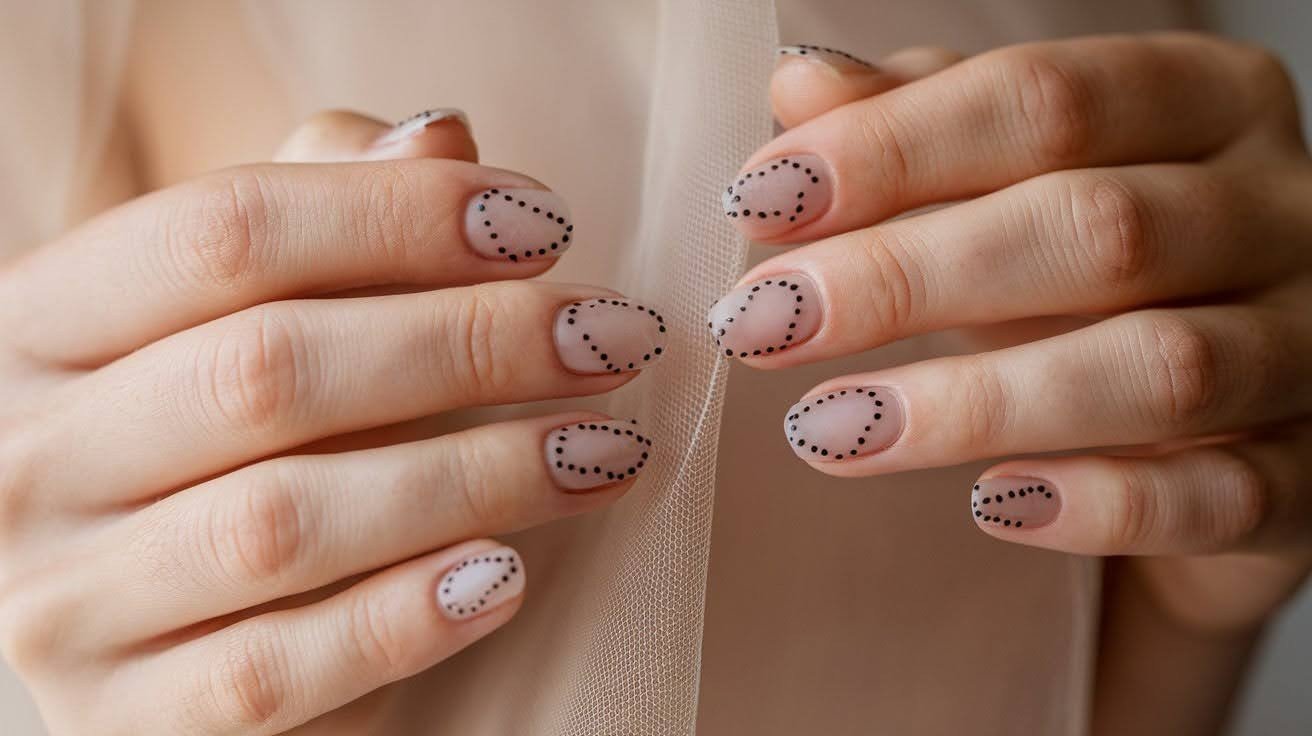
Use a barely-there sheer polish as your base, then add tiny black dots scattered across the nail. This creates texture while keeping the overall look very natural.
Finish with a matte top coat to enhance the subtle texture. The sheer base lets your natural nail show through while the dots add just enough interest.
24. Neutral Tones with Multicolor Micro Dots
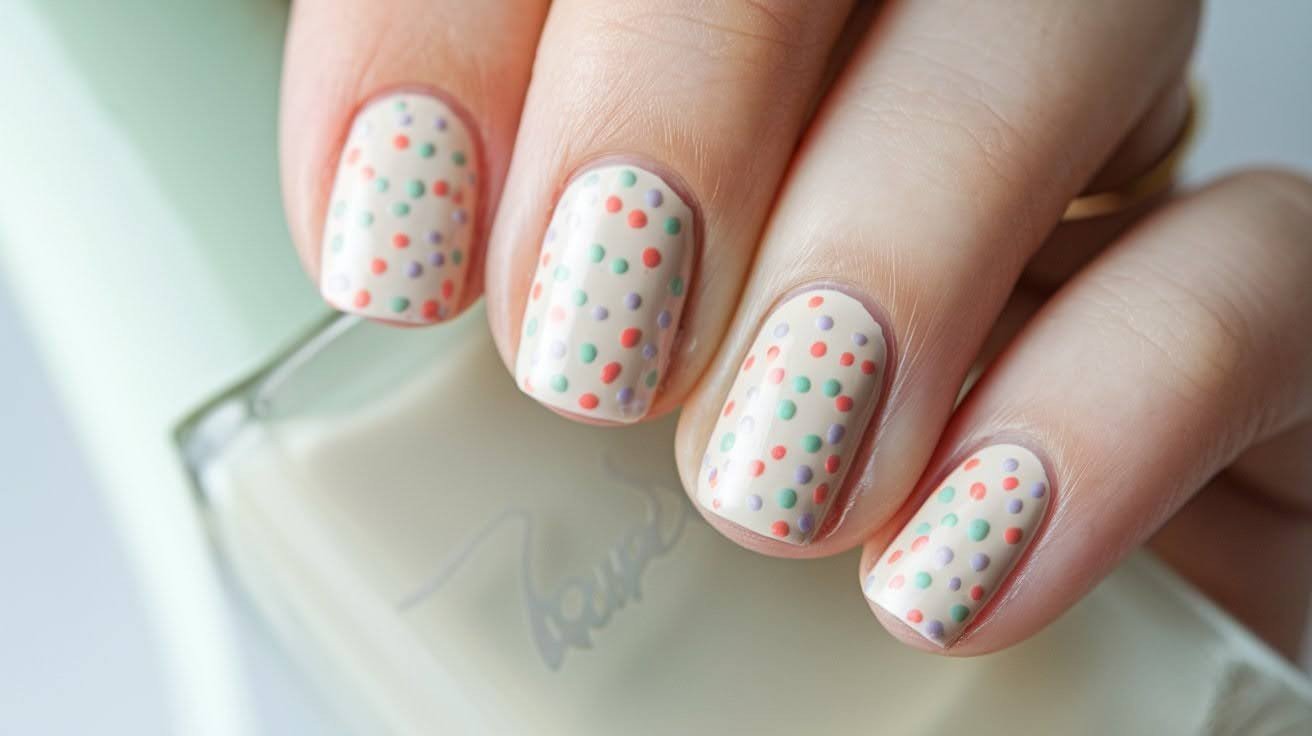
Start with a calm beige or soft gray base, then add tiny dots in different colors – maybe coral, mint, and lavender. Keep the dots small so they look like colorful specks.
This keeps things peaceful while adding playful touches. The neutral base grounds everything so it doesn’t feel too busy.
25. Glitter Dot Accent Nails
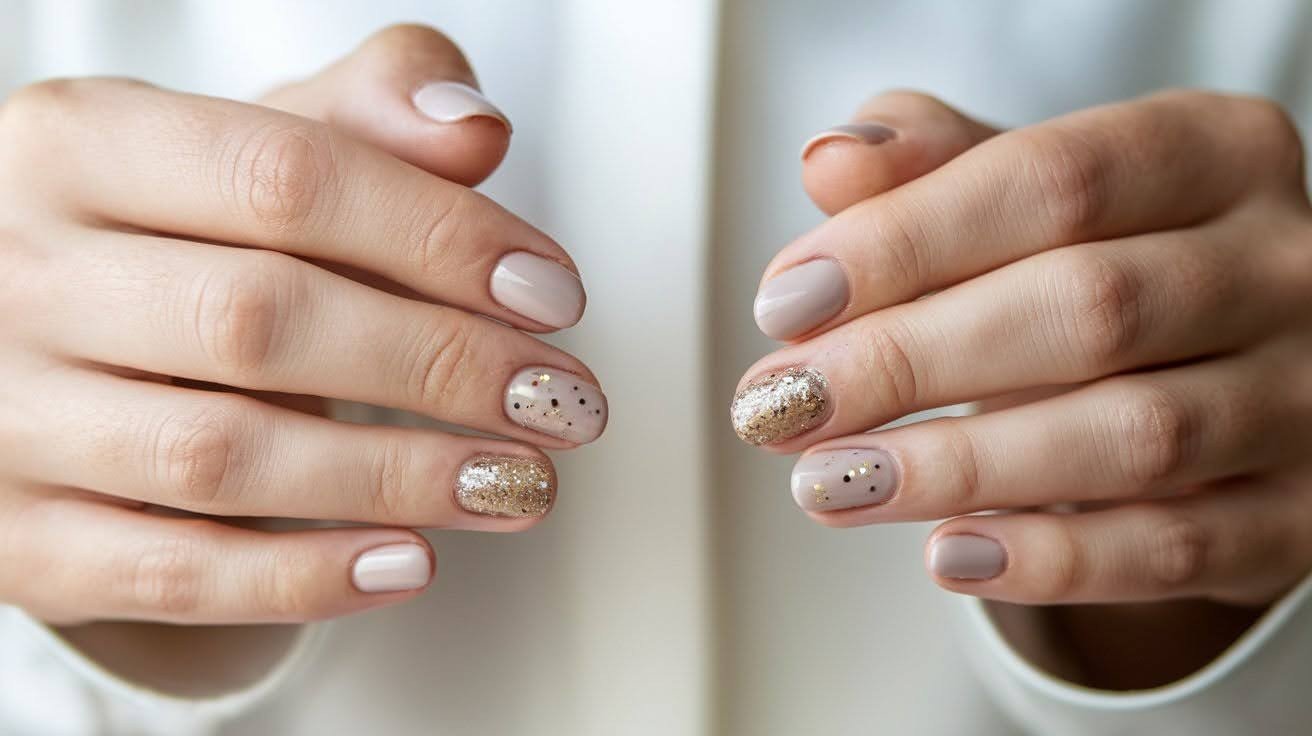
Add sparkle to just one or two nails using glitter polish dots. This gives you shine without overwhelming your whole manicure.
Try gold glitter dots on nude nails, or silver glitter on soft pink. The key is limiting the glitter to accent nails only so it stays minimal.
Pro Tips for Perfect Minimalist Dot Nails
- Use the right tools – Dotting tools, bobby pins, or toothpicks work best for consistent circles
- Let base polish dry completely – Wait at least 10 minutes before adding dots to prevent smudging
- Practice dot sizes first – Test on paper or a practice wheel to get even circles
- Work quickly but carefully – Dot polish can get thick, so don’t overthink each placement
- Clean your tool between colors – Wipe with acetone or nail polish remover for crisp, clean dots
Conclusion
These 25 designs show just how versatile tiny dots can be. From classic black dots on nude to colorful gradients and chrome accents, there’s something for every style and season. The best part? You don’t need expensive tools or years of practice.
Start with what you have at home – a bobby pin, toothpick, or dotting tool works great. Pick colors that match your wardrobe or the current season. Remember, less is more with minimalist designs.
Try one of these looks this weekend and see how such a simple technique can transform your nails. We’d love to see your results! Share your favorite minimalist dot design or tag us with your creation. Which style will you try first?
Frequently Asked Questions
What tools do I need for dot nail art?
You don’t need expensive equipment to create beautiful dots. A dotting tool, bobby pin, or even a toothpick works perfectly for making clean circles.
How long should I wait between applying base color and adding dots?
Wait at least 10 minutes for your base polish to dry completely. This prevents the dots from smudging or bleeding into the base color.
Can I do dot nail art on short nails?
Yes, dot designs work great on short nails! Keep the dots small and limit them to one or two per nail for the best proportions.
What’s the best way to make dots the same size?
Practice on paper first to get consistent pressure and technique. Use the same tool throughout your manicure and dip it in polish the same way each time.
How do I fix mistakes when doing dot nail art?
Use a small brush dipped in acetone to clean up uneven dots while they’re still wet. For dried mistakes, carefully scrape off with a cuticle pusher and start over.

