Oval French Tip Nails: Classic Style You Can Do at Home
I’ll be honest with you, I’ve been obsessed with oval french tip nails for months now.
Every time I scroll through my feed, I see another version of this classic style that makes me want to book a salon appointment immediately.
But here’s what I’ve learned: you don’t need to spend a fortune at the nail salon to get this look.
The combination of oval-shaped nails with clean French tips creates a polished appearance that works for any occasion.
I’ve tried this style myself countless times, and I’m excited to share everything I know with you.
Let’s get started.
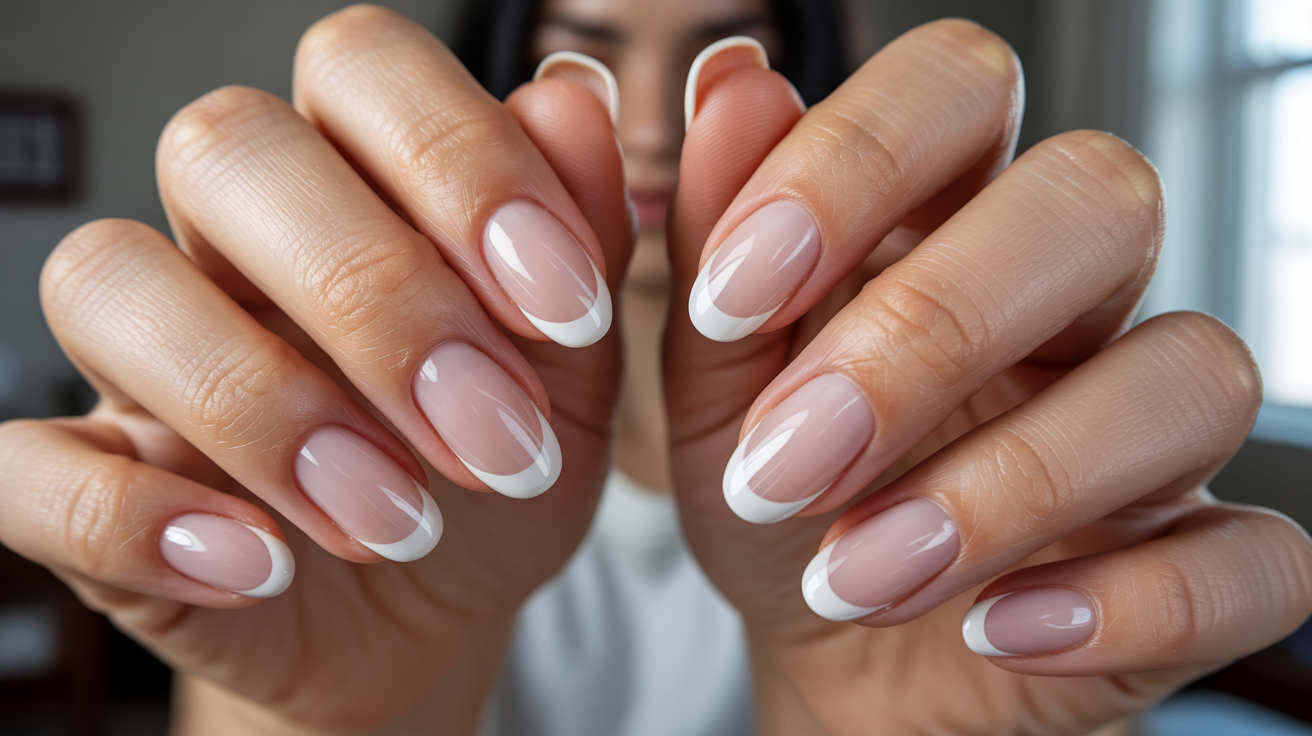
What Are Oval French Tip Nails?
Oval french tip nails combine two classic nail techniques into one beautiful style. The oval shape means your nails are filed into a soft, rounded curve at the tip.
Then you add the signature French manicure white tips across the top.
This pairing works incredibly well because the oval shape naturally flatters your fingers while the white tips add that clean, polished finish.
The oval shape is honestly one of my favorite nail shapes. It makes your fingers look longer and more slender without being too dramatic.
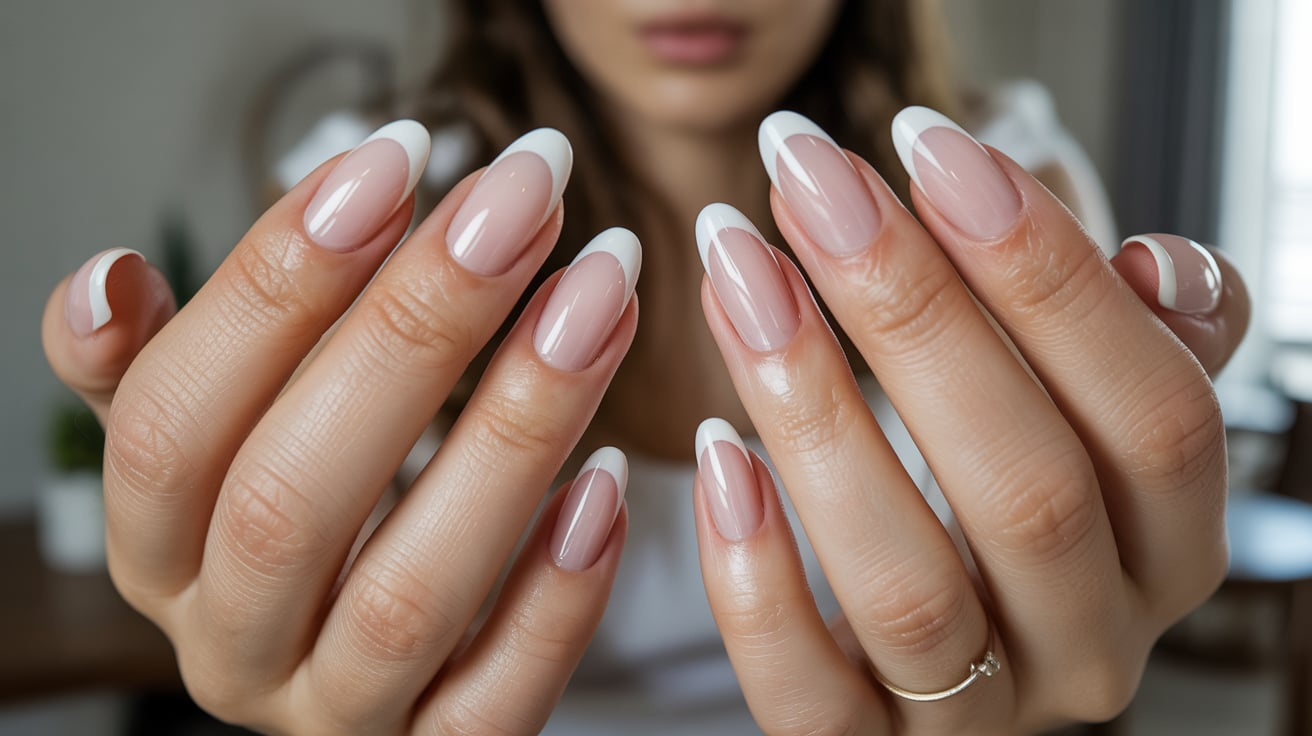
The classic version uses white polish for the tips with a nude or pale pink base. But modern variations are everywhere now.
You can use colored tips, add glitter, or go with super thin micro tips for a subtle look.
Here’s the good news: this style works on different nail lengths. Short nails can absolutely pull off oval french tip nails.
You can also choose between natural nails, gel polish, or acrylic extensions depending on what works for your lifestyle and budget.
How to Create Oval French Tip Nails at Home
Creating this manicure at home is totally doable. I’m going to walk you through each step so you can get salon-quality results without leaving your house.
Step 1: Gather Your Supplies

You’ll need a few basic tools to get started. Grab a nail file (glass files work best), a buffer, cuticle pusher, and nail clippers.
For polish, you’ll want a base coat, your chosen base color, white polish for the tips, and a top coat.
Optional items can make the process easier. French tip guides or nail stencils help you get clean lines. A thin nail art brush lets you fix mistakes.
Don’t feel like you need to buy everything at once. Start with the basics and add tools as you go.
Step 2: Prepare Your Nails
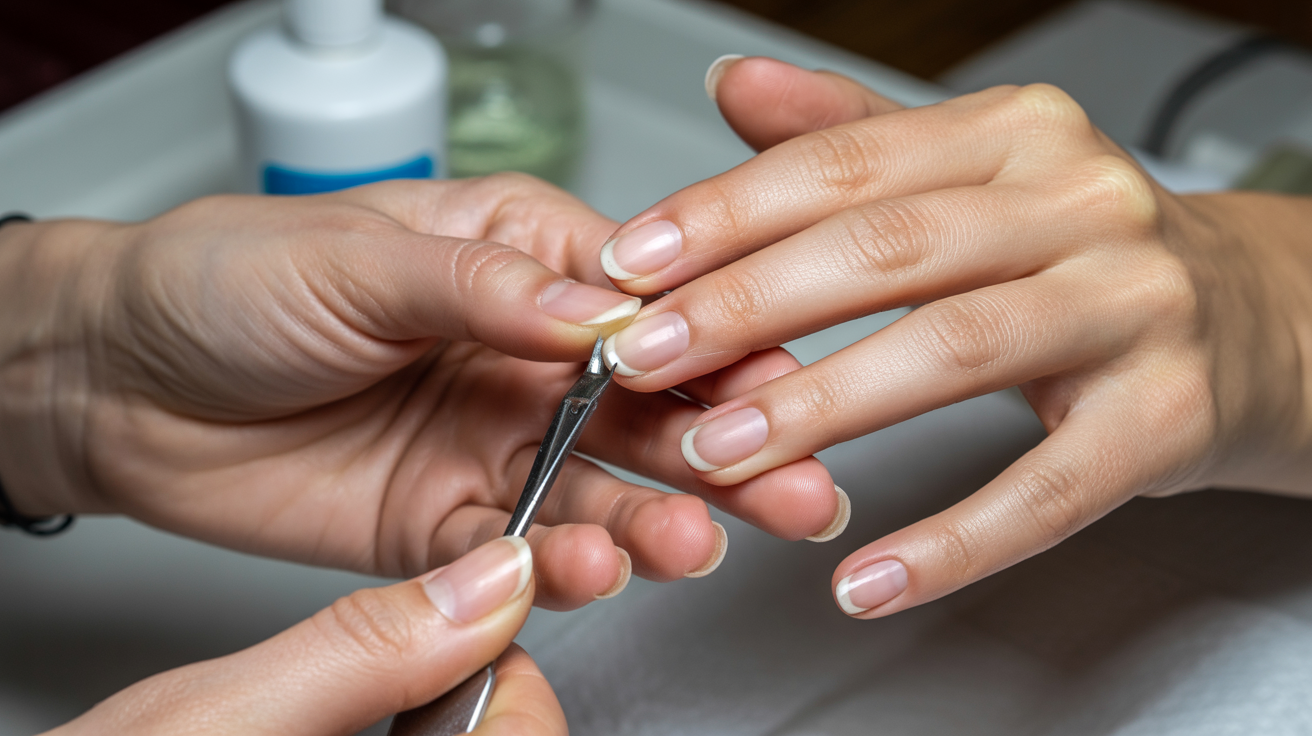
Clean hands are crucial for a long-lasting manicure. Remove any old polish with acetone or nail polish remover. Wash your hands thoroughly with soap and water.
Push back your cuticles gently using a cuticle pusher. Don’t cut them unless absolutely necessary. Trim your nails to your desired length with nail clippers.
Use a buffer to lightly smooth the surface of each nail. This helps polish adhere better.
Step 3: Shape Your Nails into Ovals
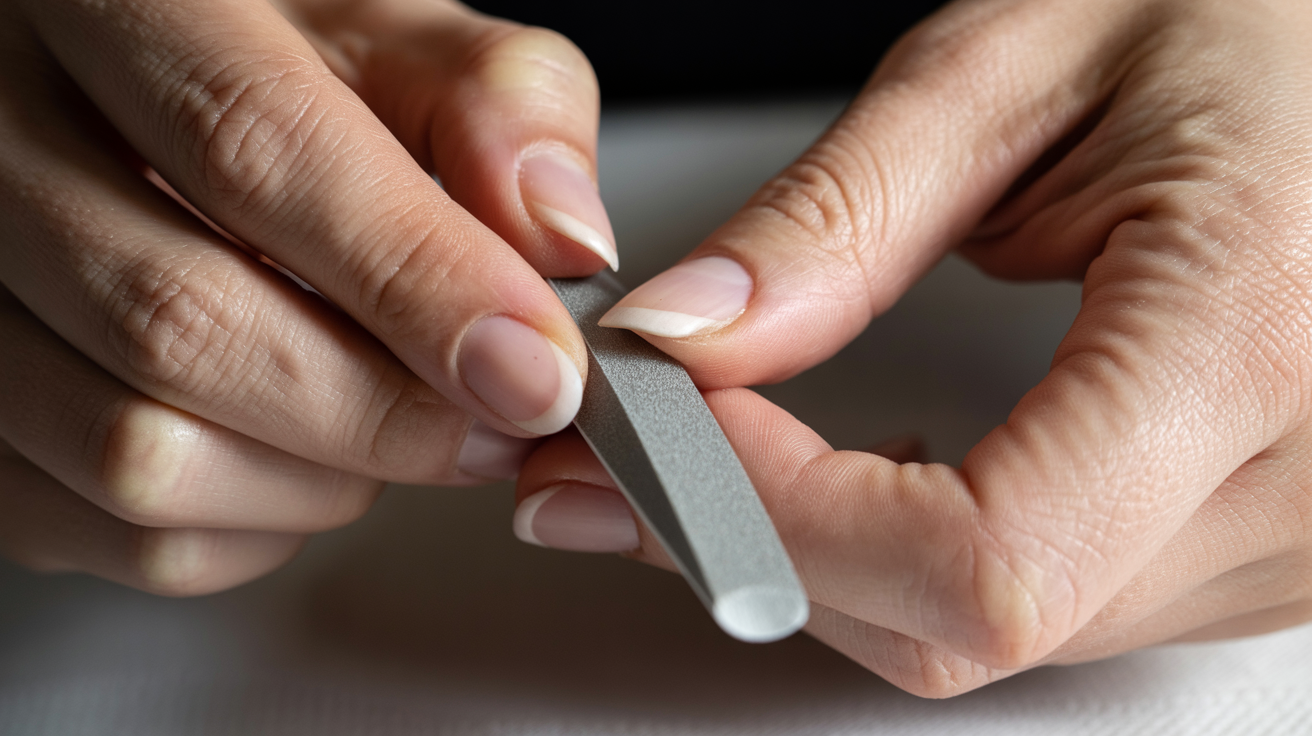
This step is where your oval french tip nails really start to take shape. File the sides of each nail at an angle toward the center. You want to create a soft curve, not a point.
The key is to file in one direction rather than sawing back and forth. This prevents splitting and damage. Keep checking your progress by looking at your nails from different angles.
Common mistakes include filing too far into the sides or creating a point instead of a curve. Take it slow. The oval should look natural and follow the curve of your cuticle.
Step 4: Apply Base Coat
Never skip the base coat. I learned this the hard way after staining my nails with dark polish. Base coat protects your natural nails and helps color polish last longer.
Apply a thin layer to each nail, covering from cuticle to tip. Let it dry completely before moving on. Most base coats dry in about two minutes.
Step 5: Paint the Base Color
Choose a shade that complements your skin tone. Classic options include soft pink, peachy nude, or sheer natural shades. I find that slightly pink tones work well for most people.
Apply the first coat in thin, even strokes. Start in the middle of the nail, then do each side. Thin coats are better than thick ones because they dry faster and look smoother.
Wait for the first coat to dry, then apply a second coat. Two thin coats give you better coverage than one thick coat.
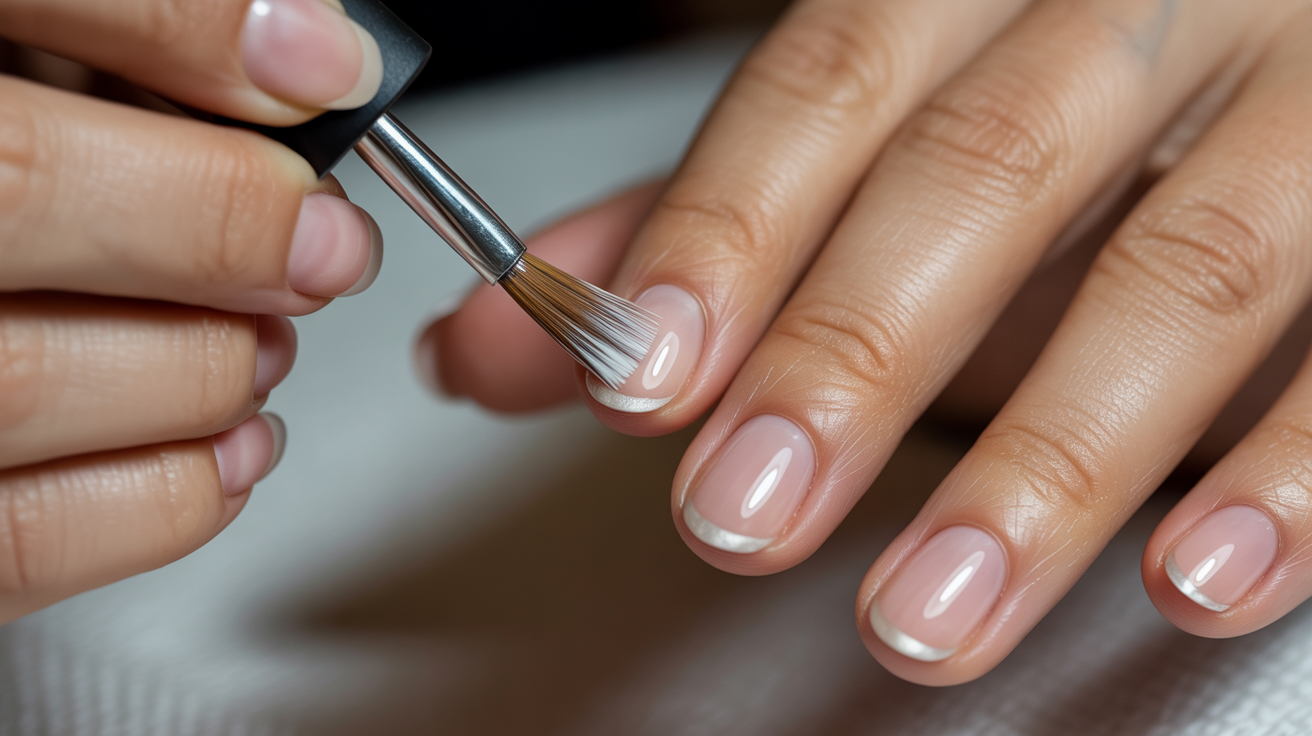
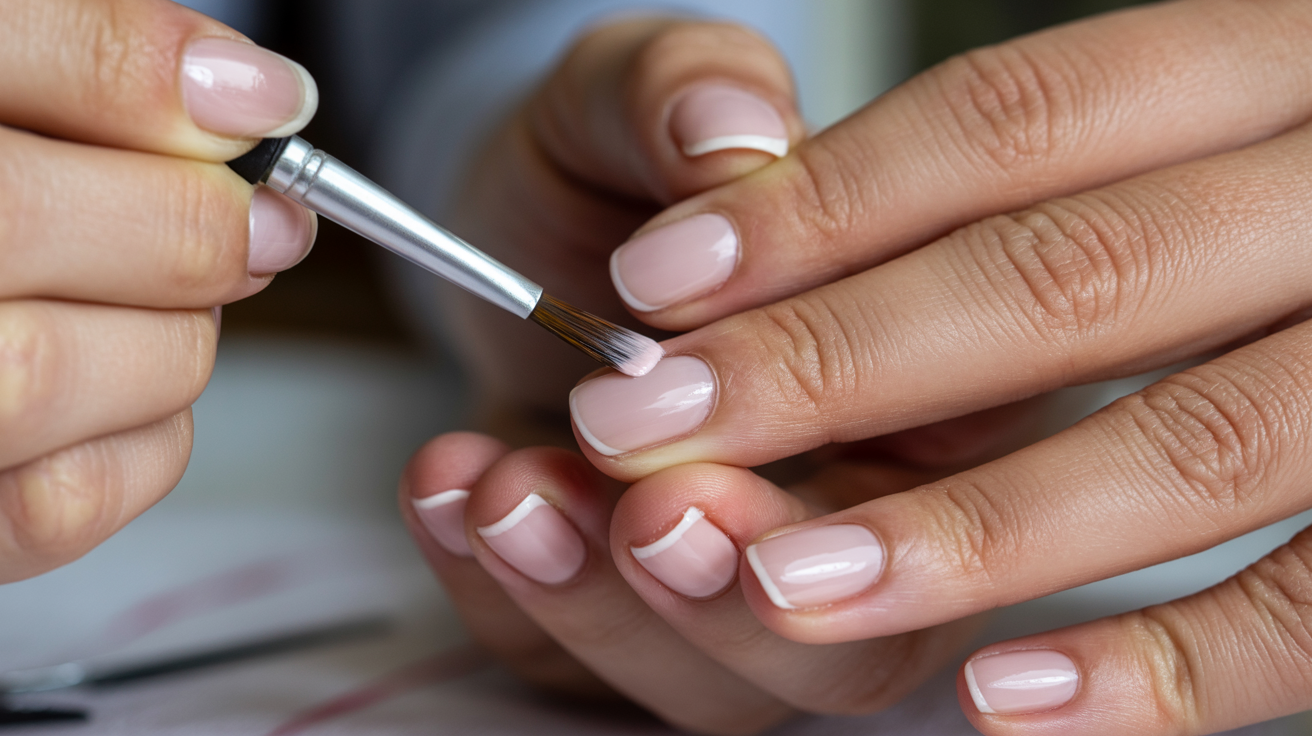
Step 6: Create the French Tip
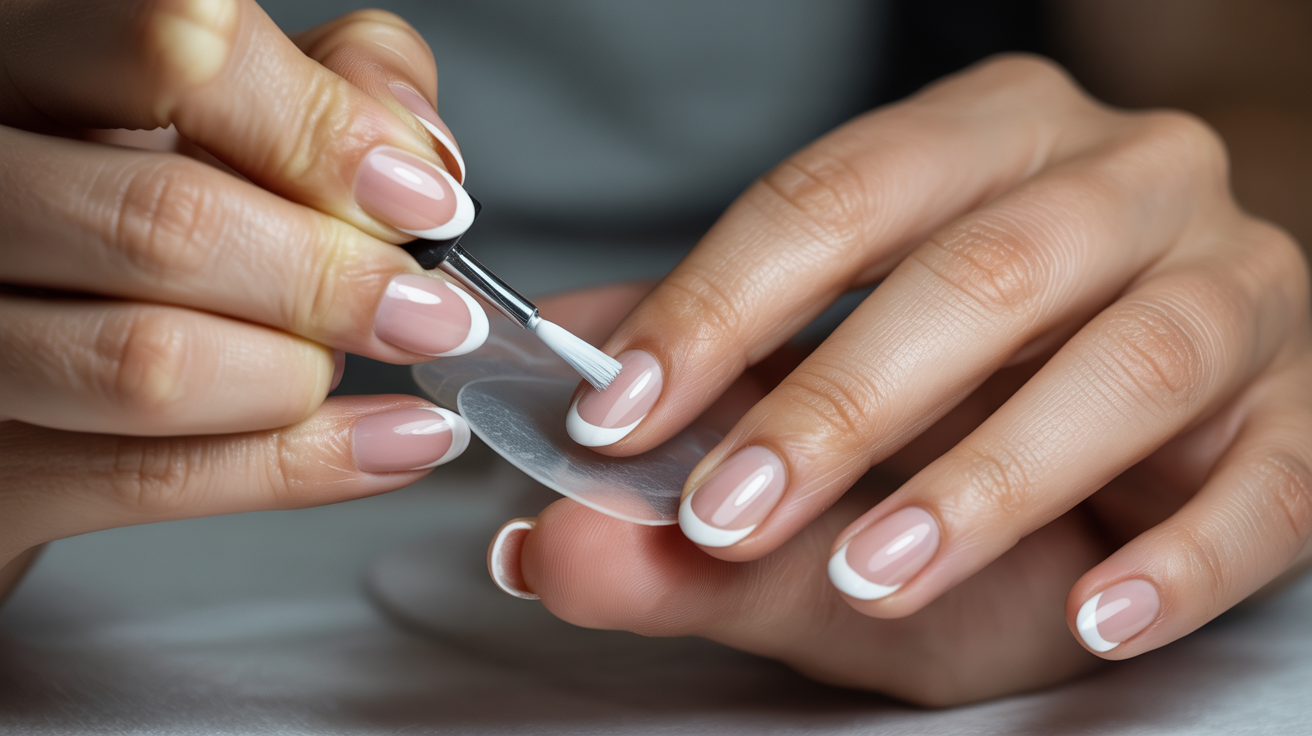
This is the fun part where your oval french tip nails really come together. You have several methods to choose from.
Freehand painting gives you the most control but requires a steady hand.
French tip guides are stickers that help you get a perfect line. Place them where you want the white to start, paint over them, and peel them off.
Nail pens or striping brushes also work great for beginners.
Decide how thick you want your tips. Classic French tips are about 2-3mm wide. Micro tips are thinner and more subtle. Paint the white polish in smooth strokes across the tip of each nail.
If you make a mistake, don’t panic. Dip a small brush in nail polish remover and clean up the edges.
Step 7: Seal with Top Coat

Top coat is just as important as base coat. It seals in your design, adds shine, and protects your manicure from chipping. Apply a generous layer over each nail.
Make sure to cap the free edge of your nail. This means running the brush along the tip to seal it. This little trick makes your manicure last much longer.
Let your nails dry completely. Gel top coats need UV or LED light to cure. Regular top coat needs about 10-15 minutes to dry fully.
Tips for Perfect Oval French Tips Every Time
I’ve picked up some tricks over the years that make creating oval french tip nails so much easier. Here’s what works for me.
- Use glass nail files for smoother shaping that lasts forever
- Practice on your non-dominant hand first to work out technique issues
- Keep your hand steady by resting your wrist on a table when painting tips
- Apply thin coats of polish for better control and fewer streaks
- Fix mistakes with a small brush dipped in nail polish remover
- Consider press-on nails if you’re in a rush or still building skills
- Apply fresh top coat every 2-3 days to prevent chipping
Maintenance is key to making your manicure last. Wear gloves when doing dishes or cleaning to protect your work.
Design Ideas and Color Variations
Once you’ve mastered the basic oval french tip nails, it’s time to have some fun with variations. There are so many ways to make this classic style your own.
- Pastel tips in soft lavender, mint green, or baby blue for spring and summer
- Colored French tips in bold shades like navy, emerald, or hot pink
- Glitter accents on the tips for special occasions like weddings or parties
- Minimalist thin tips for professional settings
- Natural look with barely-there tips for strict workplace policies
- Seasonal designs like red and green for holidays or warm tones for fall
Don’t be afraid to experiment with different colors and styles. The beauty of doing your own nails is that you can try new looks without paying for each one.
Conclusion
Oval french tip nails are one of those timeless styles that never go out of fashion.
I love that you can create this look at home with just a few basic supplies and some practice.
Start with the tutorial I’ve shared, take your time with each step, and don’t worry if your first attempt isn’t perfect.
Practice makes progress, so keep experimenting until you find what works for you.
Your perfect oval french tip nails are just a few practice sessions away!
Frequently Asked Questions
Can I Create This Look on Short Nails?
Yes, absolutely! Oval french tip nails look great on short nails. You might want to make the white tips slightly thinner to keep everything proportional. The oval shape actually makes short nails appear longer.
How Long Does This Manicure Typically Last?
Regular polish lasts about 5-7 days with proper care. Gel polish can last 2-3 weeks without chipping. Acrylic nails with this design can last 3-4 weeks before needing a fill. Top coat every few days helps extend wear time.
What’s the Best Way to Remove French Tip Nails?
For regular polish, use acetone-based remover and cotton pads. Gel polish needs soaking with acetone wraps. Acrylic nails should be removed professionally or carefully filed down and soaked off. Never peel or force anything off your natural nails.
Do I Need Professional Training to Get Good Results?
Not at all! This is a beginner-friendly style that gets easier with practice. Your first few tries might not be perfect, but you’ll improve quickly. Watch a few tutorials, follow the steps carefully, and give yourself patience to learn.
Which Base Color Works Best for Beginners?
Start with a sheer pink or light nude shade. These colors are forgiving and hide imperfections better than clear polish. They also provide good contrast with white tips, making it easier to see what you’re doing while painting.