How to Create Skeleton Makeup Looks

Halloween is almost here, and you’re stuck deciding what to be. You want something that looks amazing but won’t break the bank. You need a look that works whether you’re 8 or 80. And maybe you’re worried about messing it up if you’re not great with makeup.
Here’s the good news: skeleton makeup checks every box.
In this article, you’ll learn exactly why skeleton looks have stayed popular for decades. We’ll cover the three main reasons this classic never goes out of style. You’ll see why it’s the smart choice for your Halloween plans.
I’ve helped hundreds of people create killer Halloween looks over the years. I’ve seen what works and what doesn’t.
By the end of this post, you’ll know exactly why skeleton makeup should be at the top of your Halloween list.
What You’ll Need: Essential Products & Tools
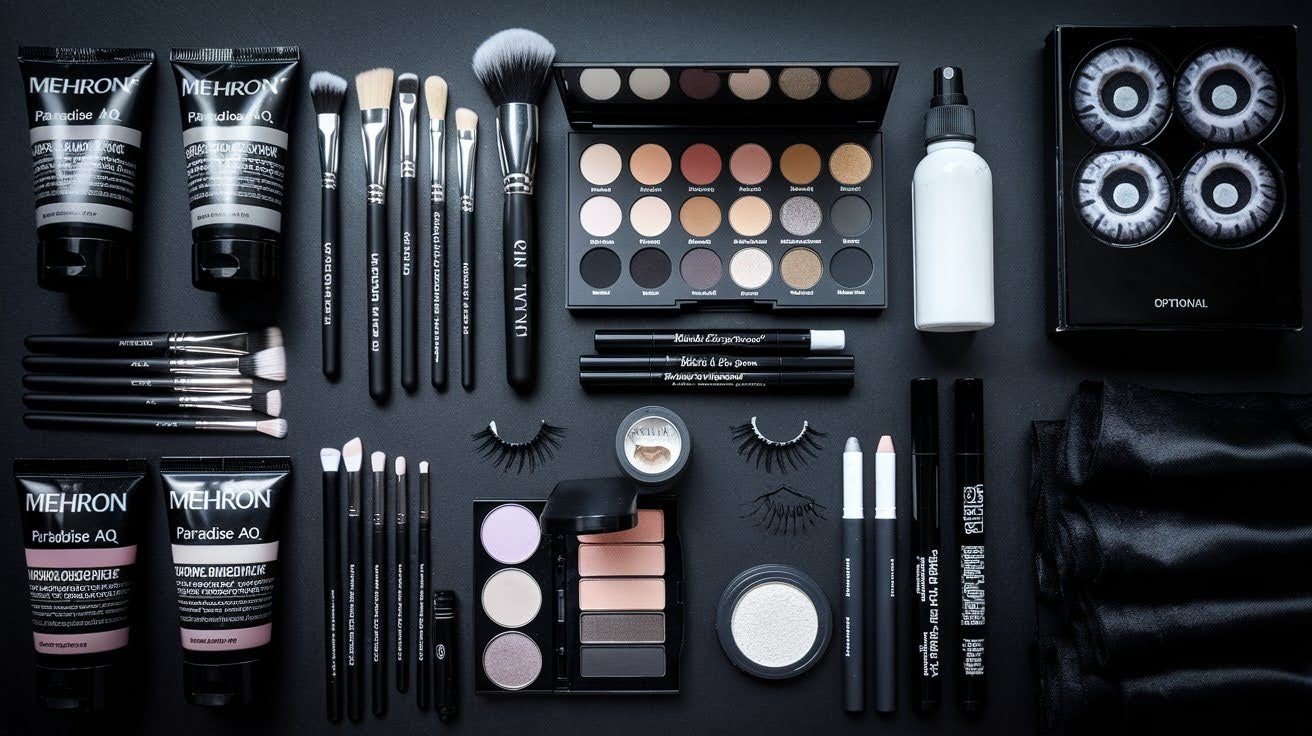
Getting skeleton makeup right starts with having the right supplies. Don’t worry – you probably already own half of these items. Here’s what you need to create a professional-looking skeleton face.
Face Paint: Mehron Paradise AQ in Black and White This is your foundation. These paints blend smoothly and stay put for hours. They’re water-based, so they won’t feel heavy or greasy on your skin.
Brushes: Flat brushes, detail brushes, fluffy blending brushes Flat brushes cover large areas quickly. Detail brushes help you draw precise lines around eyes and mouth. Fluffy brushes blend harsh edges for a more realistic look.
Eyeshadow: Matte black and white (Morphe, ColourPop, LA Colors) Use these to add depth and shadows. They’re easier to blend than face paint for subtle effects. Any drugstore brand works fine.
Eyeliners: Liquid liner and pencil (e.g., Kat Von D, NYX) Liquid liner creates sharp, clean lines. Pencil liner is better for smudging and softer effects. Both help define your bone structure.
Setting Spray & Powder: To keep your look lasting all night Your hard work deserves to last. Setting products prevent smudging and fading during parties or trick-or-treating.
Optional Extras: Fake lashes, contact lenses, all-black outfit These take your look from good to incredible. White or red contacts create an eerie effect. Bold lashes make your eyes pop against the white base.
Step-by-Step Skeleton Makeup Tutorial
Follow these seven steps to create a skull look that’s both spooky and stunning.
Step 1: Choose Your Inspiration
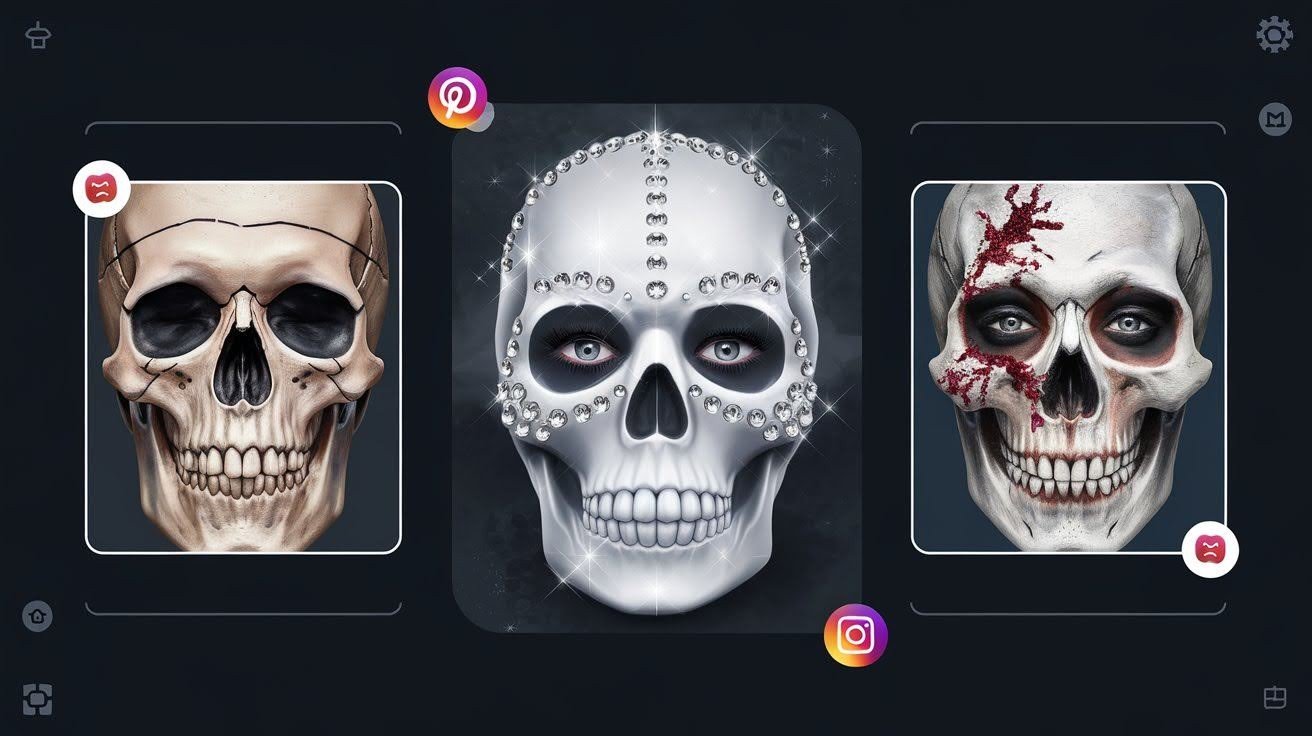
Browse Pinterest or Instagram for ideas. Pick between realistic bones, glam skull, or creepy horror styles.
Step 2: Sketch the Basic Skull Outline
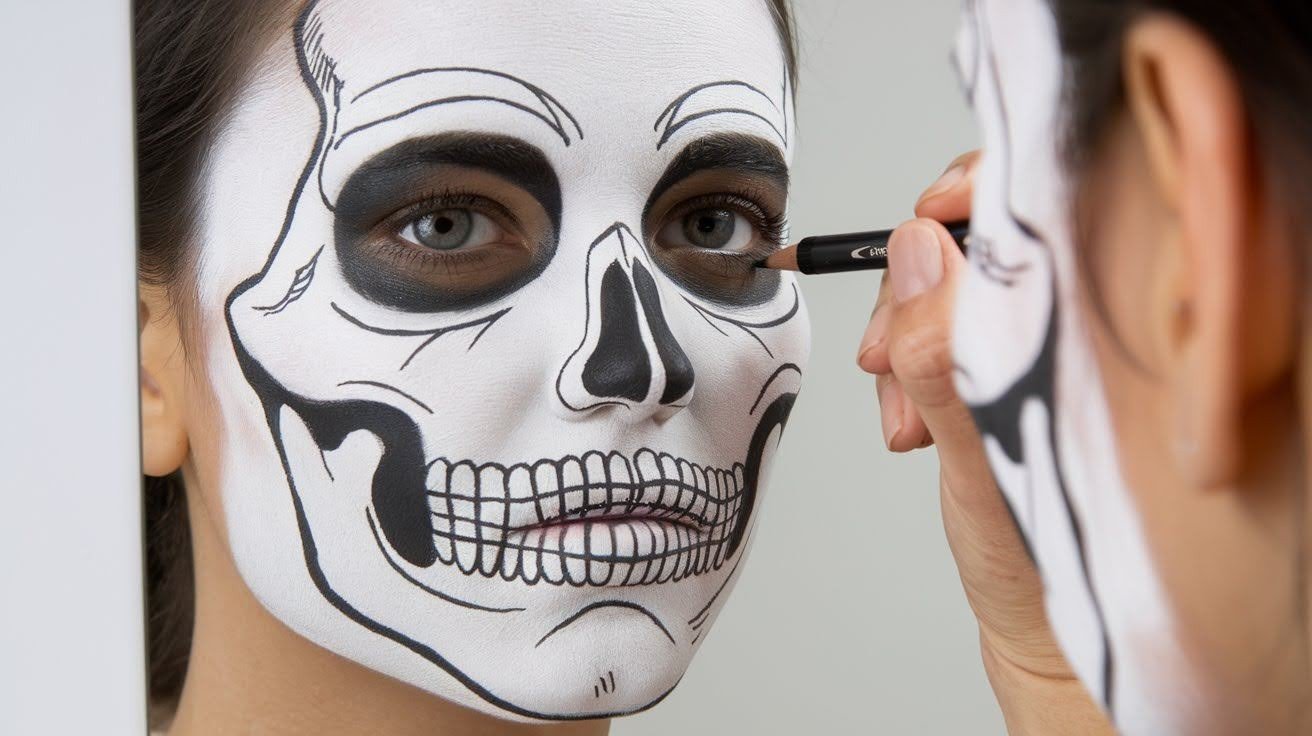
Use an eyeliner pencil to map out your plan. Mark where the cheek hollows, nose hole, jaw line, and eye sockets will go.
Step 3: Fill in the White Base
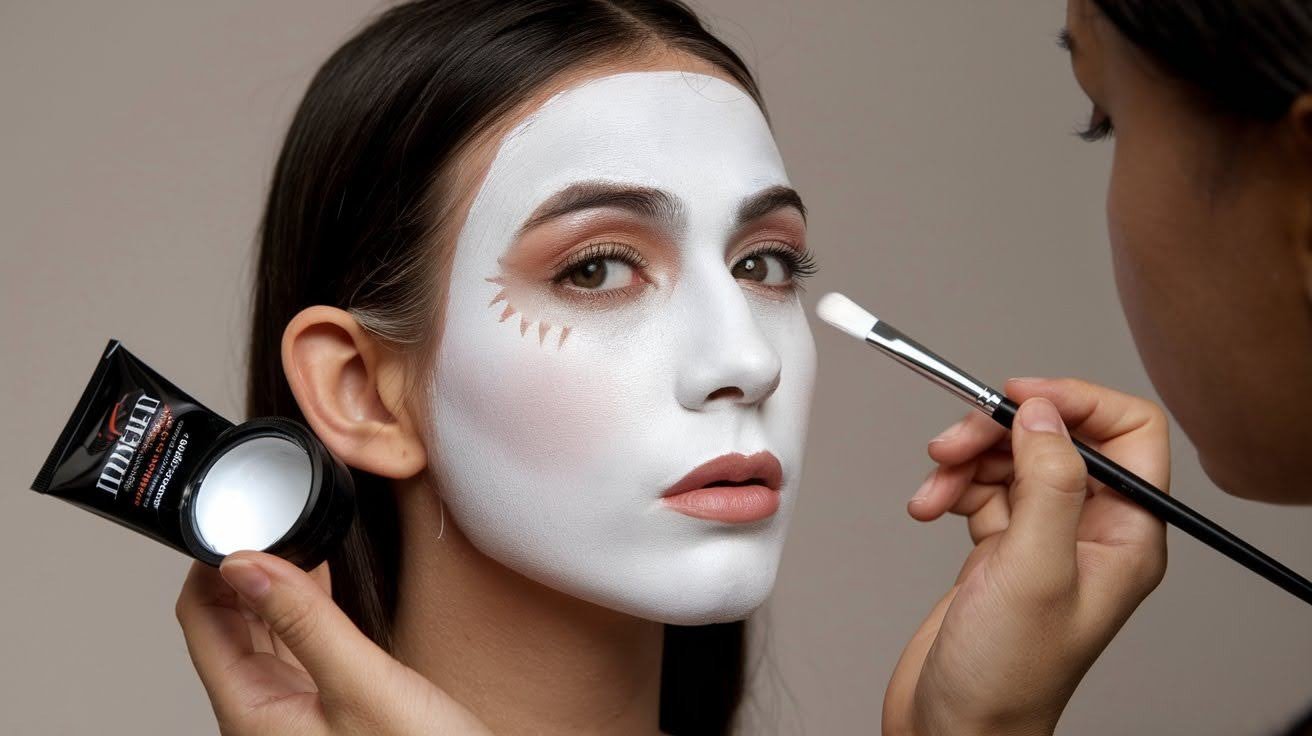
Paint white on your forehead, cheekbones, chin, and neck. Let it dry completely, then add a second coat for full coverage.
Step 4: Add the Black Paint Details
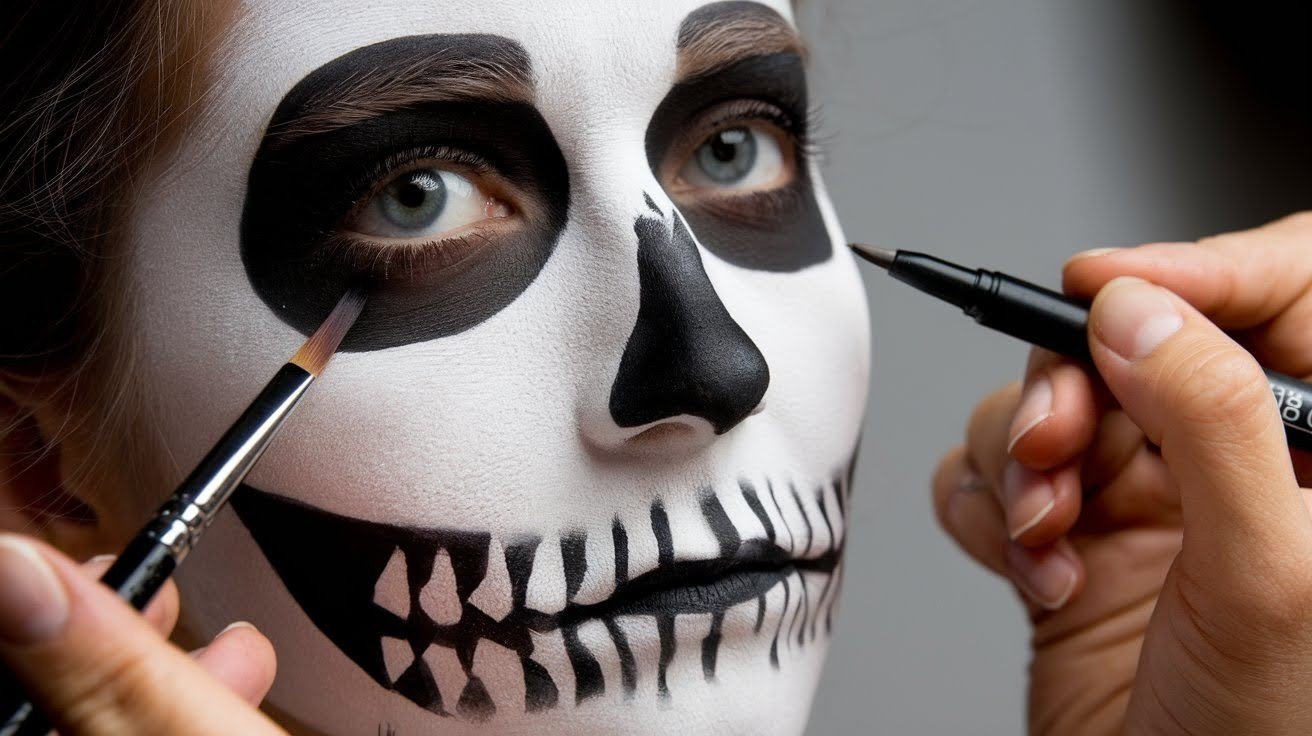
Fill in the eye sockets, nose cavity, and jaw shadows with black paint. Clean up lines with black liquid liner.
Step 5: Paint the Teeth
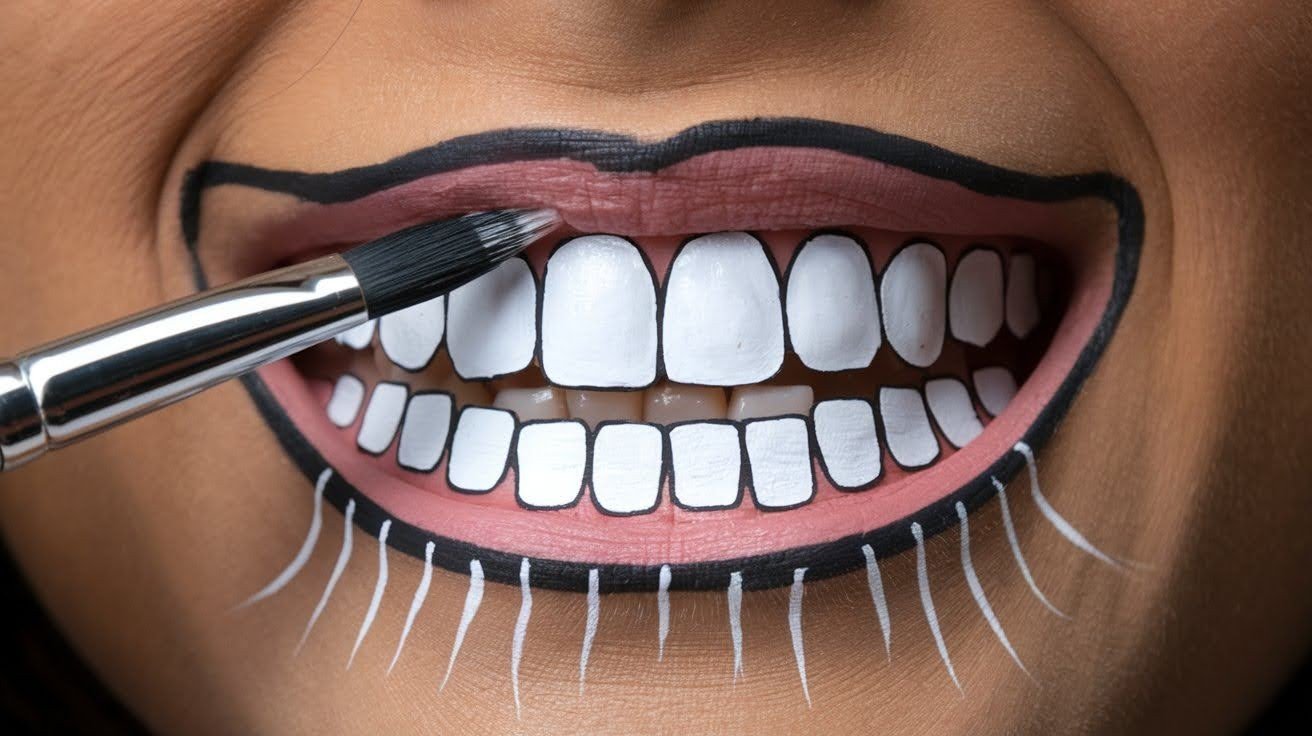
Use a flat brush to stamp white rectangles for teeth. Add pointed “roots” underneath each tooth. Keep both sides matching.
Step 6: Shade and Contour
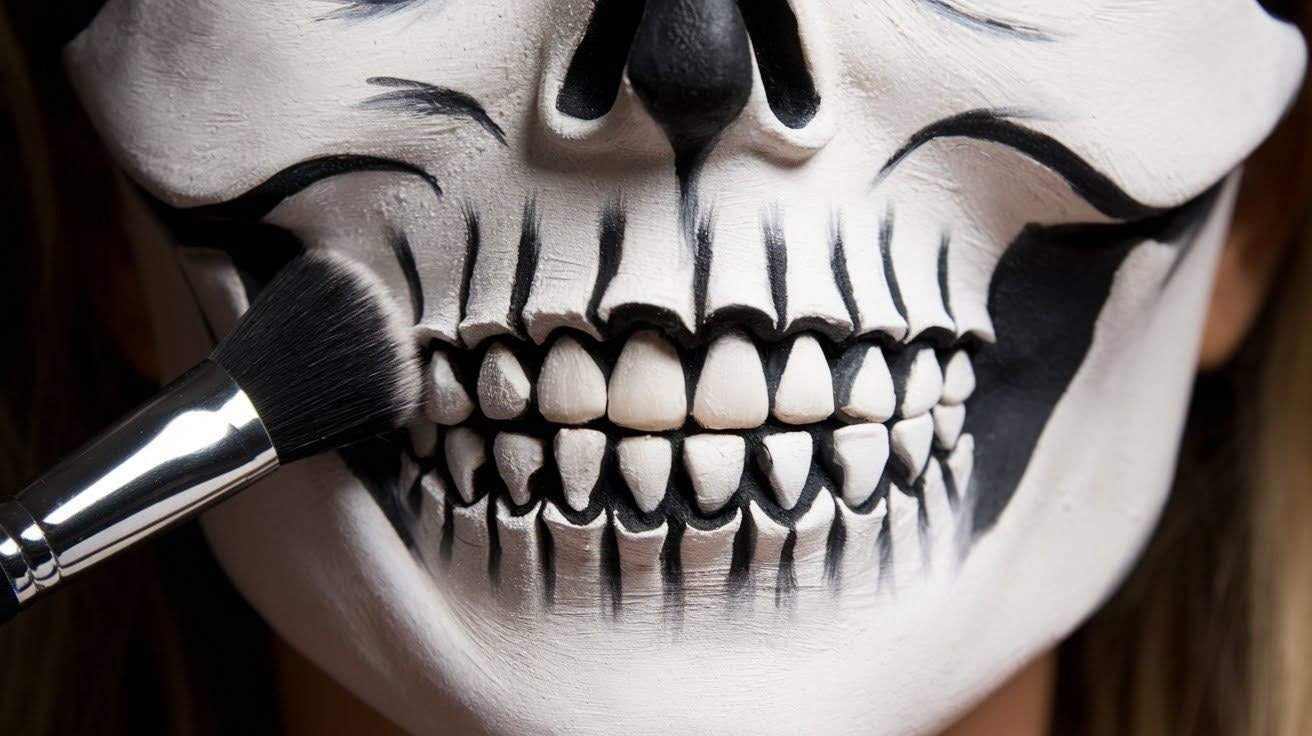
Use black eyeshadow to add depth around teeth and cheeks. Highlight with white shadow. Blend everything smooth.
Step 7: Final Detail Work
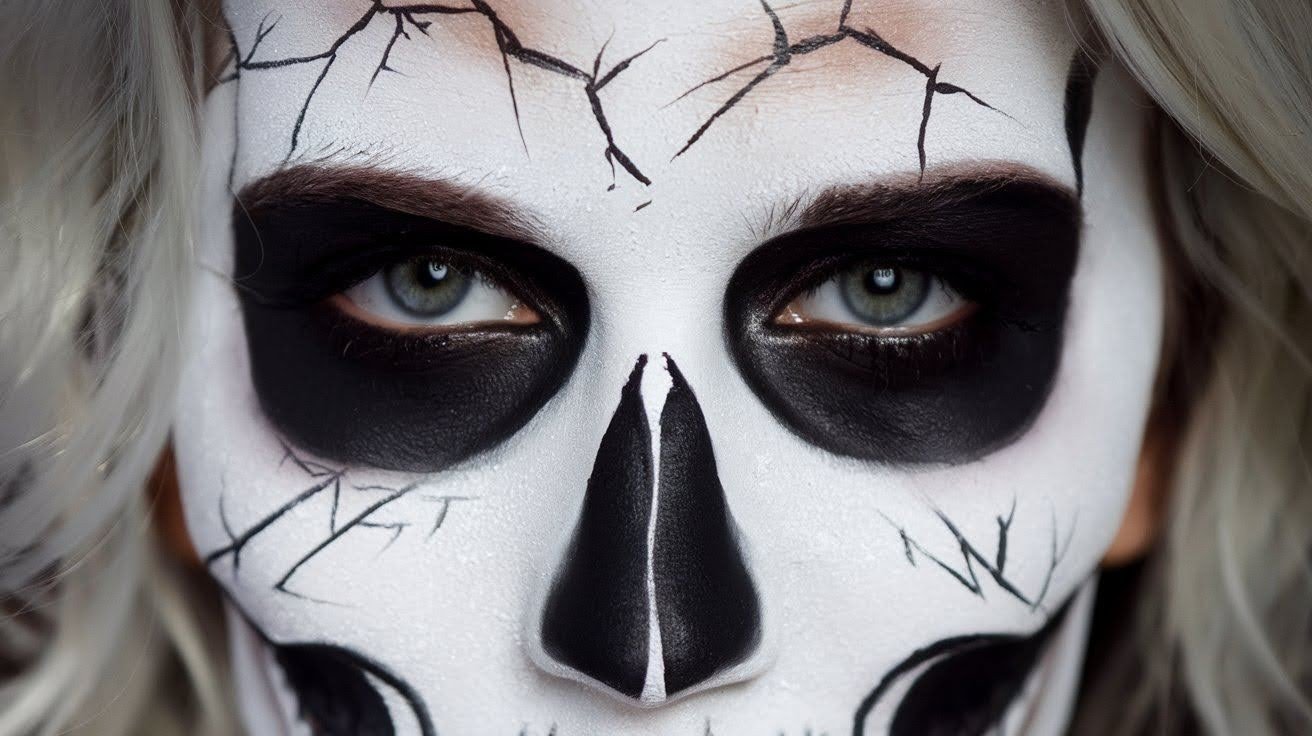
Add cracks and extra scary lines with liner. Darken your waterline. Set everything with powder and spray so it lasts.
Quick Tips for Perfect Skeleton Makeup
- Start with clean, moisturized skin – Your makeup will apply smoother and last longer
- Use a makeup sponge for the white base – It gives more even coverage than brushes alone
- Let each layer dry completely – Rushing leads to muddy colors and smudged lines
- Keep baby wipes handy – Fix mistakes quickly before they set
- Practice your design first – Try it a few days before Halloween to work out any issues
- Use reference photos – Keep them open on your phone while you work
Conclusion
Skeleton makeup might look complicated, but it’s actually easier than most people think.
Once you break it down into simple steps, anyone can create an impressive skull look that gets attention at parties.
The best part? You don’t need expensive products or years of experience. With some basic supplies and a little practice, you’ll have this technique down in no time.
The flexibility of skeleton makeup means you can make it as simple or detailed as you want.
Whether you’re heading to a Halloween party, doing a spooky photoshoot, or just want to try something creative, skeleton makeup delivers every time. It’s a classic for good reason – it works for everyone and never goes out of style.
So grab your brushes and give it a try. You might surprise yourself with how good you are at it.
Frequently Asked Questions
How long does skeleton makeup take to apply?
A basic skeleton look takes about 30-45 minutes for beginners. With practice, you can get it done in 20 minutes or less.
Will skeleton makeup rub off on my clothes?
If you use setting powder and spray, it should stay put for hours. Just avoid touching your face too much during the night.
Can I use regular makeup instead of face paint?
Yes, but face paint gives better coverage and lasts longer. Regular makeup works fine for practice or quick looks.
Is skeleton makeup hard to remove?
Not if you use the right products. Cold cream or makeup remover breaks it down easily – just don’t scrub too hard.
What if I mess up while applying it?
Keep baby wipes nearby for quick fixes. You can also use a damp brush to blend out mistakes before they dry.