Eyebrow Mapping Chart: Expert Techniques & Tips
Perfect brows shouldn’t be this complicated, right? I used to struggle with shaping mine until I found eyebrow mapping chart techniques that actually work.
In this guide, I’ll walk you through everything. You’ll understand what an eyebrow mapping chart is and why professionals swear by it.
I’ll break down the mapping process into simple steps you can follow at home. Plus, you’ll get practical tips, learn which mistakes to skip, and know exactly what tools work best.
Soon, you’ll shape symmetrical brows with confidence. Ready? Let’s go.
Understanding the Eyebrow Mapping Chart
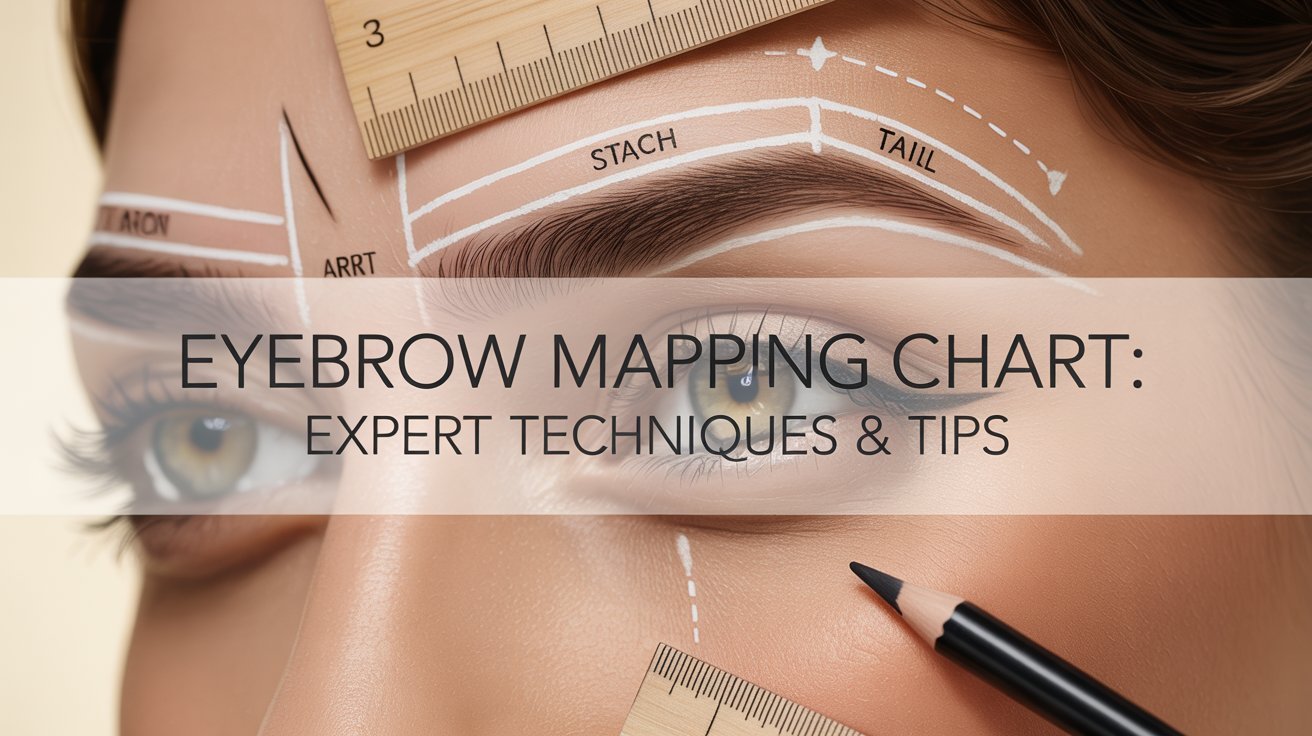
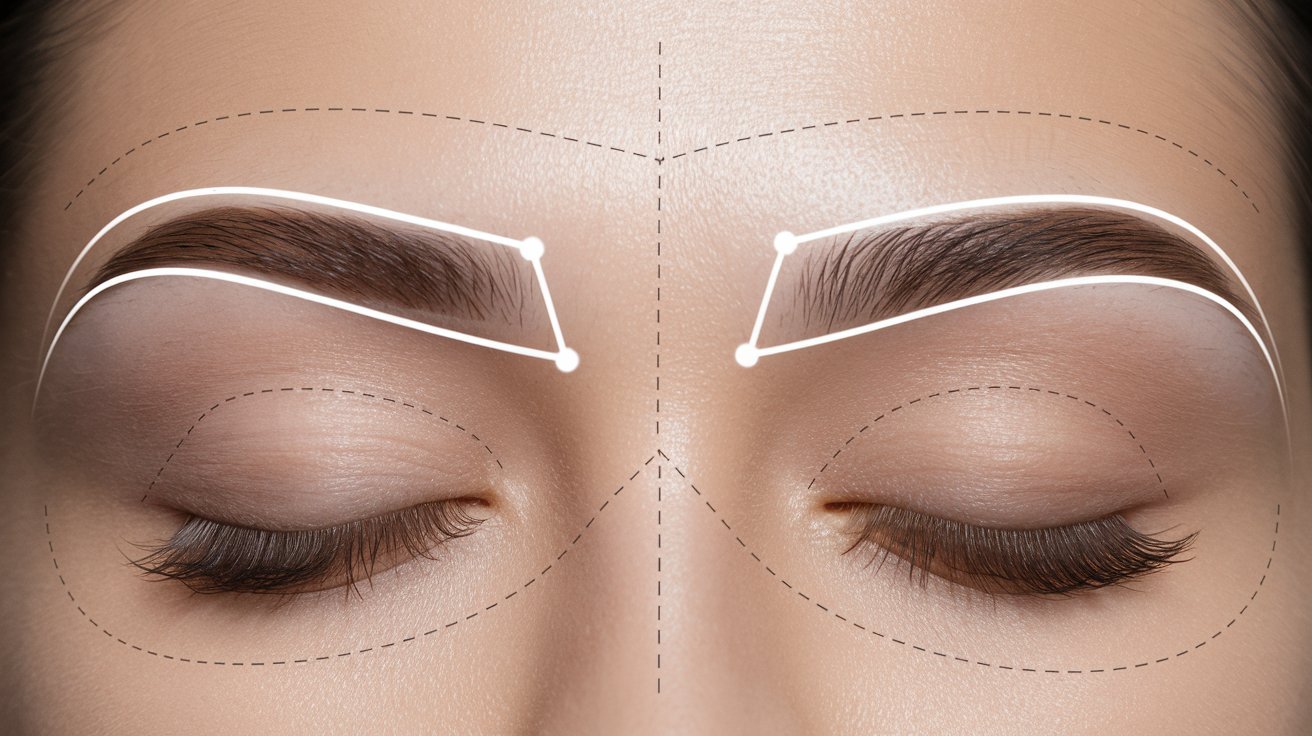
An eyebrow mapping chart helps you find the perfect brow shape for your face. It uses specific points to create symmetry and balance. Think of it as a blueprint for your brows.
The chart marks four key spots. The brow start is where your eyebrow should begin, usually aligned with the inner corner of your eye.
The arch sits at the highest point, typically above the outer edge of your iris. The brow tail is where your eyebrow ends, angling toward the outer corner of your eye. The center point between your brows helps maintain proper spacing.
The golden ratio plays a big role here. This mathematical principle creates natural-looking proportions that work with your facial features.
When you follow these guidelines, your brows complement your eyes, nose, and overall face shape. The result looks balanced and feels right.
I’ve found that using these reference points takes the guesswork out of shaping. You’re not just guessing anymore. You have a clear plan.
Step-by-Step Eyebrow Mapping Techniques
Follow simple steps to map your eyebrows using basic tools and create precise guidelines for perfect shaping results.
Step 1: Prepare the Brows

Wash your brow area and pat it dry. Brush your brow hairs upward with a spoolie to reveal your natural shape.
Remove any makeup or oils with a gentle cleanser to create a clean canvas for accurate mapping.
Work in good natural lighting so you can see all the fine hairs and your true brow shape clearly.
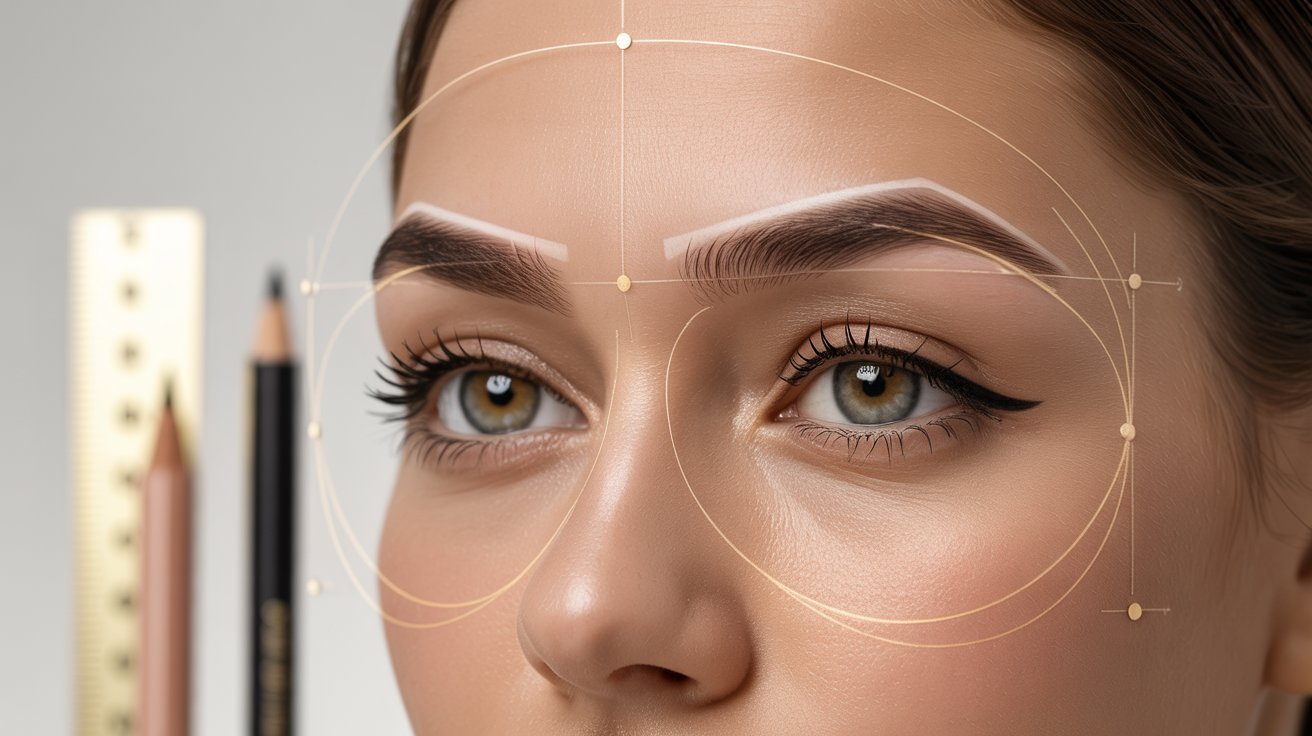
Step 2: Identify Key Points
Use a white pencil or ruler to find three main points.
Brow start: Hold your tool vertically from your nostril straight up. Mark where it meets your brow.
Arch: Angle your tool from the outer edge of your nose through your pupil. Mark where it crosses your brow.
Brow end: Angle from the outer corner of your nose to the outer corner of your eye. Mark this point.
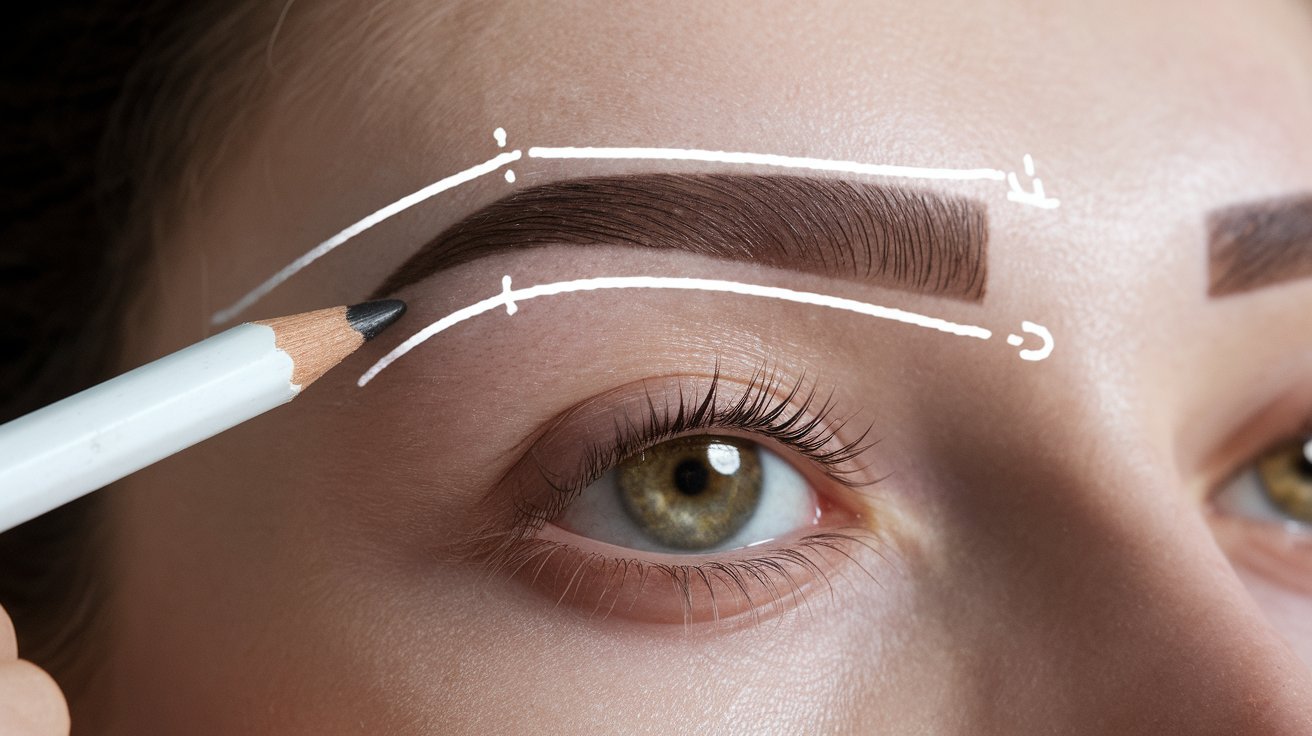
Step 3: Map the Shape Using Eyebrow Mapping Chart
Connect the three points with light lines. Use horizontal and vertical guide lines to check that both brows are even and balanced.
Draw the bottom brow line following your natural bone structure for the most flattering shape.
Keep the top line soft and slightly irregular to mimic natural hair growth patterns.
Step 4: Review Symmetry
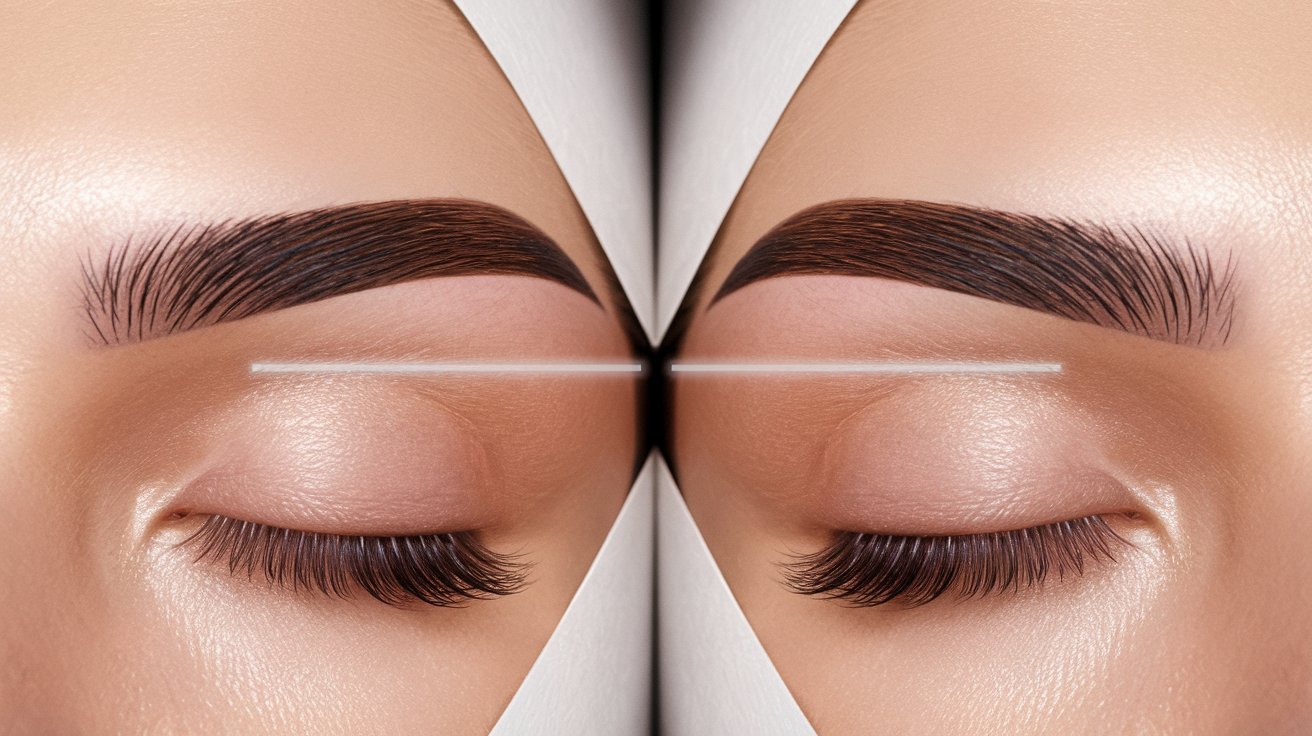
Step back and compare both brows. Check if arches are the same height and tails end at the same angle. Adjust lines as needed.
Take a photo with your phone to spot any asymmetry you might miss in the mirror.
Remember that brows should be sisters, not twins, slight differences are completely natural.
Step 5: Shape the Brows
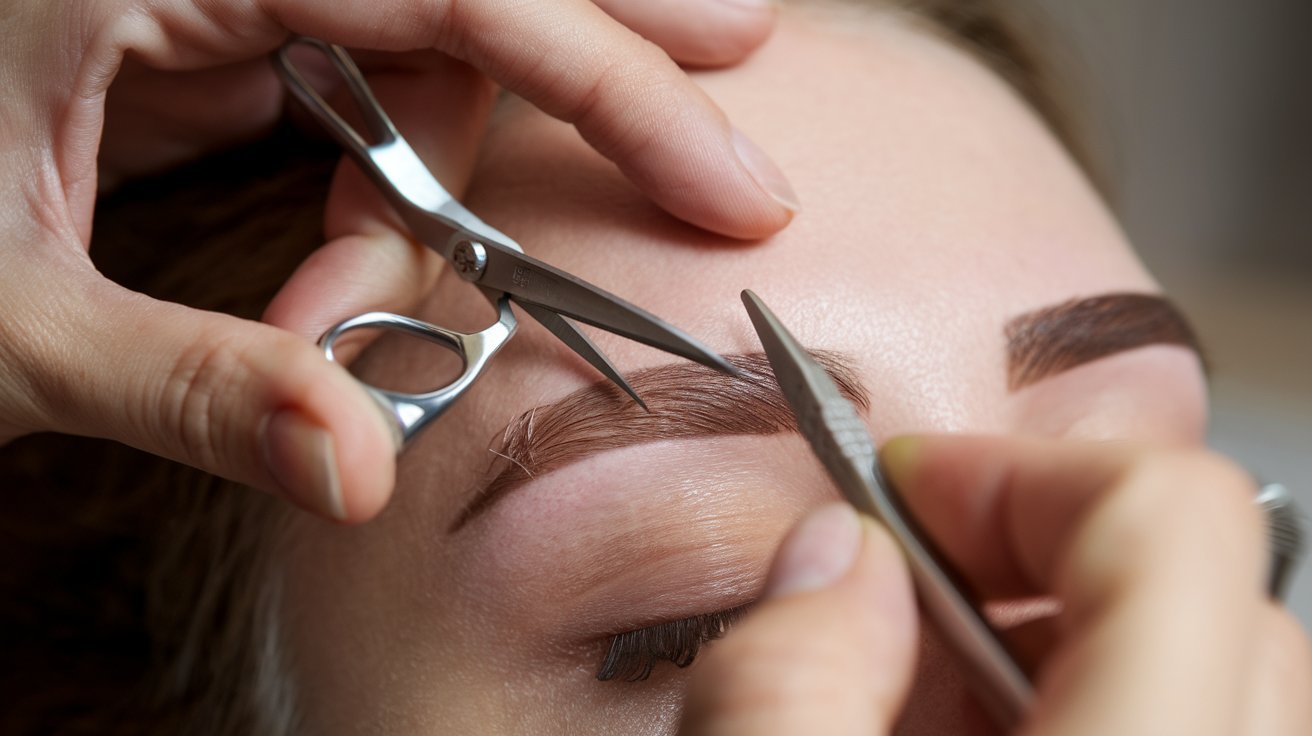
Trim hairs that stick out past your desired shape. Tweeze hairs outside your mapped lines. Wax (optional) areas outside the mapped shape for faster removal.
Always tweeze in the direction of hair growth to minimize pain and prevent ingrown hairs.
Work slowly and step back frequently to avoid over-plucking—you can always remove more later.
Step 6: Fill, Feather & Fix
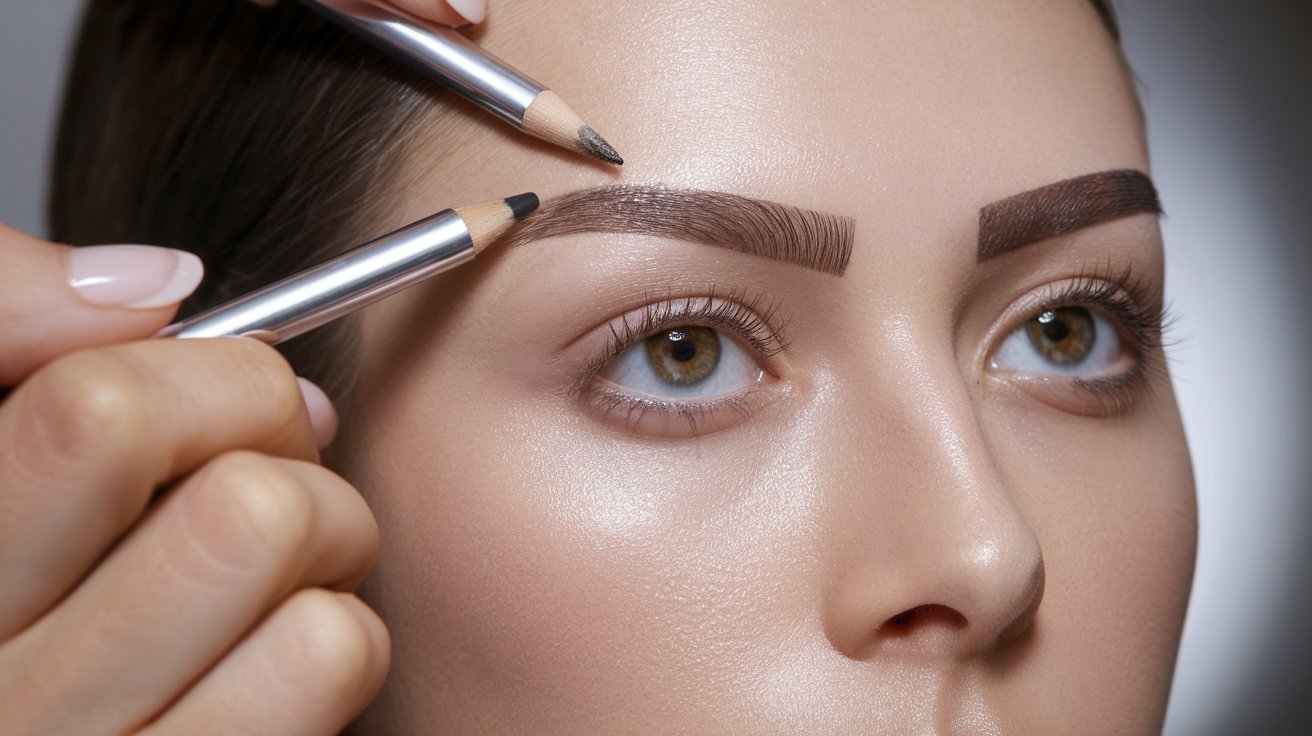
Fill sparse areas with a brow pencil using light, hair-like strokes. Feather through with a spoolie to blend. Set with brow gel to keep everything in place.
Choose a pencil color one shade lighter than your natural brow for the most natural finish.
Apply concealer around the brow edges to sharpen the shape and clean up any mapping marks.
Expert Tips for Perfect Brows
- Round faces: need a higher arch to add length and definition.
- Oval faces: can handle most brow shapes. A soft arch works best.
- Square faces: benefit from a strong arch with thickness to soften angles.
- Heart-shaped faces: look great with a rounded arch. Keep some thickness.
- Don’t over-map: your brows. Too many lines get confusing.
- Watch for misaligned points: Uneven arches make brows look off.
- Respect your natural brow growth: for easier maintenance.
- Review constantly: Check from different angles and lighting.
Brow Mapping Tools and Learning Resources
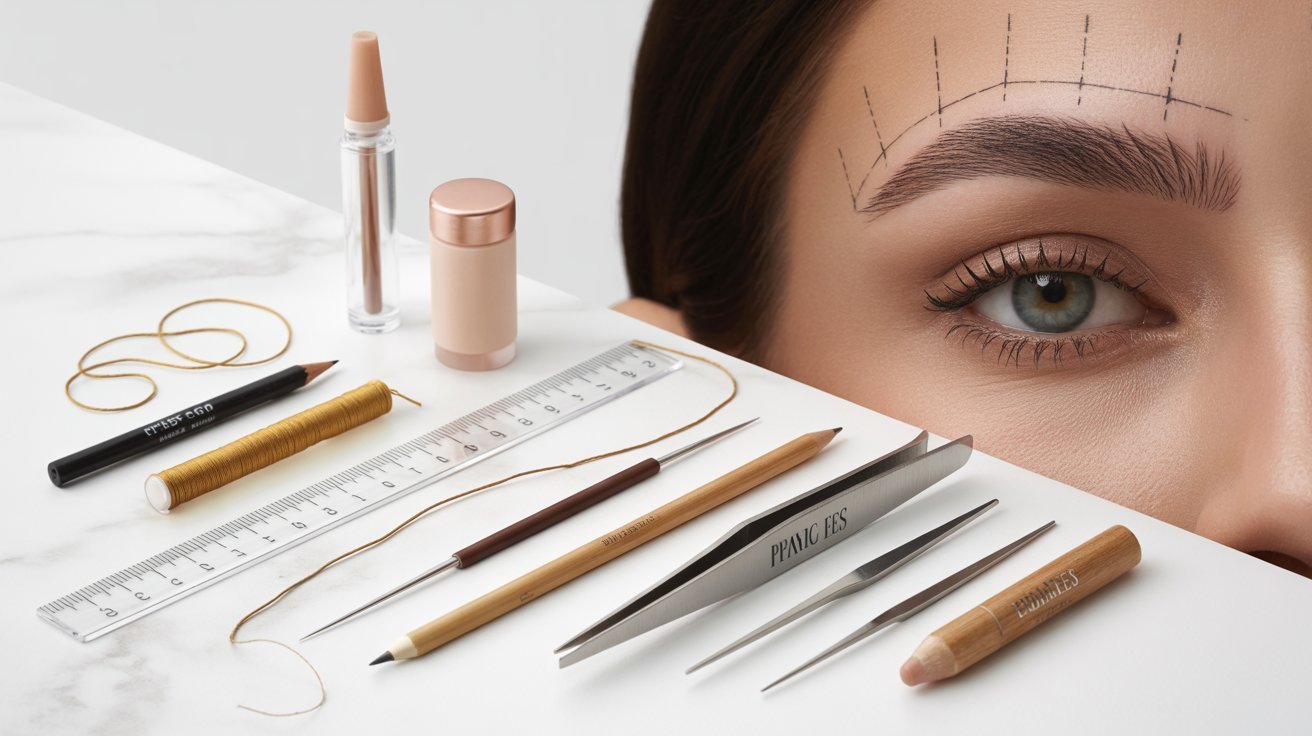
Want to take your skills further? Professional courses teach advanced techniques. Beauty schools offer hands-on classes. Online programs let you learn at your own pace.
The right tools make brow mapping easier. Mapping thread creates straight guidelines. White pencils show up clearly and erase easily. Measuring tools ensure accuracy.
Quality tweezers grab individual hairs cleanly. Brow gels help you see the final shape. Complete kits include pencils, thread, rulers, tweezers, and brushes in one package.
Learning Course & Resources
Want to take your skills further? Professional courses teach advanced mapping techniques and troubleshooting.
Professional In-Person Classes
Beauty schools offer hands-on brow mapping classes. You practice on models and get immediate feedback from instructors.
Online Certification Courses
Online programs let you learn at your own pace with video tutorials and practice exercises. Some offer certifications for professional credibility.
Brow Mapping Thread
Creates straight guidelines on skin without leaving marks. Thin, precise, and reusable for marking exact points.
Mapping Pencils
White or skin-toned pencils show up clearly during mapping. Easy to erase and adjust as needed.
Measuring Tools and Rulers
Ensures accuracy with clear markings. Some have angled edges for lining up points perfectly.
Quality Tweezers
Slanted-tip tweezers grab individual hairs cleanly. Good tweezers make shaping much easier.
Brow Gels and Pencils
Help you visualize the final shape before removing hair. Prevents over-plucking mistakes.
Complete Mapping Kits
Include multiple tools in one package: pencils, thread, rulers, tweezers, and brushes. Keeps everything organized and ready.
Conclusion
Mastering the eyebrow mapping chart has made my brow routine so much easier. I finally get consistent results without second-guessing myself.
The steps I’ve shared here will help you shape brows that look balanced and feel right for your face. Keep practicing and don’t skip the basics. You’ll notice improvement each time you try.
I’d really appreciate hearing from you. Leave a comment sharing your experience or any questions you have about mapping.
Frequently Asked Questions
What is an eyebrow mapping chart?
An eyebrow mapping chart is a visual guide that marks specific points on your face to create symmetrical, well-proportioned brows. It uses reference points like brow start, arch, and tail to guide shaping.
How do I find my perfect eyebrow arch?
Hold a pencil or tool from your nose through the outer edge of your iris, looking straight ahead. Where the tool crosses your brow bone is your ideal arch placement for balanced results.
Can I map my eyebrows at home?
Yes, eyebrow mapping is easy to do at home with basic tools like a pencil, ruler, or brow thread. Follow the step-by-step guidelines and take your time to ensure accuracy.
What tools do I need for eyebrow mapping?
You need a white or light-colored pencil for marking, a ruler or straight edge for alignment, and a spoolie brush. Optional tools include brow thread, tweezers, and a small mirror.
How often should I remap my eyebrows?
Remap your eyebrows every 4-6 weeks or whenever you notice your shape becoming uneven. Regular mapping helps maintain consistency as your brows grow and change over time.