Mid Helix Piercing Guide: Pain, Healing & Jewelry Tips
Thinking about adding a mid helix piercing, but not sure where to start?
If you’re curious about the perfect spot, pain levels, healing time, and jewelry options, you’re in the right place.
In this guide, I’ll walk you through everything I’ve learned from years of professional piercing experience, sharing tips to make your journey smooth and safe.
From understanding ear anatomy to choosing the right stud or hoop, you’ll get expert advice personalized for your ear.
By the end, you’ll feel confident and prepared to get a mid helix piercing that suits your style and comfort.
Let’s get started.
What Is a Mid Helix Piercing?
A mid helix piercing is a cartilage piercing placed on the outer rim of the ear, between the upper and lower helix.
It sits above the lobe and below the top of the ear, following the natural curve of the helix. The main difference between upper, mid, and lower helix piercings is placement height.
A mid helix is positioned between the two and sits on the outer edge, unlike a forward helix, which sits near the face.
The exact placement can vary because ear shape and cartilage thickness differ from person to person. A professional piercer adjusts the position to ensure comfort and proper healing.
Mid Helix Piercing Anatomy Explained
The mid helix is made of firm cartilage along the outer rim of the ear. This cartilage has limited blood flow, so it heals more slowly than soft tissue.
Placement depends on cartilage thickness, ear rim width, and natural curvature. Thin or uneven cartilage can cause pressure, irritation, and delayed healing.
People with a defined ear rim are generally suitable. Very thin cartilage, flat rims, or a history of slow cartilage healing may affect placement and healing time.
Comparison: Mid Helix, Outer Helix & Forward Helix
The three main cartilage piercings differ in placement, pain, healing, and jewelry options.
Mid helix: Placed on the outer rim between the upper and lower helix. Moderate pain and standard cartilage healing. Suitable for studs and small hoops.
Outer helix: Positioned higher on the outer edge of the ear. Similar pain and healing to a mid helix. Works well with larger or more visible jewelry.
Forward helix: Located at the front of the ear near the face. Often, sharper pain and longer healing are due to thicker cartilage. Best for small, flat jewelry.
Mid Helix Piercing Pain Level & Piercing Experience
A mid helix piercing goes through firm cartilage on the outer rim of the ear. Pain is moderate, usually 4-6 on a 1-10 scale, depending on cartilage thickness and tolerance.
Compared to other piercings:
- Lobe piercings are less painful.
- Upper helix piercings have similar pain.
- Conch piercings feel sharper because of the thicker cartilage.
The procedure involves cleaning, marking, and inserting the jewelry with a sterilized needle. Afterward, the area may be swollen, warm, or tender.
Most people tolerate the procedure well, and proper aftercare supports healing.
Mid Helix Piercing Healing Time
A mid helix piercing takes longer to heal than a lobe piercing because cartilage has limited blood flow.
On average, healing ranges from 6 to 12 months, depending on aftercare, anatomy, and lifestyle.
Healing Stages
Healing for a mid helix piercing happens in stages and varies for each person. The timeline shows when the piercing is stabilizing.
- Week 1-2: Swelling, redness, and soreness are common.
- Months 1-3: Piercing gains initial stability, some tenderness may remain.
- Months 3-6: Pain and swelling reduce, and the area feels more settled.
- Months 6-12: Full internal healing occurs, and jewelry can usually be safely changed.
Signs of Normal Healing vs Infection
Normal healing includes mild redness, occasional tenderness, and slight crusting.
Seek professional help if you notice severe pain, spreading redness, foul discharge, or prolonged swelling, as these may indicate infection.
Mid Helix Piercing Procedure: Step-by-Step
Getting a mid helix piercing requires precision and proper hygiene. Each step is important to ensure safe placement and smooth healing.
- Studio preparation and sterilization: The piercer cleans the workspace and uses sterilized tools to prevent infection.
- Marking and placement accuracy: The exact spot is marked on the ear to ensure correct alignment and comfort.
- Needle vs gun: Piercing guns are unsafe for cartilage. A sterilized needle is preferred for precision and safer healing.
- Jewelry insertion process: After the needle creates the hole, the chosen jewelry is carefully inserted and secured.
- Immediate aftercare instructions: The piercer cleans the area and provides guidance on cleaning, avoiding irritation, and protecting the piercing during the first few days.
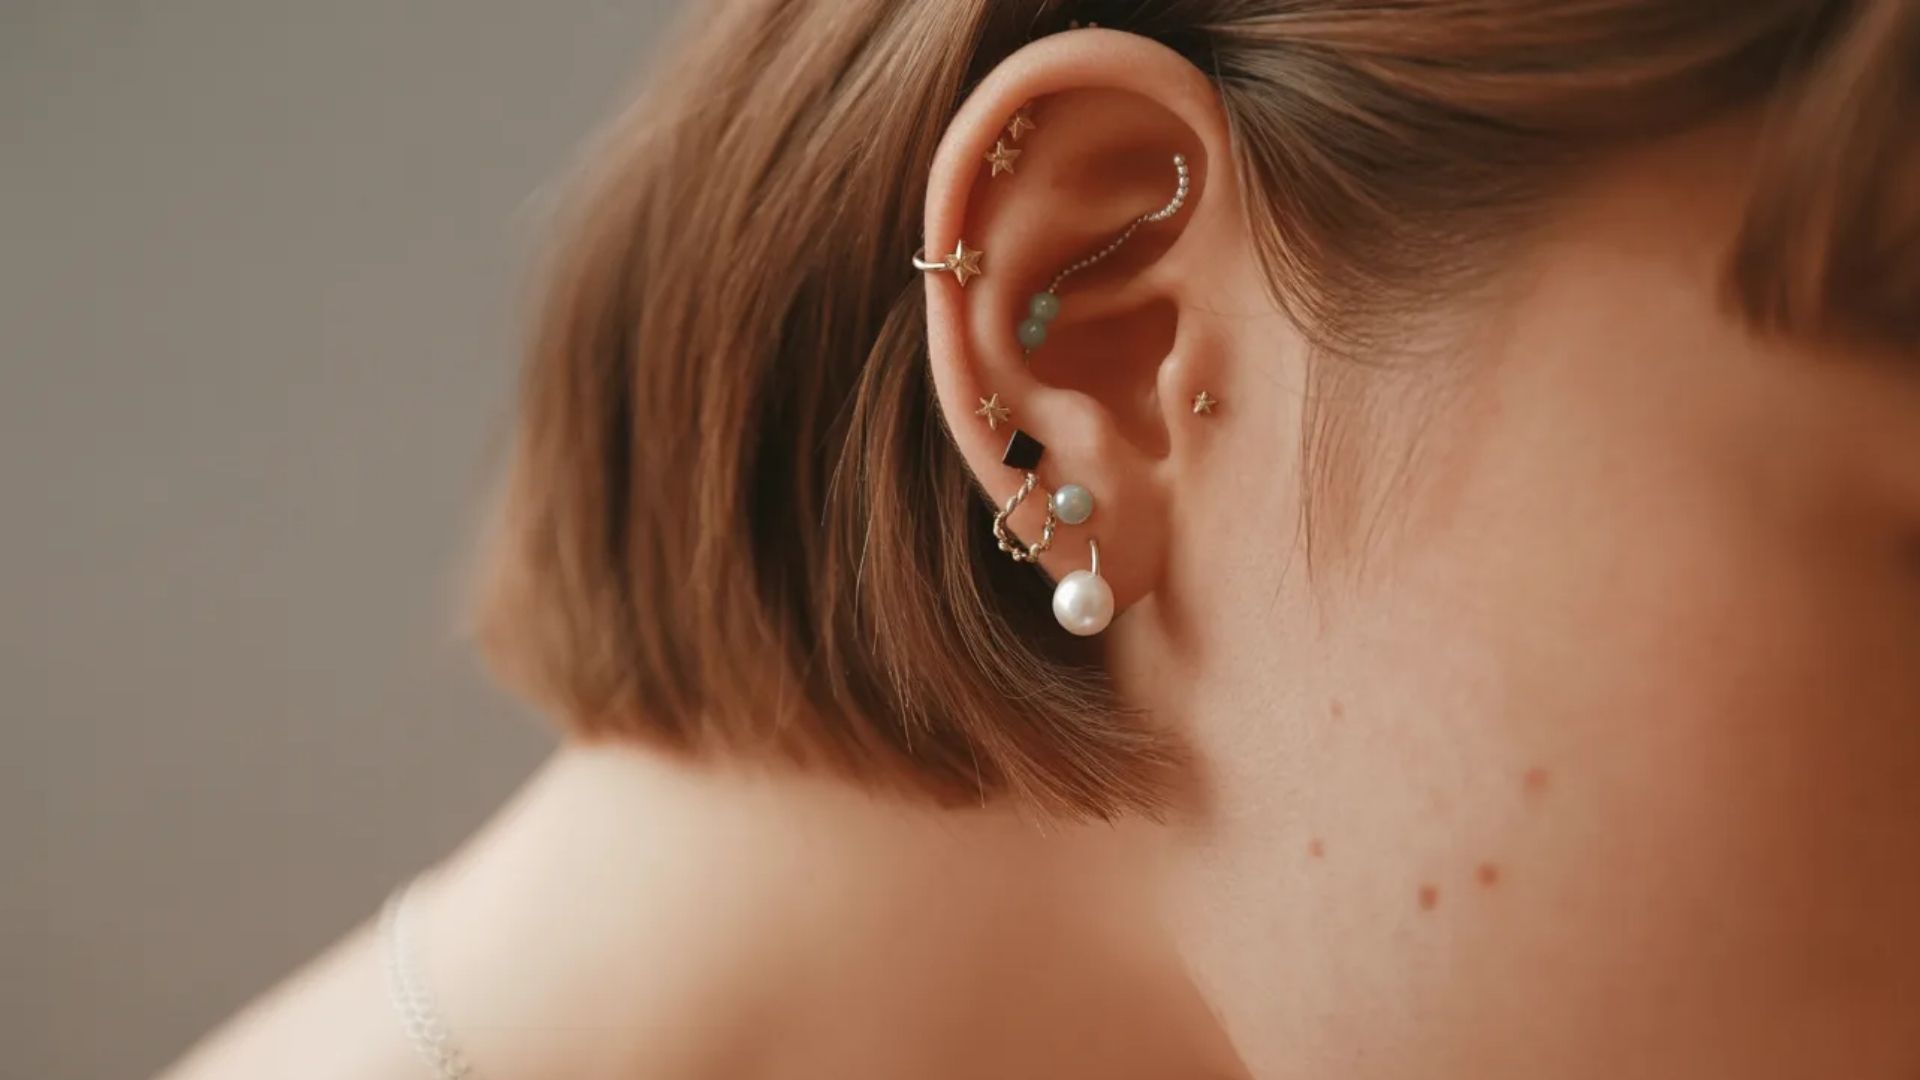
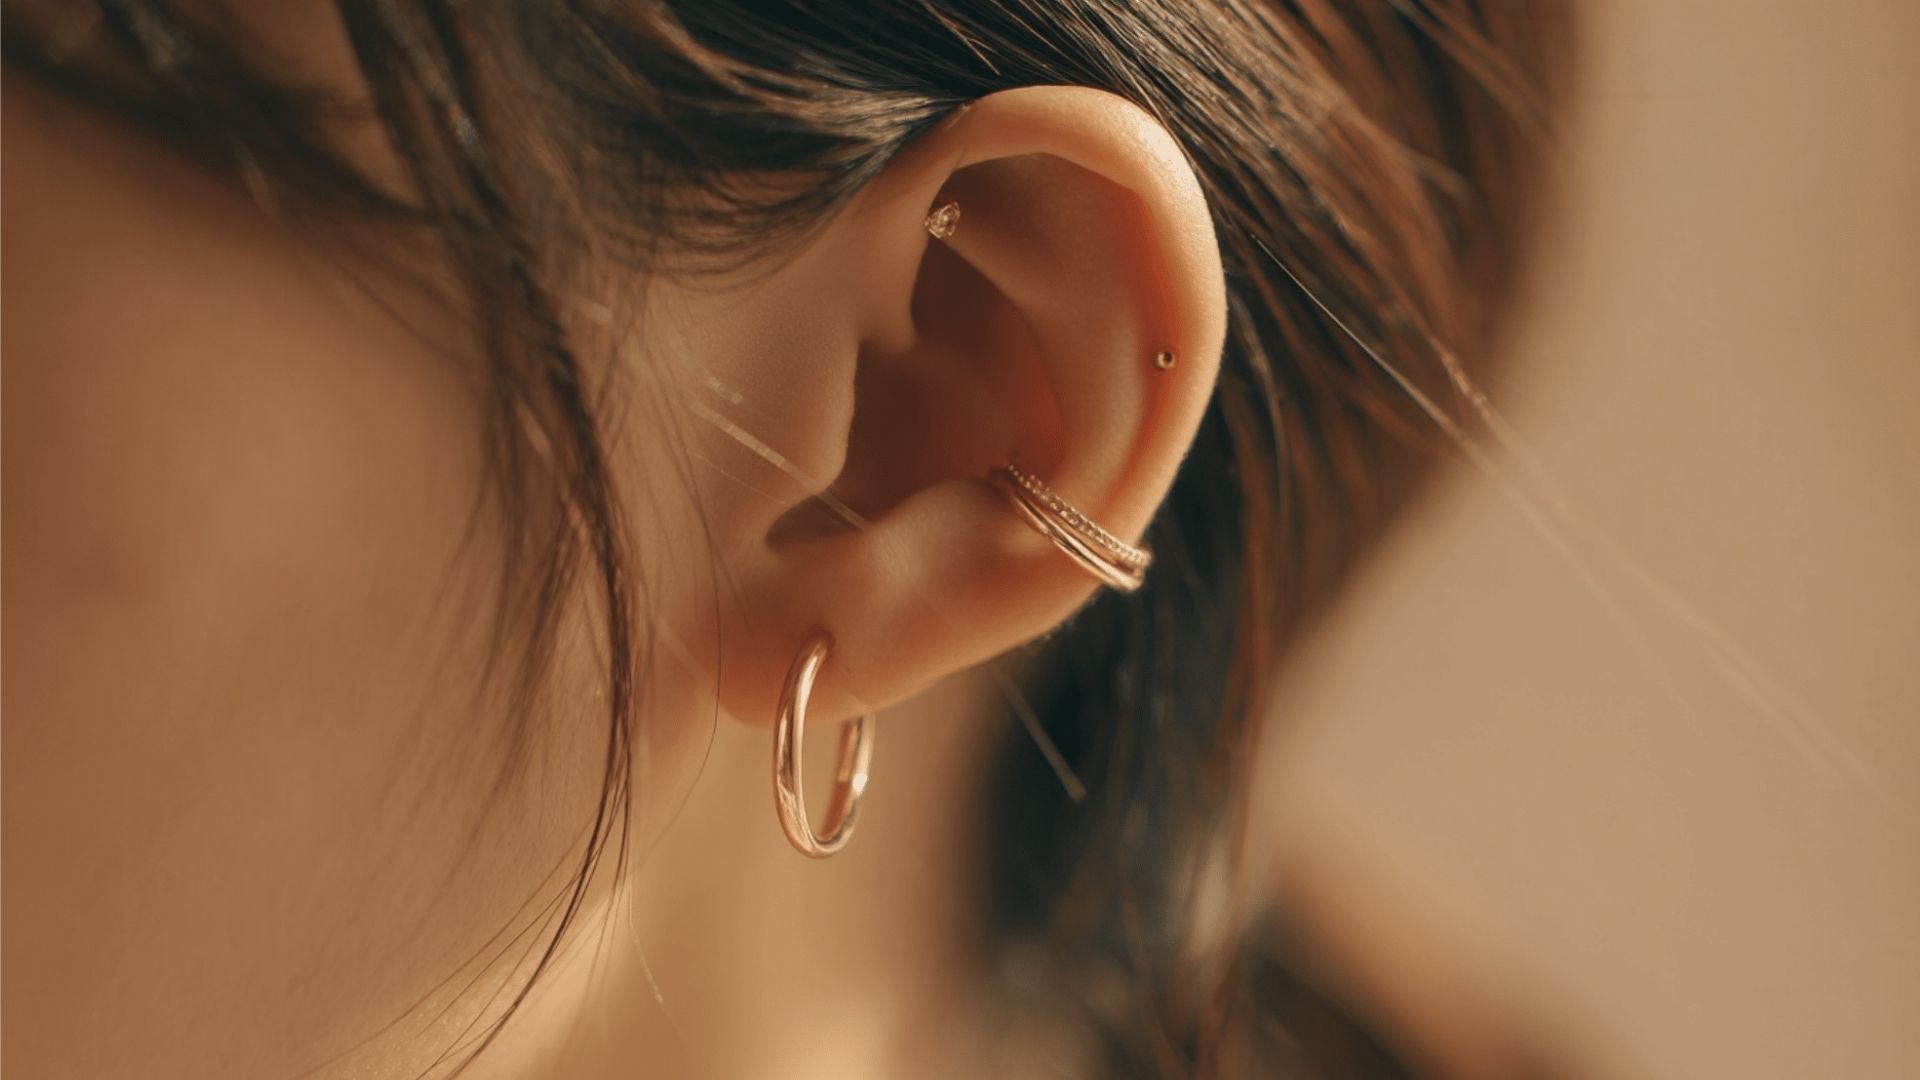
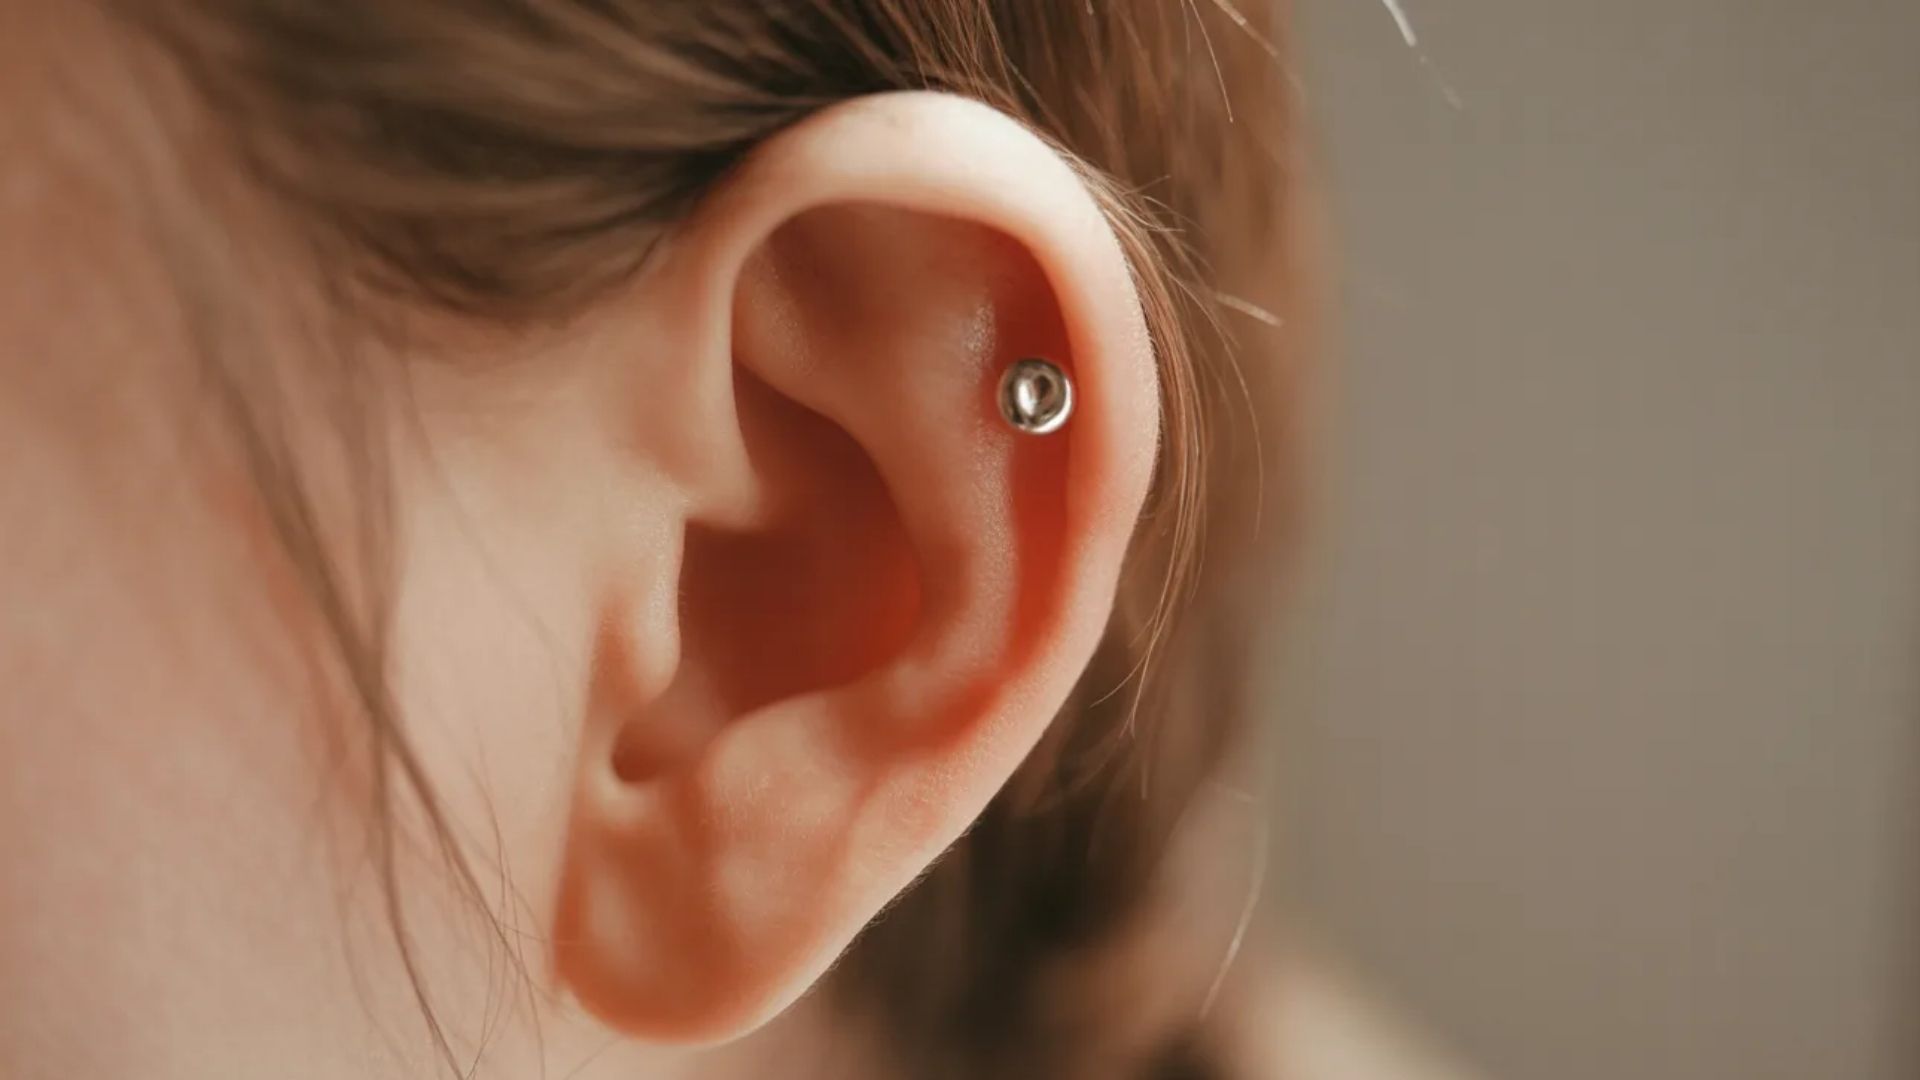
Mid Helix Piercing Jewelry Types
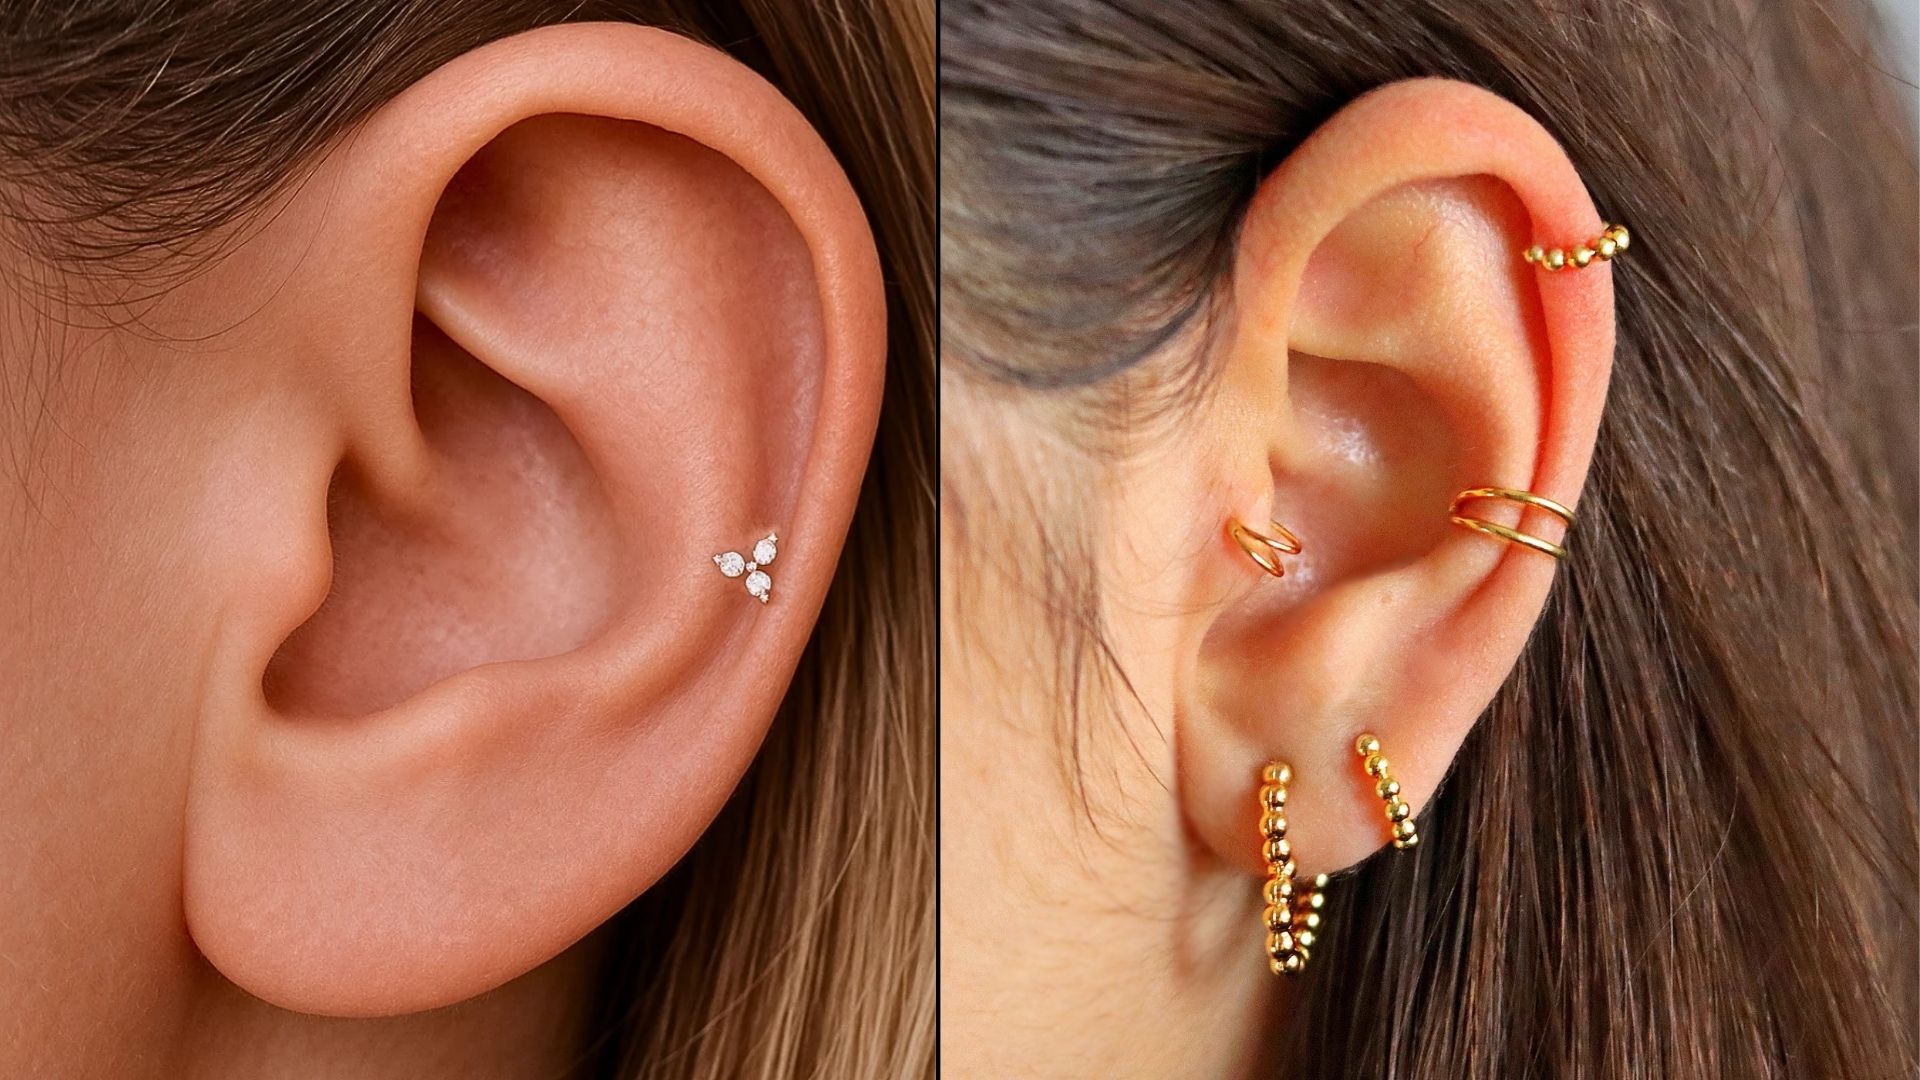
Choosing the right jewelry affects comfort and healing. Starter styles are simple and lightweight to reduce pressure on the cartilage.
Mid Helix Piercing Stud
Flat-back labret studs are the most common starter jewelry for mid helix piercings. The typical size is 16 gauge with a short post to fit the ear’s cartilage comfortably.
Studs are ideal for initial healing because they sit flat against the ear, reduce movement, and minimize irritation.
Mid Helix Piercing Hoops & Rings
Hoops and rings can be used once the piercing is fully healed, usually after 6–12 months. They provide a stylish look, but if inserted too early, movement can cause irritation and slow healing.
The ideal hoop diameter is small and snug enough to fit comfortably without putting pressure on the piercing.
Mid Helix Piercing Size & Placement Guide
Choosing the right size and placement is crucial for comfort and proper healing. The correct gauge and bar length also affect how the piercing looks and feels.
Standard gauge sizes: Professionals typically use 16 or 18 gauge for mid helix piercings to ensure proper healing and stability.
Bar length recommendations: The bar should be long enough to accommodate initial swelling but not too long to cause movement or irritation.
Placement impact on comfort and aesthetics: Proper placement ensures the piercing sits comfortably on the ear’s curve and looks balanced. Incorrect positioning can cause pressure, slow healing, or an uneven appearance.
Mid Helix Piercing Cost & What Affects Price
The cost of a mid helix piercing varies depending on the studio, jewelry, and location. Choosing quality over cheap options ensures safer healing and better results.
| Aspect | Details |
|---|---|
| Average cost range | $30 – $100, depending on the studio and jewelry |
| Factors affecting price | Studio reputation, quality of jewelry, geographic location |
| Why cheap piercings can cost more later | Low-quality jewelry or improper technique can lead to infections, migration, or delayed healing, resulting in extra costs for replacements or medical care |
Investing in a professional piercing saves money and complications in the long run.
Mid Helix Piercing Styling Ideas
Here are popular ways to style your mid helix piercing for a balanced and trendy look:
Minimalist Single Stud Looks: A single stud creates a clean and simple appearance. It is ideal for first-time piercings and easy to maintain while healing.
Double and Triple Mid Helix Combinations: Adding a second or third mid helix piercing allows for a layered look. Proper spacing prevents irritation and supports healthy healing.
Curated Ear Styling with Helix, Conch, and Tragus: Combining the mid helix with other cartilage piercings like the helix, conch, or tragus creates a balanced ear design and enhances visual appeal.
Matching Mid Helix with Other Cartilage Piercings: Coordinating mid helix piercings with additional cartilage piercings allows for creative patterns and jewelry combinations while maintaining comfort.
Styling a mid helix piercing enhances your ear’s appearance while keeping it comfortable. The right combination supports proper healing.
Mid Helix Piercing Aftercare: Do’s and Don’ts
Proper aftercare is essential for a mid helix piercing to heal safely and avoid infection. Following the right routine helps reduce swelling and ensures a smooth recovery.
| Aspect | Guidelines |
|---|---|
| Daily cleaning routine | Clean the piercing twice daily with a gentle saline solution or a piercer-recommended cleanser. Avoid alcohol or harsh antiseptics. |
| Best saline solutions | Use sterile saline sprays or DIY saline (1/4 tsp salt in 1 cup warm distilled water) to rinse the piercing. |
| Sleeping positions | Avoid sleeping on the pierced ear to prevent pressure, irritation, and prolonged swelling. |
| Hair, headphones, helmets & masks | Keep hair, headphones, helmets, and masks away from the piercing to prevent snagging or bacterial contact. |
| Common aftercare mistakes | Touching the piercing with dirty hands, over-cleaning, or changing jewelry too early can slow healing or cause infection. |
Consistent care and avoiding common mistakes ensure faster healing and a healthy mid helix piercing.
Conclusion
Getting a mid helix piercing can be an exciting way to express your style.
By understanding the ear’s anatomy, healing time, and what to expect during the process, you can feel confident and prepared.
Choosing the right jewelry and following proper aftercare will keep your piercing comfortable and help it heal smoothly.
If you’re starting with a single stud or planning multiple piercings, knowing these details makes the experience easier and more enjoyable.
Start your mid helix piercing journey today and find the jewelry that suits you best!
Frequently Asked Questions
How Long Does a Mid Helix Piercing Take to Heal Fully?
A mid helix piercing typically takes 6-12 months to fully heal because cartilage has limited blood flow. Healing time depends on aftercare, anatomy, and lifestyle.
Are Mid Helix Piercings Painful?
Pain is usually moderate (4-6/10). The firmness of the cartilage and individual tolerance affect the sensation. Stud piercings tend to be less painful than forward helix or conch piercings.
Can I Sleep on My Mid Helix Piercing?
It’s best to avoid sleeping on the pierced ear, especially during the first few months, to prevent pressure, irritation, and slower healing.
Is a Hoop or Stud Better for Initial Piercing?
Studs are recommended for initial healing because they sit flat, minimize movement, and reduce irritation. Hoops should only be used once the piercing is fully healed.
When Can I Change My Mid Helix Jewelry?
Jewelry can usually be changed safely after 6-12 months, once the piercing is fully healed and stable. Early changes can irritate or delay healing.