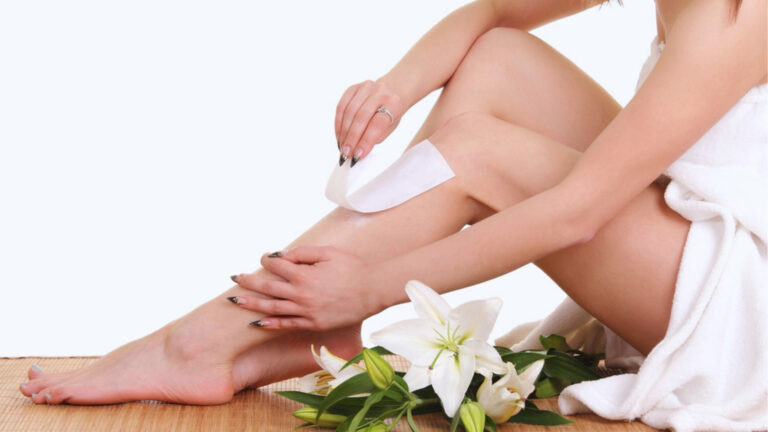
Homemade Foot Soak to Remove Dead Skin Easily

Dealing with rough, cracked heels? I’ve been there too. Dead skin builds up on feet when cells don’t shed naturally, leaving them dry and uncomfortable.
A homemade foot soak to remove dead skin softens tough areas and makes exfoliation easier.
I’ll show you simple recipes using ingredients you already have at home. We’ll cover why dead skin forms, how to create effective soaks, and safe ways to remove it.
You’ll learn the best exfoliation methods and how often to treat your feet.
By the end, you’ll have everything needed to get smoother, healthier feet without expensive treatments.
Causes of Dead Skin on Feet

Dead skin naturally builds up on feet when old cells don’t shed on schedule, creating thick, rough patches.
Dry Skin and Dehydration
Feet lack oil glands found elsewhere on the body. This makes them prone to dryness. When you don’t drink enough water or live in low humidity, your skin loses moisture. The outer layer becomes tough and flaky.
Heels bear your full body weight daily, which thickens skin as protection. Without regular hydration, this protective layer turns into hard, dead skin that cracks.
Lack of Regular Exfoliation
Your body sheds millions of skin cells daily. On feet, these cells cling together instead of falling away. Walking barefoot or wearing sandals exposes feet to dirt and friction.
This speeds up cell buildup. Without scrubbing away old layers, they stack up and harden. The result is thick, callused areas that feel rough to touch.
Improper Footwear and Friction
Tight shoes create constant rubbing against heels and toes. Your skin responds by thickening to protect itself. Open-back shoes let heels spread and crack. Socks that don’t breathe trap sweat, making skin soggy then dry.
High heels shift weight to the front of your foot, creating pressure points. Each of these factors contributes to dead skin formation.
Benefits of Using a Homemade Foot Soak

Foot soaks do more than just clean your feet. They prepare skin for effective treatment.
Softens and Loosens Dead Skin
Warm water penetrates the outer skin layer and breaks down the bonds holding dead cells together. This process takes 15-20 minutes. Adding salts or acids speeds up softening.
Once loosened, dead skin becomes easier to remove without aggressive scrubbing. The soaking action hydrates dry patches, making them flexible instead of brittle.
Improves Skin Texture and Comfort
Regular soaking reduces callus thickness over time. Smoother feet feel better in shoes and look healthier. Removing rough patches prevents painful cracks from forming.
Your feet will feel lighter and less tired. The treatment also preps the skin to absorb moisturizers more effectively.
Relaxing and Cost-Effective Foot Care
A foot soak costs pennies compared to salon treatments. You control the ingredients and avoid harsh chemicals. The warm water relieves tired muscles after long days on your feet.
It’s a simple self-care ritual you can do while reading or watching TV. Most recipes use pantry staples you already own.
How to Prepare a Homemade Foot Soak

Setting up your foot soak correctly ensures the best results and prevents skin damage.
Start with a basin large enough for both feet. You’ll need warm water, your chosen soaking ingredient, and clean towels.
Keep a pumice stone or foot file nearby for after. Have moisturizer ready to apply when done. A timer helps track soaking duration.
Water should feel warm but not hot, around 95 to 100°F. Test with your elbow like you would for a baby’s bath. Too hot damages skin and causes more dryness.
Soak for 15 to 20 minutes maximum. Longer soaking makes skin wrinkly and vulnerable. This timeframe gives ingredients enough time to work without weakening healthy skin.
Homemade Foot Soak Recipes to Remove Dead Skin

These three recipes use common household items to soften tough skin effectively.
Epsom Salt Foot Soak for Dead Skin Removal
Epsom salt contains magnesium sulfate, which draws out impurities and softens hardened areas. Mix half a cup of Epsom salt into warm water and stir until dissolved.
This recipe works well for rough, dry patches on heels. It’s gentle enough for weekly use. After soaking, dead skin scrubs away easily with minimal effort.
Apple Cider Vinegar Foot Soak for Exfoliation
Apple cider vinegar’s mild acidity loosens stubborn dead skin buildup naturally. Combine one part vinegar with two parts warm water.
The acetic acid gently dissolves the protein bonds in callused skin. You might notice a slight tingling, and that’s normal. Rinse feet thoroughly after soaking to remove the acidic residue.
Baking Soda Foot Soak (Use with Caution)
Baking soda offers gentle exfoliation for thick skin areas. Add three tablespoons to warm water and mix well. The alkaline nature softens calluses while deodorizing feet. However, baking soda can be drying if used too often.
Limit this soak to once every two weeks. People with sensitive skin should skip this option. Always moisturize heavily after using baking soda on your feet.
How to Exfoliate After a Foot Soak

Proper exfoliation technique removes dead skin without causing damage or irritation.
Pat feet slightly dry but keep them damp. Rub the pumice stone in circular motions on rough areas. Use light to moderate pressure only.
Work on heels, balls of feet, and sides where calluses form.
Don’t scrub until the skin feels raw or looks red. A foot file works similarly. Move it in one direction rather than sawing back and forth.
Apply a thick cream or petroleum jelly immediately after exfoliating. Freshly buffed skin absorbs moisture better than at any other time.
Put on cotton socks to lock in hydration. For best results, moisturize feet twice daily between soaks.
How Often to Use a Homemade Foot Soak
Finding the right frequency prevents over-treating your skin while maintaining results.
Start with 2 to 3 soaks per week if your feet are very dry. As condition improves, reduce to once or twice weekly. Listen to how your feet respond.
If they start feeling tender or look irritated, you’re overdoing it.
Cut back if skin becomes thin, sensitive, or painful to touch. Redness that lasts more than an hour after soaking signals overuse. Stop soaking completely if you develop cuts, open wounds, or infections.
Resume only after skin heals fully. Pregnant women and diabetics should check with doctors before starting any new foot care routine.
Safety Tips for Homemade Foot Soaks
Following these guidelines protects your skin and prevents complications.
- Test new ingredients on your inner wrist first. Wait 24 hours to check for redness, itching, or burning. People with eczema or psoriasis need extra caution.
- Never use razors, blades, or scissors on your feet. These tools cut too deep and cause infections. Stick with pumice stones or foot files only.
- Clean any accidental cuts immediately. Apply antibiotic ointment and a bandage. Watch for signs of infection over the next few days.
- See a podiatrist if home treatments don’t work after a month. Deep cracks that bleed or persistent pain need professional care. Diabetics should have regular foot checkups.
- Stop soaking if you develop cuts, wounds, or infections. Resume only after skin heals fully. Pregnant women and diabetics should consult doctors first.
Conclusion
I’ve struggled with dry, cracked heels for years, and these simple soaks finally gave me relief. Consistency matters more than fancy products.
Try these recipes, be patient with your feet, and make moisturizing a daily habit. Your feet carry you everywhere, so they deserve this care.
What’s your biggest foot care challenge? Drop a comment below and let me know which soak you’ll try first. Check out my other posts on natural skincare for more budget-friendly tips.
Frequently Asked Questions
Can I use regular table salt instead of Epsom salt?
Regular salt softens skin but lacks magnesium benefits. It works in a pinch but Epsom salt gives better results. Table salt might also dry out skin more quickly.
How long does it take to see results?
Most people notice softer feet after the first soak. Significant improvement in rough patches takes 2-3 weeks of regular treatments. Deep calluses may need a month to smooth out.
Is it safe to soak feet every day?
Daily soaking strips away natural oils and weakens healthy skin. Stick to 2-3 times weekly maximum. Overdoing it causes more dryness and irritation than it solves.
Can I add essential oils to my foot soak?
Yes, but use only 3-5 drops per basin. Tea tree oil fights bacteria while lavender relaxes. Make sure you’re not allergic before adding any oils to your soak.
Why do my feet still feel dry after soaking?
Soaking without moisturizing afterward actually increases dryness. Water evaporates and takes skin moisture with it. Always apply cream immediately after patting your feet dry for best results.