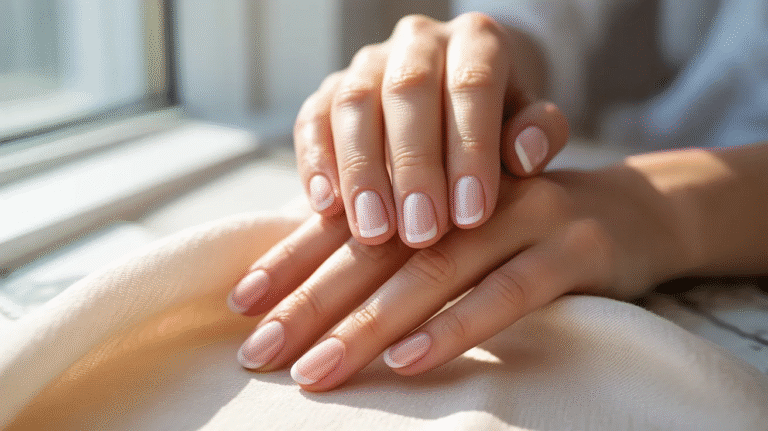
What Is Ombre Nails and How to Do Them at Home

Ready to try something different with your nails?
Single-color manicures are nice. But gradient nails? They take things to a whole new level.
Ombre nails have become incredibly popular in recent years. You’ve probably seen them on Instagram or at your local nail salon.
I’m going to explain what is ombre nails and show you exactly how to create this look at home. No professional experience needed.
You’ll get step-by-step guidance that actually makes sense. By the end of this, you’ll be ready to try your first gradient manicure.
Let’s start with the basics.
What Are Ombre Nails?
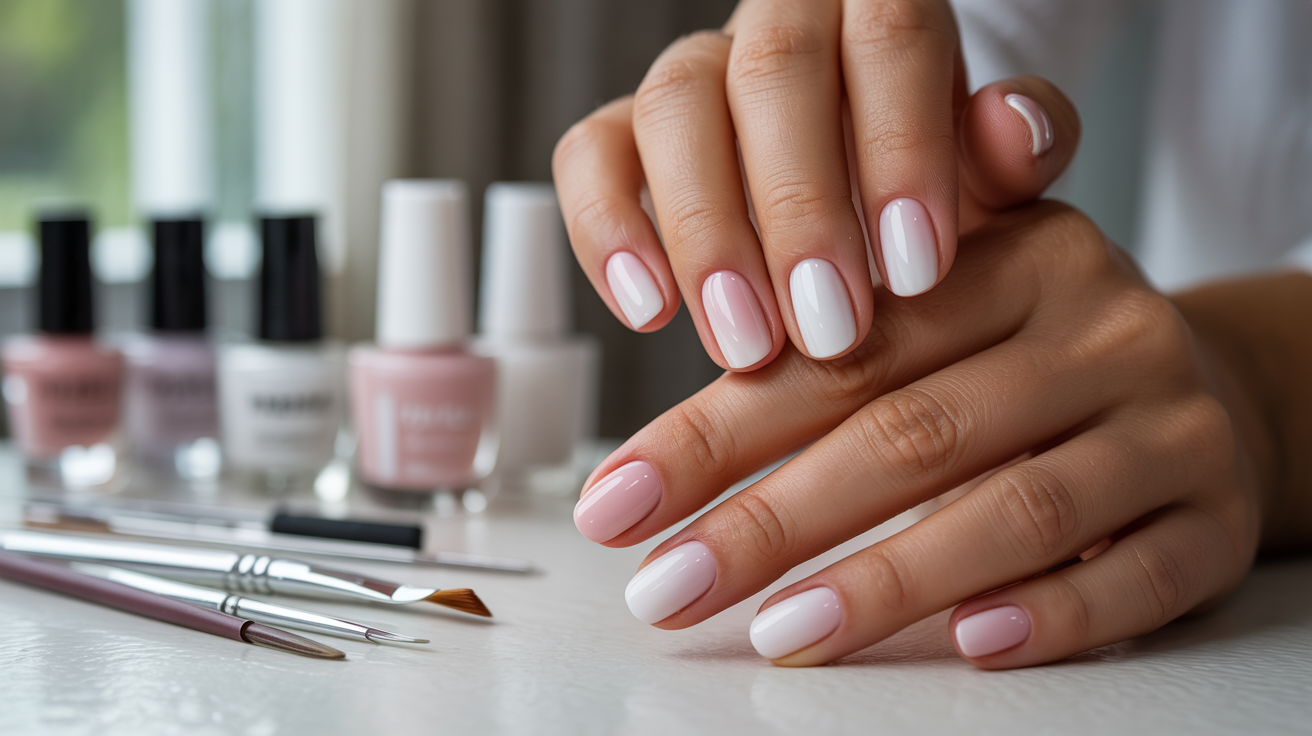
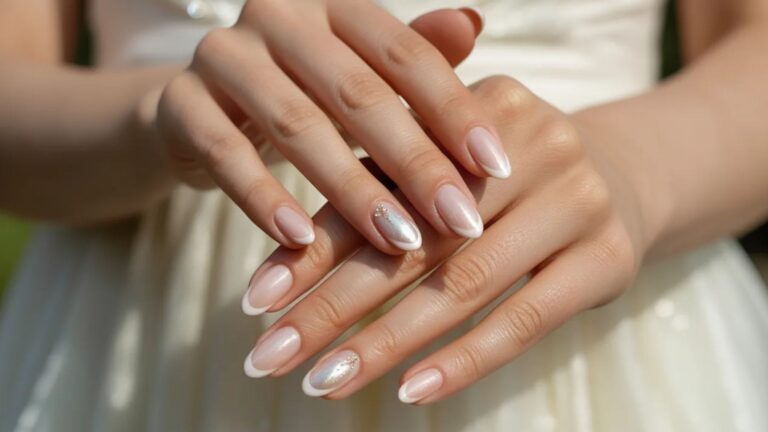
Ombre nails feature a gradient color transition from light to dark. Or you can go from dark to light. Either way works.
The magic is in the seamless blend between shades. There are no harsh lines or obvious separations.
Traditional manicures have defined color boundaries. Ombre creates a smooth fade instead.
This style works with pretty much everything. Gel polish, regular lacquer, acrylics, and dip powder all create great ombre effects.
Popular color combinations include pink to white, purple to blue, or nude to burgundy. But you can mix any colors you want.
The versatility is what makes this technique so appealing. You can keep it subtle or go bold with contrasting shades.
Different Types of Ombre Nail Designs
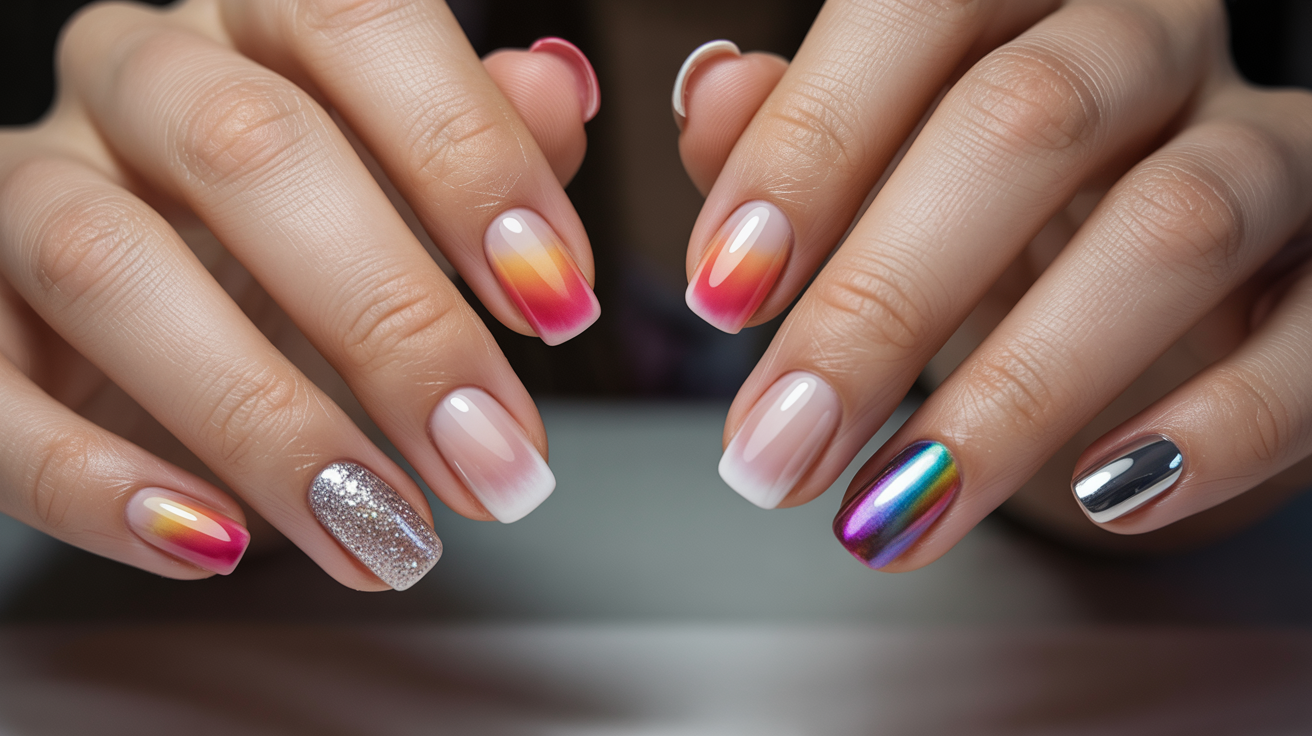
When people ask what is ombre nails, they’re often surprised by how many variations exist. Let me break down the most popular styles.
- Classic vertical gradient runs from your cuticle to your nail tip. This is the most common type you’ll see.
- Horizontal ombre creates a side-to-side fade instead. It’s less common but looks really cool.
- Glitter ombre variations add sparkle to the gradient. The glitter usually concentrates at the tips or base.
- French ombre style updates the traditional French manicure with a soft gradient instead of a white tip line.
- Multi-color gradients use three or more colors. These create rainbow effects or sunset-inspired looks.
- Chrome ombre finishes combine the gradient technique with metallic or holographic polish. They’re super eye-catching.
Each style offers something different. Pick one that matches your personality and skill level.
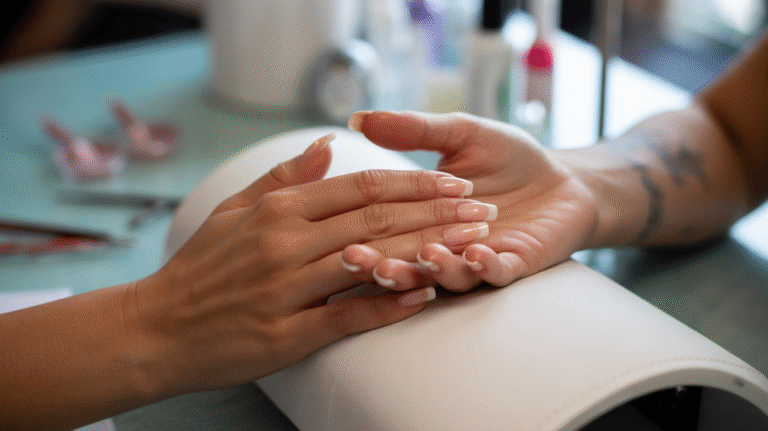
What You’ll Need to Create Ombre Nails
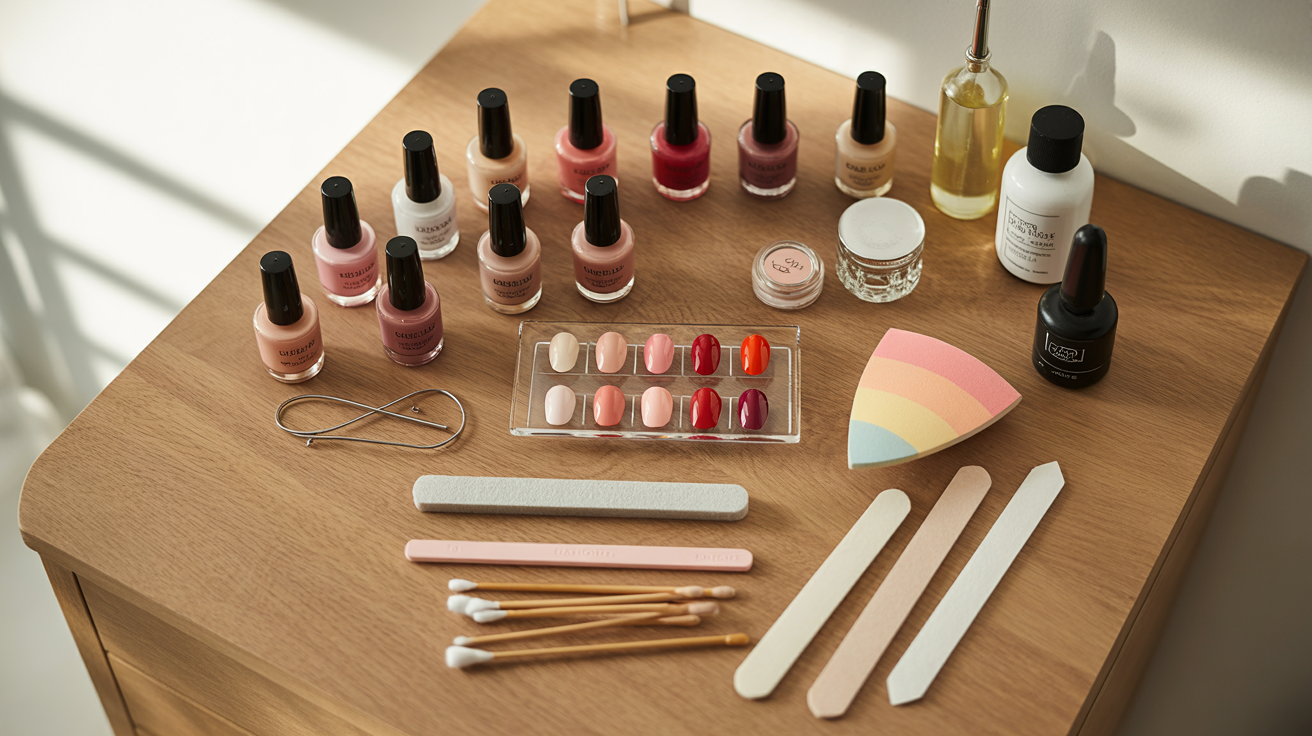
Gathering your supplies first makes the whole process smoother. Here’s everything you need.
- Base coat and top coat protect your nails and seal your design. Don’t skip these.
- Two or more nail polish colors in shades that blend well together. Start with just two colors if you’re new to this.
- Makeup sponge or nail sponge applies the gradient effect. The finer the texture, the smoother your blend.
- Small dish or palette holds your polish while you work. An old lid or piece of foil works fine.
- Nail file and buffer prep your nails properly. Smooth nails help polish go on evenly.
- Cotton swabs and nail polish remover clean up mistakes around your nails. You’ll definitely need these.
- Optional items include liquid latex or tape for easier cleanup. These protect your skin from excess polish.
Having everything ready before you start saves time and frustration.
How to Do Ombre Nails at Home
Creating ombre nails is easier than it looks. Follow these steps and you’ll get great results.
Step 1: Prep Your Nails

Clean your nails thoroughly and shape them with a file. This creates the perfect canvas.
Push back your cuticles gently. Don’t cut them unless absolutely necessary.
Apply a thin layer of base coat to each nail. This protects your natural nails from staining.
Let the base coat dry completely before moving forward. Patience here prevents smudging later.
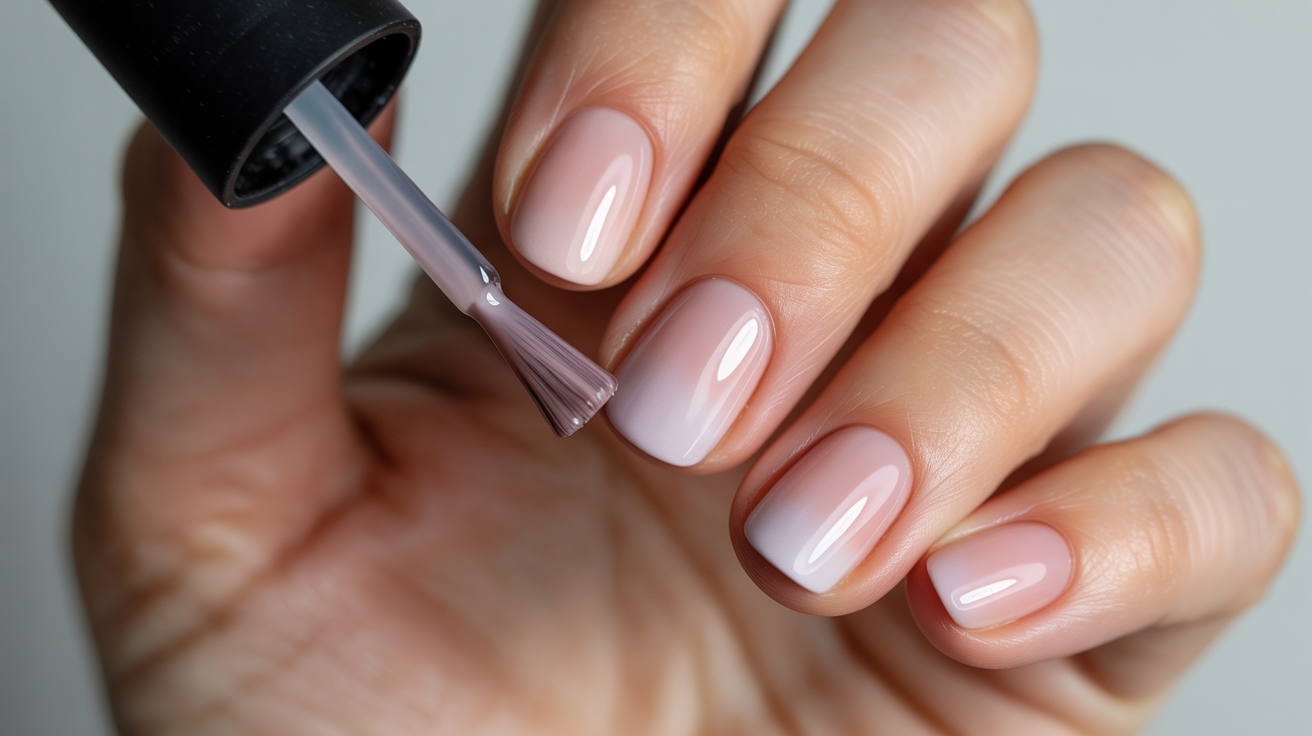
Step 2: Apply Base Color

Choose your lighter shade as the base color. This helps the gradient show up better.
Apply one or two thin coats depending on the opacity. Thin coats dry faster and look smoother.
Allow proper drying time between coats. Rushing this step ruins everything that comes next.
Make sure your base is completely dry before starting the gradient. Touch it lightly to check.
Step 3: Create the Gradient
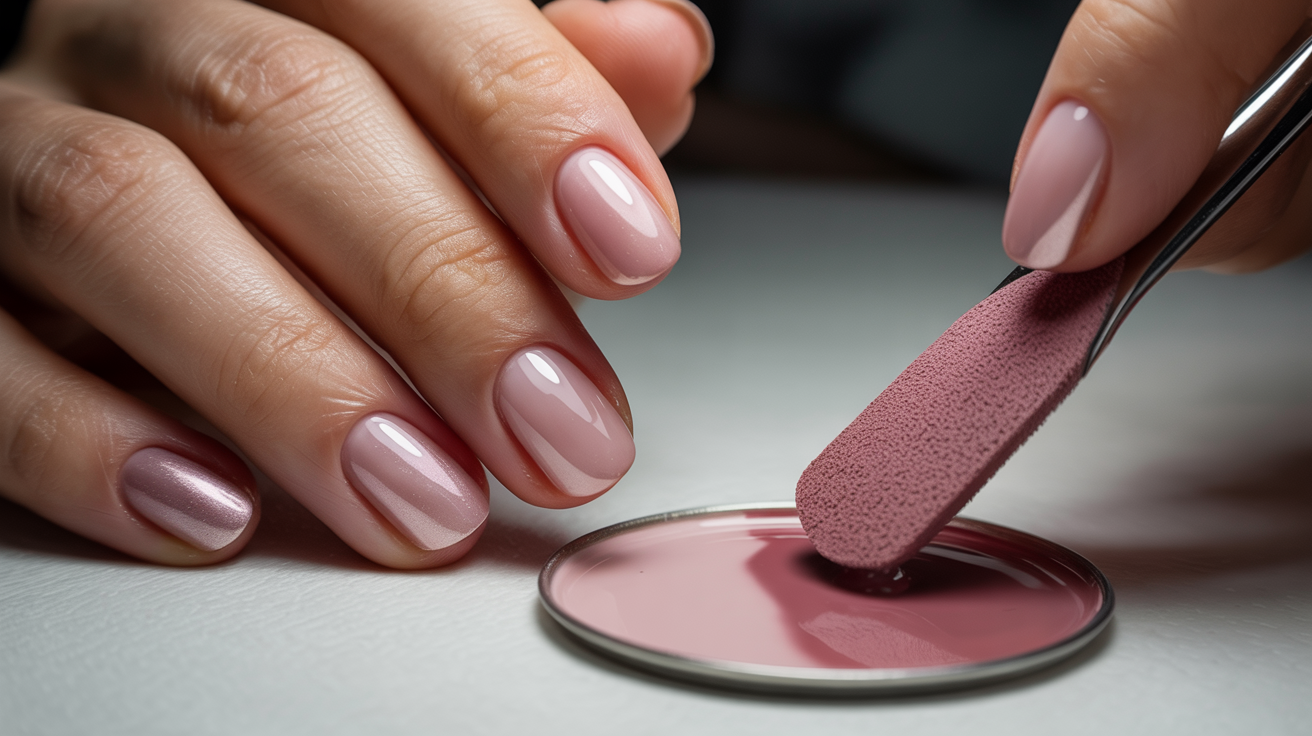
Pour small amounts of both polish colors onto your palette. Don’t pour too much or it’ll dry out.
Let the colors touch slightly where they meet on the palette. This creates a natural transition zone.
Dab your sponge into the color blend. Get both colors on the sponge at once.
Pat the sponge onto your nail gently. Don’t wipe or drag it. Just press and lift repeatedly.
Build the color gradually with multiple layers. This creates a smoother, more professional-looking gradient.
Work quickly before the polish dries on your sponge. You might need to reapply polish to the sponge several times per nail.
Step 4: Clean Up Edges

Use a cotton swab dipped in nail polish remover for cleanup. This removes excess polish from your skin.
Clean around your nails carefully without touching the design. Take your time here.
Remove all the messy bits for a polished final look. This step makes the biggest difference in how professional your nails look.
If you used liquid latex earlier, just peel it off now. Much easier than using remover.
Step 5: Seal Your Design
Apply a glossy or matte top coat over your gradient. This seals everything in place.
Make sure you get complete coverage including the tips. The top coat prevents chipping.
Let everything dry thoroughly before using your hands. Give it at least 30 minutes to be safe.
Understanding what is ombre nails includes knowing that the top coat makes or breaks the final result.
Tips for Perfect Ombre Nails
Want your gradient to look salon-quality? These tips will help you nail the technique.
- Work quickly before polish dries on your sponge. Dried polish creates a bumpy texture instead of a smooth blend.
- Use similar polish formulas for best blending. Mixing gel and regular polish doesn’t work well.
- Practice your gradient on paper first. This lets you see how colors blend before touching your nails.
- Apply thin layers rather than thick coats. Multiple thin layers look smoother than one thick application.
- Buff nails lightly between coats for extra smoothness. This removes any texture from previous layers.
- Choose colors that complement each other. Colors next to each other on the color wheel blend best.
- Consider undertones when selecting shades. Cool-toned colors blend with other cool tones. Same with warm tones.
- Don’t skip the top coat for longevity. It makes your manicure last days longer.
These small details add up to much better results.
Common Mistakes to Avoid
Learning what is ombre nails means knowing what not to do. Here are the biggest mistakes people make.
- Using too much polish on the sponge creates a goopy mess. Less is more with this technique.
- Dragging instead of patting the sponge smears the gradient. Always use a patting motion.
- Rushing between coats causes smudging and uneven color. Wait for each layer to dry.
- Skipping base coat preparation leads to staining and poor adhesion. Never skip this step.
- Not cleaning up edges makes even perfect gradients look sloppy. Take time for cleanup.
- Forgetting to seal with top coat means your design won’t last. Always finish with top coat.
Avoid these mistakes and your ombre nails will look amazing.
Conclusion
Now you know what is ombre nails and how to create them yourself. The technique is simpler than it looks.
Ombre nails let you blend colors creatively. The possibilities are truly endless.
Experiment with different color combinations until you find your favorites. Try seasonal palettes or match your outfits.
Grab your supplies and try your first gradient manicure this week. You’ve got this. Express your creativity through these gorgeous gradient designs.
Have fun with it!
Frequently Asked Questions
How Long Do Ombre Nails Last?
Regular polish ombre lasts 5-7 days with proper top coat application. Gel polish ombre can last 2-3 weeks without chipping. Maintain your manicure by applying a fresh top coat every few days. Avoid harsh chemicals and wear gloves when cleaning to extend wear time.
Can You Create Ombre With Gel Polish?
Yes, gel polish works great for ombre nails. The process is similar but you cure each layer under a UV or LED lamp. Work quickly since gel can self-level before curing. The blend stays put once cured, making it easier for beginners to perfect their technique.
What Colors Work Best Together for Ombre?
Colors next to each other on the color wheel blend smoothly. Try pink to purple, blue to green, or orange to yellow. Neutral combinations like nude to brown or white to gray work for any season. Summer calls for bright tropical blends while fall looks great with warm burgundy tones.
Is It Easier to Do Ombre on Long or Short Nails?
Long nails provide more space for the gradient to develop fully. Short nails can still look great but require more precision. On shorter nails, use just two colors instead of three. The technique stays the same regardless of length, just adjust your sponge placement accordingly.
Can You Use Regular Household Sponges for Ombre Nails?
Regular kitchen sponges are too coarse and create texture problems. Makeup sponges work best because they’re fine-grained and smooth. Beauty blenders or wedge sponges from the makeup aisle give professional results. Nail-specific sponges designed for this technique work even better if you can find them.